🔎 Reverse Image Search
Image search techniques made simple: upload a photo or paste a URL and search 6 engines at once. 100% free, nothing stored.
🔒 Your image is never stored on our servers longer than 24 hours and is never shared.
Your photo sits in Google Drive. You want to know where else it appears online, or what it shows, and the obvious move is to search it from inside Drive. That move does not exist. Drive can find words inside a photo, but it cannot take a photo and find matching images on the web. This guide shows the route that does work, step by step, on desktop, Android and iPhone, and it tests the route on a real photo stored the way you would store one.
Short answer: No. Google Drive has no built-in reverse image search, so you cannot upload a photo to Drive and ask it to find similar images on the web. Download the photo first, then upload it to Google Lens, Google Images or TinEye. A photo inside a Word document needs the same save-first step: our guide to reverse image search a photo in a Word document compares Save as Picture, copy and paste, and the .docx unzip route. Drive search only finds text and objects inside your own files.
If you are new to the method itself, start with our how to reverse image search guide, then come back here for the Drive part. That short answer matches what Google itself says. A live Google search for this exact question on 21 November 2026 returns an AI Overview that opens with the same point: Drive does not have a built-in reverse image search feature, and you cannot upload a photo to Drive to find visually similar images inside your Drive or across the web. The rest of this article covers every point that Overview makes, in our own words, and then goes further than it does, with the full steps, a worked test on three engines, and the fixes for the places where the simple route breaks.
Does Google Drive have reverse image search built in?
No, and the answer is the same on every platform. There is no “search by image” button in Drive on the web, no Lens button in the Drive app on Android or iPhone, and no image upload box in Drive search. The top result for this question is a Google Search Community thread from September 2024, and its only reply, from Bronze Product Expert Santiago Parra Suarez, says the same thing in plain terms: Lens can help with your own images, including ones in Google Photos, but not directly from Google Drive at the moment, and there is no built-in option for reverse searching images directly from Drive within Lens.
That thread is now locked and marked as a duplicate, with 47 people voting that they had the same question. It gives no desktop steps, no separate iPhone steps, and no download steps at all. It just says to download the image to your device first. That is the gap this guide fills.
It is worth being clear about what “built in” would mean, because two Drive features look close enough to confuse people. First, Drive search can find a photo by the words inside it. Second, Drive for desktop can keep a local copy of your files on your computer. Neither of those is a reverse image search, and neither finds the same photo anywhere else on the web. The table below is the check that settles it.
| What you try in Drive | What it actually does | Is it reverse image search? |
|---|---|---|
| Drive search bar, type a word | Finds files in your own Drive whose text, file name or image text matches, using OCR on images | No |
| Drive search, type an object such as “bridge” | Finds your own photos that Google thinks contain that object | No |
| Right-click a photo, then Open with | Opens a generic app chooser; no Lens or TinEye option is listed | No |
| Open the photo preview, look for a Lens button | There is no Lens button in the Drive preview on web or mobile | No |
| Download the photo, then upload it to Lens, Google Images or TinEye | Searches the web for the same image and visually similar ones | Yes |
Answer capsule: Drive has no built-in reverse image search on any platform, so the only working route is download first, then search the file on a real image search engine.
What can Drive search actually find in a photo?
Drive search is text search, and it is good at it. Google’s own help page for searching in Drive lists filter chips for Type, People and Modified, plus advanced operators such as quotes, minus, owner:, creator:, to:, from:, app:, sharedwith:, is:starred, is:trashed, type:, before:, after: and title:. It also searches the text inside files, and that includes text inside images, because Drive runs OCR on them. A photo of a letter, a sign or a whiteboard can turn up when you search for a word that appears in it.
That is useful, and it is also the reason people assume Drive can reverse search. If Drive can read the words in a photo, surely it can match the photo itself. It cannot. Reading text inside one of your own files and matching a picture against billions of images on the web are two different jobs, and Drive only does the first one. The AI Overview for this question makes the same distinction: use the Drive search bar to locate files by content, not by visual similarity.
There is also a newer tip on the Drive search help page about asking Gemini in natural language. That is still text search with a friendlier front end. It does not add an image upload box, and it does not search the web for copies of your photo.
So if your question is “which of my Drive files contains the word Tower Bridge”, Drive search answers it. If your question is “where else on the internet does this photo appear”, Drive search cannot answer it, and no setting changes that. The download step is not a workaround for a hidden feature. It is the feature.
Answer capsule: Drive search finds words and objects inside your own files, but it never matches a photo against images on the web.
How do I reverse image search a photo from Google Drive?
The route is the same on every device, and it has three moves: get the file out of Drive, put it into an image search engine, and read the results. The only part that changes is the first move, because the download menu sits in a different place on desktop, Android and iPhone. All three sets of steps below were checked against Google’s own Drive download help page on 21 November 2026, and the exact menu labels are the ones those pages give today.
On a desktop or laptop
- Go to drive.google.com and sign in.
- Click the photo once to select it. To download more than one file, hold Ctrl on Windows or Command on Mac and click each extra file.
- Right-click the selection and click Download.
- Your browser saves the file to your downloads folder. One file arrives as it is; several files arrive together in a zip file, so unzip it first.
- Open Google Lens, Google Images or TinEye and upload the downloaded file.
- Read the matches. Lens names what it thinks the photo shows and lists exact matches; TinEye lists every page it has indexed with that exact image; Yandex lists other sizes and similar images.
Two small facts from Google’s download help page are worth knowing before you start. First, you cannot drag a file or folder directly from Drive to your desktop; use the Download menu instead. Second, if the file is very large, the download can take a while, and a slow connection is the usual cause, not a fault in Drive.
On Android
- Open the Google Drive app.
- Find the photo, then tap More, the three dots next to the file name.
- Tap Download. The file saves to your device, usually in the Downloads folder.
- Open the Google Lens app, or open Google Images in Chrome, and upload the downloaded file.
Google’s Android download page adds a data tip: if you use Data Saver, downloads may be held back, so check that setting if the download seems stuck. The file you get is the file as stored in Drive, which matters for the quality point covered later in this guide.
On iPhone or iPad
- Open the Google Drive app.
- Find the photo, then tap More next to the file name.
- Tap Download to save the file to your device.
- If you want the file in a particular place instead, tap Open in, then Save to Files, choose the folder, and tap Save.
- To put a photo or video straight into your camera roll, tap More, then Send a copy, then Save image or Save video.
- Open the Google Lens app, or Google Images in Safari or Chrome, and upload the saved file.
That iPhone route is the one the competitor thread never gives. Its only reply covers Android and iOS together in one short paragraph and never mentions a download step at all. If you are on an iPhone and the photo only lives in Drive, the More menu is the step that unlocks everything else.
| Route | How the file leaves Drive | What you keep | What to watch for |
|---|---|---|---|
| Desktop download, then upload to Lens, Google Images or TinEye | Right-click, then Download | The original file, at full size | Several files arrive as a zip; unzip before uploading |
| Android download, then upload | More, then Download | The original file, at full size | Data Saver can hold the download back |
| iPhone download, then upload | More, then Download, or Open in, then Save to Files | The original file, at full size | Send a copy saves to the camera roll instead of Files |
| Open with, from the Drive preview | Right-click, then Open with, then choose an app | Nothing leaves Drive | No image search app is listed; this route does not search |
| Copy to Google Photos, then Lens in Photos | Photos, Add, Google Drive, select, Upload | A copy in Photos, at your chosen backup quality | Manual one-way copy only; changes in one place do not carry to the other |
Answer capsule: Download the photo from Drive first, on desktop, Android or iPhone, then upload that file to Lens, Google Images or TinEye.
Can I use Google Lens in Chrome without downloading the photo?
Almost, and this is the closest thing to a built-in route that exists. The AI Overview for this question lists it first: open the image preview in Drive and use Lens in Chrome. In practice that means right-clicking the image in Chrome and choosing “Search image with Google Lens”, or opening the photo in the Drive preview and using Lens from the browser. Chrome sends the image to Lens for you, so you do not have to save it first.
That only works in Chrome on a desktop, and it only works because the browser is doing the upload, not Drive. The moment you leave Chrome, or switch to the Drive mobile app, the shortcut goes away. It is also less reliable than uploading the file yourself. In the worked example below, Lens refused the same photo twice when it was given as a web address, and it worked from an uploaded file in earlier rounds. If the right-click route fails, do not take that as a verdict on the photo. Download the file and upload it by hand.
There is one more limit to know. Lens in Chrome searches the image you can see in the browser. If Drive is showing you a preview rather than the full file, Lens may be working from a smaller copy. For a photo you want to check properly, the downloaded original is still the safer input, and the next section explains why size matters.
Answer capsule: Lens in Chrome can search a Drive photo without a download on desktop, but it is a browser feature, not a Drive feature, and uploading the downloaded file yourself is more reliable.
What about the Google Photos route?
The community thread suggests a workaround: integrate your Drive images into Google Photos, then use Lens inside Photos. That advice is now out of date in an important way, and it needs a correction before you follow it.
Google used to sync photos between Drive and Photos automatically. It does not any more. Google’s own help page for adding photos from Drive to Photos now describes a manual one-way copy: go to photos.google.com, click Add, then Google Drive, find and select your photos, and click Upload. The same page says plainly that changes you make in Drive only apply to Drive, and changes you make in Photos only apply to Photos. Copies count against your storage, and they are backed up at whatever quality you have chosen. If you use a work or school account, you cannot use the copy route at all; you have to download the photo from Drive and upload it to Photos yourself.
That changes the maths of the workaround. If your photo is already in Google Photos, Lens is one tap away, and our reverse image search in Google Photos guide covers that route in full, including the troubleshooting table. If your photo is only in Drive, copying it to Photos just to reach Lens adds a step, a duplicate file and a storage cost, and it still ends with the same Lens search you could have run from the downloaded file. The copy route is worth it only when you want the photo in Photos anyway, for albums or backup.
One more thing to check before you copy anything: your backup quality setting in Photos. If Photos is set to Storage saver, the copy may be compressed, and a compressed copy can change what the engines find. The downloaded original from Drive is the full file, so for a serious check, use that.
Answer capsule: Drive and Photos no longer sync automatically, so copying a photo to Photos just to reach Lens adds a duplicate file for no gain unless you want it in Photos anyway.
Worked example: a Tower Bridge photo from Drive, checked on three engines
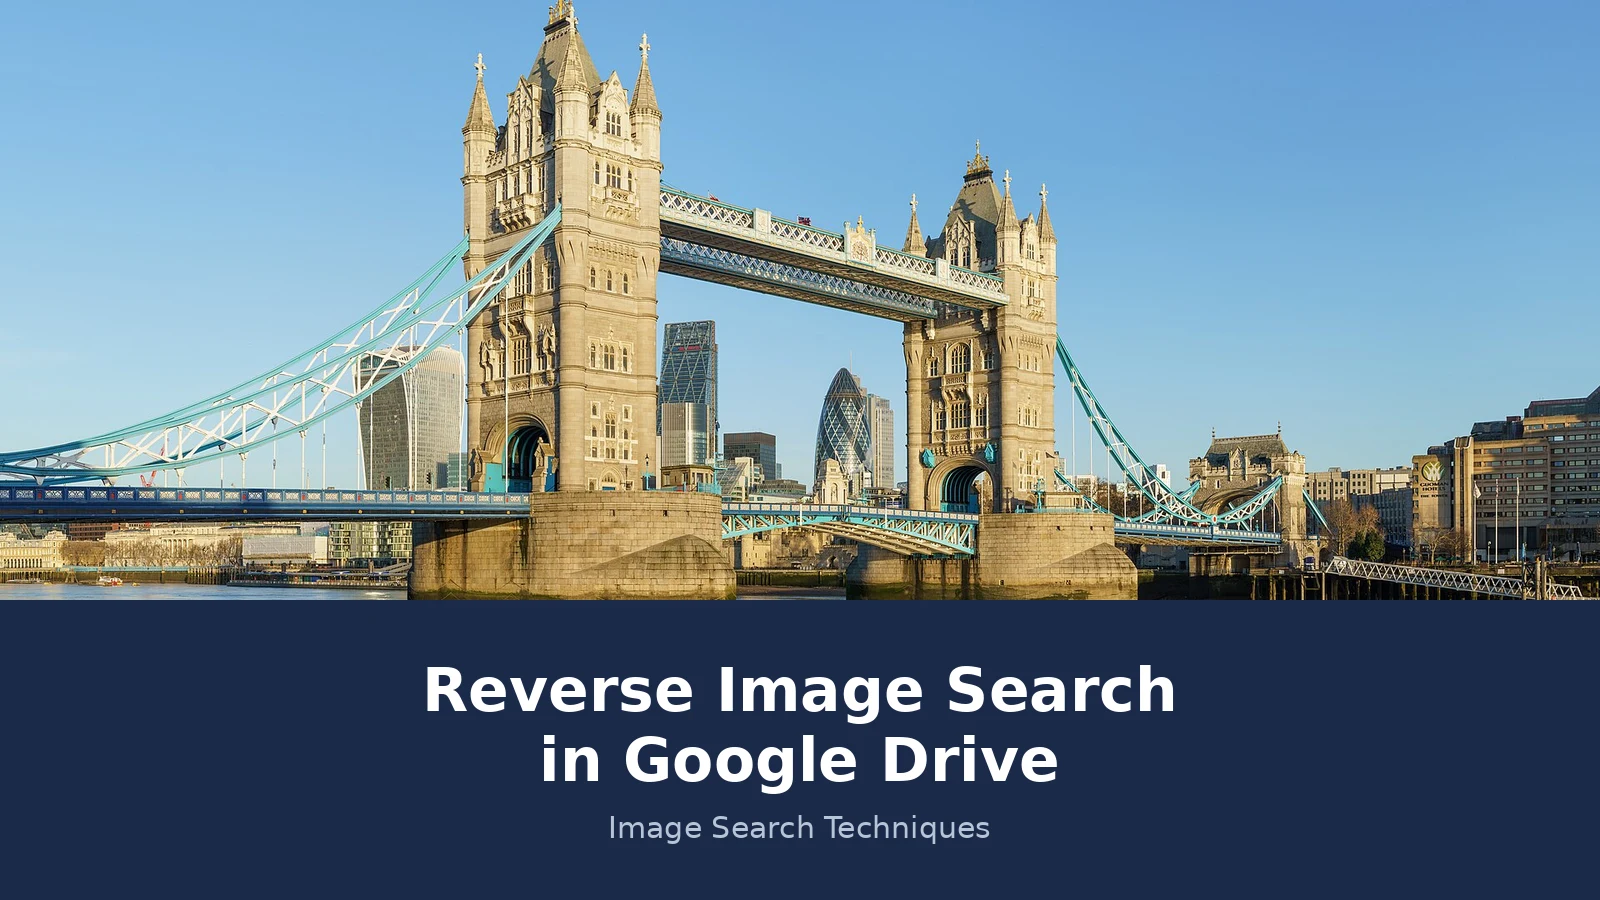
Every claim in this guide so far comes from Google’s own pages. This section tests the route the way a reader would use it, with a real photo and honest counts. The photo is a panorama of Tower Bridge taken from Shad Thames in the morning golden hour, by Colin, published on Wikimedia Commons under a Creative Commons Attribution-Share Alike 4.0 licence. It was taken on 24 January 2015 at 08:46, as 30 frames stitched together, on a Sony A77II with a 50 mm f/1.8 lens at f/8, 1/125s and ISO 100. The original file is 15,287 by 7,643 pixels and 35 MB, and it is a featured picture on Commons.
That file is a good test case precisely because it is awkward. It is a well-known landmark, it has been online for more than a decade, and it is far too big for some engines. Here is what happened when it was searched on 21 November 2026, after being downloaded from Drive the way this guide describes.
Google Lens: failed, not a zero
Lens was given the photo by its direct web address, twice: once at full size and once as a 3,840 pixel preview. Both times it answered “Something went wrong, No image at the URL. Try again with a different URL or image”, on both the Exact matches and Visual matches tabs. The AI Mode “All” tab stayed empty with “Expired visual search”. Lens gave no identification and no counts at all.
That is a failure, not a result. It does not mean the photo is unknown, and it does not mean no matches exist. The same Wikimedia address pattern has failed in earlier rounds too, while an uploaded file worked. If Lens does this to you, upload the downloaded file instead of pasting a link, and treat a URL failure as a reason to try another engine, not as an answer.
TinEye: 215 results, after the file was resized
TinEye failed first too, and its failure is more useful because it explains itself. The full-size 35 MB file was rejected with this message: the image is too large, TinEye cannot read images over 10 MB in size, or with a height or width over 10,000 pixels, so resize the image and try again. The file is 15,287 pixels wide, so it breaks both limits at once.
The search was run again with the 1,280 by 640 pixel preview, as TinEye’s own message suggests. That search returned 215 results across 86.8 billion images searched, first indexed by TinEye on 13 March 2015, spread over 22 pages. TinEye does not give a separate exact-match count and does not name the subject in words; the matches are the file itself at many sizes. The oldest results include the Wikipedia file page, the Commons featured picture candidates page from March 2015, a WordPress blog at 1,600 by 400 pixels, and a small 220 by 110 copy on digplanet.com. Two results were listed as not available, and three were found in stock. A separate Similar Images section showed 20 sponsored Shutterstock stock photos, which are adverts, not matches.
The lesson is practical. If your Drive photo is a huge original, perhaps a panorama or a scan, shrink a copy to under 10 MB and under 10,000 pixels on the longest side before you upload it to TinEye. The resized copy still finds the same matches, as this test shows.
Yandex Images: the same photo in 18 sizes
Yandex took the 1,280 pixel version by web address with no captcha and no error. It recognised the Tower Bridge panorama and listed the same image in 18 other sizes, from 2,560 by 1,280 down to 310 by 206, with a “Show all sizes” link for more. It showed no numeric exact-match or similar-image total. Its similar images grid showed 16 or more other Tower Bridge and London photos on the first screen, including another Commons photo and a Dreamstime London skyline. Its Sites tab listed about 20 pages using the image, including pureminutes.com, healthweb.gr, clondres.com, tripstour.ru, living.alot.com, factinate.com, tvzvezda.ru and royalcentral.co.uk, plus the Commons featured picture candidates page. Like TinEye, Yandex gave no text identification of the subject; the identification comes from the sizes and the sites, not from a label.
| Engine | What was searched | Result on 21 November 2026 |
|---|---|---|
| Google Lens | Full-size file and 3,840 px preview, by web address | Failed, not a zero: “No image at the URL” both times, no identification, no counts |
| TinEye | Full-size file, then 1,280 by 640 px copy | Full size rejected: over 10 MB and over 10,000 px. Resized copy: 215 results, first indexed 13 March 2015, 86.8 billion images searched |
| Yandex Images | 1,280 px version, by web address | Same image in 18 sizes, 16 or more similar images, about 20 sites using it |
Put together, the test proves the point of this guide twice over. First, the download step works: a photo that only lives in Drive can be checked on all three engines once it is out of Drive. Second, the engines disagree usefully. Lens failed where Yandex succeeded, and TinEye needed a smaller file before it would search at all. One engine is never the whole answer, and a failure on one engine is never proof of anything about the photo.
Answer capsule: The Tower Bridge test found the photo on TinEye 215 times and on Yandex in 18 sizes, while Lens failed to load it at all, so run more than one engine and never read a failure as a zero.
Troubleshooting: when the download or the search goes wrong
Most problems with this route have boring causes and quick fixes. The table below covers the ones that come up most often, including the two this guide hit during testing.
| Problem | Likely cause | Fix |
|---|---|---|
| TinEye refuses the file | Over 10 MB, or over 10,000 pixels on any side | Resize a copy to under both limits and upload the copy |
| Lens says “No image at the URL” | Lens cannot fetch that web address, a common fault with Wikimedia addresses | Download the file and upload it to Lens by hand instead |
| Download saves as a zip file | You selected more than one file | Unzip the file, then upload the photo on its own |
| Nothing downloads on Android | Data Saver is holding the download back | Check the Data Saver setting, then tap Download again |
| The photo opens in a viewer instead of downloading | You tapped the photo rather than the Download menu | Use More, then Download, or right-click, then Download, on desktop |
| Copy to Photos is blocked | Work or school accounts cannot use the Photos copy route | Download from Drive and upload to Photos yourself |
| Results look thin or wrong | One engine only, or a compressed copy | Search the full-size downloaded original on at least two engines |
One last warning, and it matters more than any of the rows above. Do not upload private documents to a public image search engine. A photo of a passport, a bank letter, a medical record or a work document with internal data in it should never be sent to Lens, TinEye or Yandex. Crop to the image itself first, and if the photo contains private information, do not search it at all. The engines keep what you upload in ways you cannot control, and a reverse search is not worth that trade.
If you want the same method on other apps, our Microsoft Teams guide and our iPhone guide follow the same save-first pattern, and our screenshot guide covers the case where the image only exists on your screen. The starting point is the same in all of them: get the file out first, then search it.
Answer capsule: Resize oversized files, upload by hand when a link fails, and never send a private document to a public search engine.
FAQs
Can I reverse image search directly in Google Drive?
No. Google Drive has no built-in reverse image search on the web, Android or iPhone, and there is no Lens button in the Drive preview. Download the photo first, then upload it to Google Lens, Google Images or TinEye. Drive search only finds text and objects inside your own files, never matching images on the web.
How do I download a photo from Google Drive?
On desktop, go to drive.google.com, right-click the photo and click Download. On Android, open the Drive app, tap More next to the file name and tap Download. On iPhone, tap More and then Download, or tap Open in and then Save to Files. One file downloads as it is, while several files arrive together in a zip file.
Can I use Google Lens in Chrome on a Drive photo?
Yes, on desktop Chrome you can right-click the image and choose Search image with Google Lens, without downloading it first. That is a Chrome feature, not a Drive feature, and it only works in Chrome on a desktop. If Lens refuses the link, download the file and upload it to Lens by hand instead.
Can Drive search find a photo by what it shows?
It can find your own photos by words and objects, using OCR on the text inside images and object recognition on the scene. That only searches your own Drive, and it only finds files, never matching images on the wider web. For the wider web, download the photo and search it on Lens, Google Images or TinEye.
Can I copy a Drive photo to Google Photos and use Lens there?
Yes, but it is now a one-way copy, since the automatic sync between Drive and Photos is gone. Go to photos.google.com, click Add, then Google Drive, select the photos and click Upload. Changes in one place do not carry to the other, and copies count against your storage, so it is worth it unless you want it in Photos anyway.
Why does TinEye reject my photo from Google Drive?
TinEye cannot read images over 10 MB in size, or with a height or width over 10,000 pixels. A panorama or a large original from Drive can break both limits at once. Resize a copy to under 10 MB and under 10,000 pixels on the longest side, then upload the copy. The resized copy still finds the same matches.