🔎 Reverse Image Search
Image search techniques made simple: upload a photo or paste a URL and search 6 engines at once. 100% free, nothing stored.
🔒 Your image is never stored on our servers longer than 24 hours and is never shared.
You have a photo sitting in a PowerPoint deck and you want to know where it came from. Maybe a colleague dropped it into a shared slide and nobody remembers the source. Maybe you are checking whether a stock photo was used with permission, or you want a higher resolution copy. Whatever the reason, the question is the same: can you reverse image search a photo in PowerPoint?
No. PowerPoint has no built-in reverse image search, so you first save the photo out of the deck and then search it elsewhere. On desktop, right-click the photo and choose Save as Picture. If that fails, unzip a copy of the .pptx and take the file from ppt/media. Then upload it to Google Lens, TinEye or Yandex.
That is the whole job in three moves: get the photo out, keep the best copy you can, and search it on a real reverse image search engine. The rest of this guide walks through each move, shows what each route keeps and loses, and then runs the full workflow on a real deck with a real photo so you can see honest results from all three engines.
Does PowerPoint have reverse image search built in?
No. There is no button, menu or add-in inside PowerPoint that sends a slide photo to a reverse image search. Microsoft’s own support pages list the picture features PowerPoint offers, and reverse image search is not one of them. The features listed are finding and adding pictures, inserting online pictures, picture styles, compressing pictures, displaying background images, and adding, changing or removing background images. Nothing there searches the web for a photo.
This catches people out because PowerPoint does have a picture search of its own. When you insert a picture you can search stock images and online pictures from inside the app. That search finds new pictures to put into a deck. It does not take a picture already in your deck and find where it came from. The two jobs sound similar and they are not the same thing.
Reverse image search means uploading a picture to a search engine and asking where else that picture, or pictures like it, appear on the web. Google Lens, TinEye, Bing Visual Search and Yandex Images all do it. They match the pixels, not the file name, so renaming a file changes nothing.
The practical answer is therefore simple: export first, search second. Everything below is about doing the export well, because a poor export is the usual reason a search comes back empty. A screenshot of a small slide photo, or a copy that PowerPoint compressed on the way out, gives the search engine far less to work with than the original file.
Answer capsule: PowerPoint cannot reverse search a photo for you. Export the photo, then search it in a browser.
How do I save a photo from a PowerPoint slide?
On the desktop app this is a one-minute job. The command is called Save as Picture, and Microsoft documents it for both Windows and Mac. The steps below come from Microsoft’s own support page, Save a picture or other graphic as a separate file.
On Windows
- Open the deck and go to the slide with the photo.
- Right-click the photo.
- Click Save as Picture.
- Pick a format in the Save as type list. JPEG is the safe choice for a photo; PNG keeps more detail if you plan to crop or edit it later.
- Type a file name, pick a folder, and click Save.
On a Mac
- Open the deck and go to the slide with the photo.
- Control-click the photo.
- Click Save as Picture.
- Pick a format in the Save as type list, type a name in the Save As box, choose a folder in the Where box, and click Save.
The two versions are not identical. On Windows you can save as GIF, JPEG, PNG, TIFF, Device-Independent Bitmap, Windows Metafile, Enhanced Windows Metafile or SVG. On a Mac the list is PNG, JPEG, PDF, GIF, BMP and SVG. SVG needs Microsoft 365 version 1909 or later. For a reverse image search the format matters less than the resolution, so pick JPEG or PNG and move on.
One warning from Microsoft’s own pages: Save as Picture works on photos, shapes, charts, SmartArt graphics, digital ink and text boxes. It does not work on everything. A photo used as a slide background, or as the fill inside a shape or a text box, will not always offer the command when you right-click it. That is the point where people get stuck, and the next section covers what to do then.
What about PowerPoint for the web?
PowerPoint for the web does not have Save as Picture at all. Microsoft’s support article for the feature has Windows and Mac tabs only, with no web version. A Microsoft Learn answer from December 2023 puts it plainly: the online versions of Office are not designed to replace the desktop editions, and Save as Picture is one of the commands missing from PowerPoint for the web. That statement still matches the support article as it stands in November 2026.
If you only have the web version, your options are narrower. You can take a screenshot of the slide, which works but costs you resolution. You can ask someone with the desktop app to save the picture for you. Or you can download a copy of the deck and use the unzip route in the next section, which needs no PowerPoint licence at all. For a longer look at the screenshot route, see our guide on how to reverse image search a screenshot.
Answer capsule: On desktop, right-click and choose Save as Picture. On the web, the command does not exist, so use a screenshot or the unzip route instead.
What if the photo will not save?
Three situations block Save as Picture. A photo used as a background or a shape fill has no right-click menu for it. A photo buried inside a group of objects may refuse to save on its own. And a photo on PowerPoint for the web has no Save as Picture command at all. Each one has a way round it.
Route 1: unzip the .pptx and read the media folder
A .pptx file is really a zip archive wearing a different extension. Every picture in the deck sits inside it as a separate file, usually in a folder called ppt/media. Microsoft documents this in its support page on extracting files or objects from a PowerPoint file. The steps are:
- Make a copy of the deck, so the original stays untouched.
- Change the copy’s extension from .pptx to .zip.
- Open the zip file and look in the ppt/media folder.
- Copy out the picture you want. The file names will be plain, such as image1.jpg, so open each one to find yours.
Microsoft notes that this procedure works on Windows but not on macOS, where the built-in Archive Utility can turn the renamed file into a .zip.cpgz file instead of opening it. On a Mac, use Terminal’s unzip command or a free tool such as The Unarchiver. This route is the strongest one in the guide: it returns the picture exactly as it was stored in the deck, with no extra compression and no screenshot in between. It also pulls out every picture at once, which is handy when a deck holds dozens of them.
Route 2: copy and paste the photo out
Click the photo, copy it, and paste it into an image editor such as Paint on Windows or Preview on a Mac, then save it from there. This works when Save as Picture is missing but the photo itself can still be selected. It is quick, but it is also the route most likely to lose quality, because the clipboard copy may be a resized version of the picture rather than the original file. Use it when you need a fast answer and the unzip route is not practical.
Route 3: screenshot the photo
When nothing else works, take a screenshot of just the photo. On Windows, press Win + Shift + S and drag around the photo. On a Mac, press Shift + Command + 4 and drag around it. Crop tight to the photo’s edges and leave out the slide border, the title text and the taskbar. A screenshot is a photo of a photo, so it carries less detail than the original file, but a clean, full-screen screenshot of a large slide photo still searches well. A small, blurry screenshot of a small photo does not.
One more check before you search: if the picture was inserted from the web through Insert Online Picture, right-click it first and look for a View Source link. Microsoft’s own Q and A thread on this question notes that web-inserted pictures carry a link back to their source, while pictures inserted from a computer lose all naming information. If View Source is there, it answers your question without any search at all.
Answer capsule: If Save as Picture is missing, unzip a copy of the .pptx and take the file from ppt/media. Copy-paste and screenshots are fallbacks, not first choices.
Which route keeps the original file?
Not every way out of PowerPoint keeps the same file. The table below is the short version of the whole guide. It compares the three routes on the only question that matters for a reverse image search: how close is the file you get to the file that went into the deck?
| Route | What you get | Quality kept | Best for |
|---|---|---|---|
| Right-click, Save as Picture | One picture, saved as JPEG or PNG | Good, but PowerPoint may apply its own compression and any crop or effect on the slide | A single photo on desktop, fast |
| Copy and paste to an editor | One picture via the clipboard | Fair, often a resized copy rather than the original | A quick check when Save as Picture is missing |
| Unzip the .pptx, read ppt/media | The stored file itself | Best, the file as stored in the deck | Backgrounds, fills, grouped photos, and whole decks |
| Screenshot the slide | A picture of the slide | Lowest, limited by screen resolution | Last resort, or PowerPoint for the web |
The same test that produced this table is in the worked example below. A real deck was built with a real photo, and the file pulled out of ppt/media was byte-for-byte identical to the file that went in. That is the strongest result any route can give, and it is why the unzip route leads the table.
There is one more thing to check before you search. If the photo looks cropped, recoloured or filtered on the slide, the version you save may carry those edits. Google’s AI Overview mentions a Save Original Picture option that would skip the edits, but I could not verify that label in Microsoft’s own support pages, so do not rely on it. If the saved copy looks edited and the search comes back thin, try the unzip route instead: the stored file is usually the unedited original.
Answer capsule: The unzip route keeps the original file. Save as Picture is close behind. A screenshot is the weakest copy, so use it last.
How do I reverse search a photo in PowerPoint once it is saved?
With the file on your computer, the search itself takes a minute. Upload the same file to each engine in turn, because they index different corners of the web and one of them often finds what the others miss. Our main guide to how to reverse image search covers the full method; the short version for a PowerPoint photo is below.
Google Lens
- Go to lens.google.com or open Google Images and click the camera icon.
- Upload the saved file.
- Read the name Lens gives the picture, then open the Exact matches tab to see where the same file appears.
- If Lens crops the wrong part of the image, drag the crop box over the photo itself.
TinEye
- Go to tineye.com and upload the file.
- Note the number of results and the size of the index TinEye searched.
- Open the oldest results first: they are the closest thing TinEye gives you to a first publication date.
Yandex Images
- Go to yandex.com/images and upload the file.
- Read the tags under “Image appears to contain” for what Yandex thinks the picture shows.
- Open the Similar images tab for near matches and the Sites tab for pages that carry the image.
Bing Visual Search is a fair fourth option if the first three come back thin. Upload the file at bing.com/visualsearch and compare its similar images with what Lens found. The same save-first pattern applies in other workplace apps too: our guide to reverse image search on Microsoft Teams uses the same save-then-search workflow, because Teams has no built-in reverse search either.
Answer capsule: Upload the saved file to Lens, TinEye and Yandex in turn. Different engines index different pages, so one search is never enough.
Worked example: a real deck, a real photo, three real searches
To test the workflow honestly, I built a real PowerPoint deck and ran it through every step above. The deck is a one-slide talk called “London Landmarks”, holding a single photo: “Big Ben at sunset”, taken on 27 October 2014 by Colin and published on Wikimedia Commons under a CC BY-SA 4.0 licence. The photo shows the Elizabeth Tower and Westminster Bridge at dusk, with light trails crossing the bridge. The file used was the 1920 by 1300 pixel copy, 386,149 bytes.
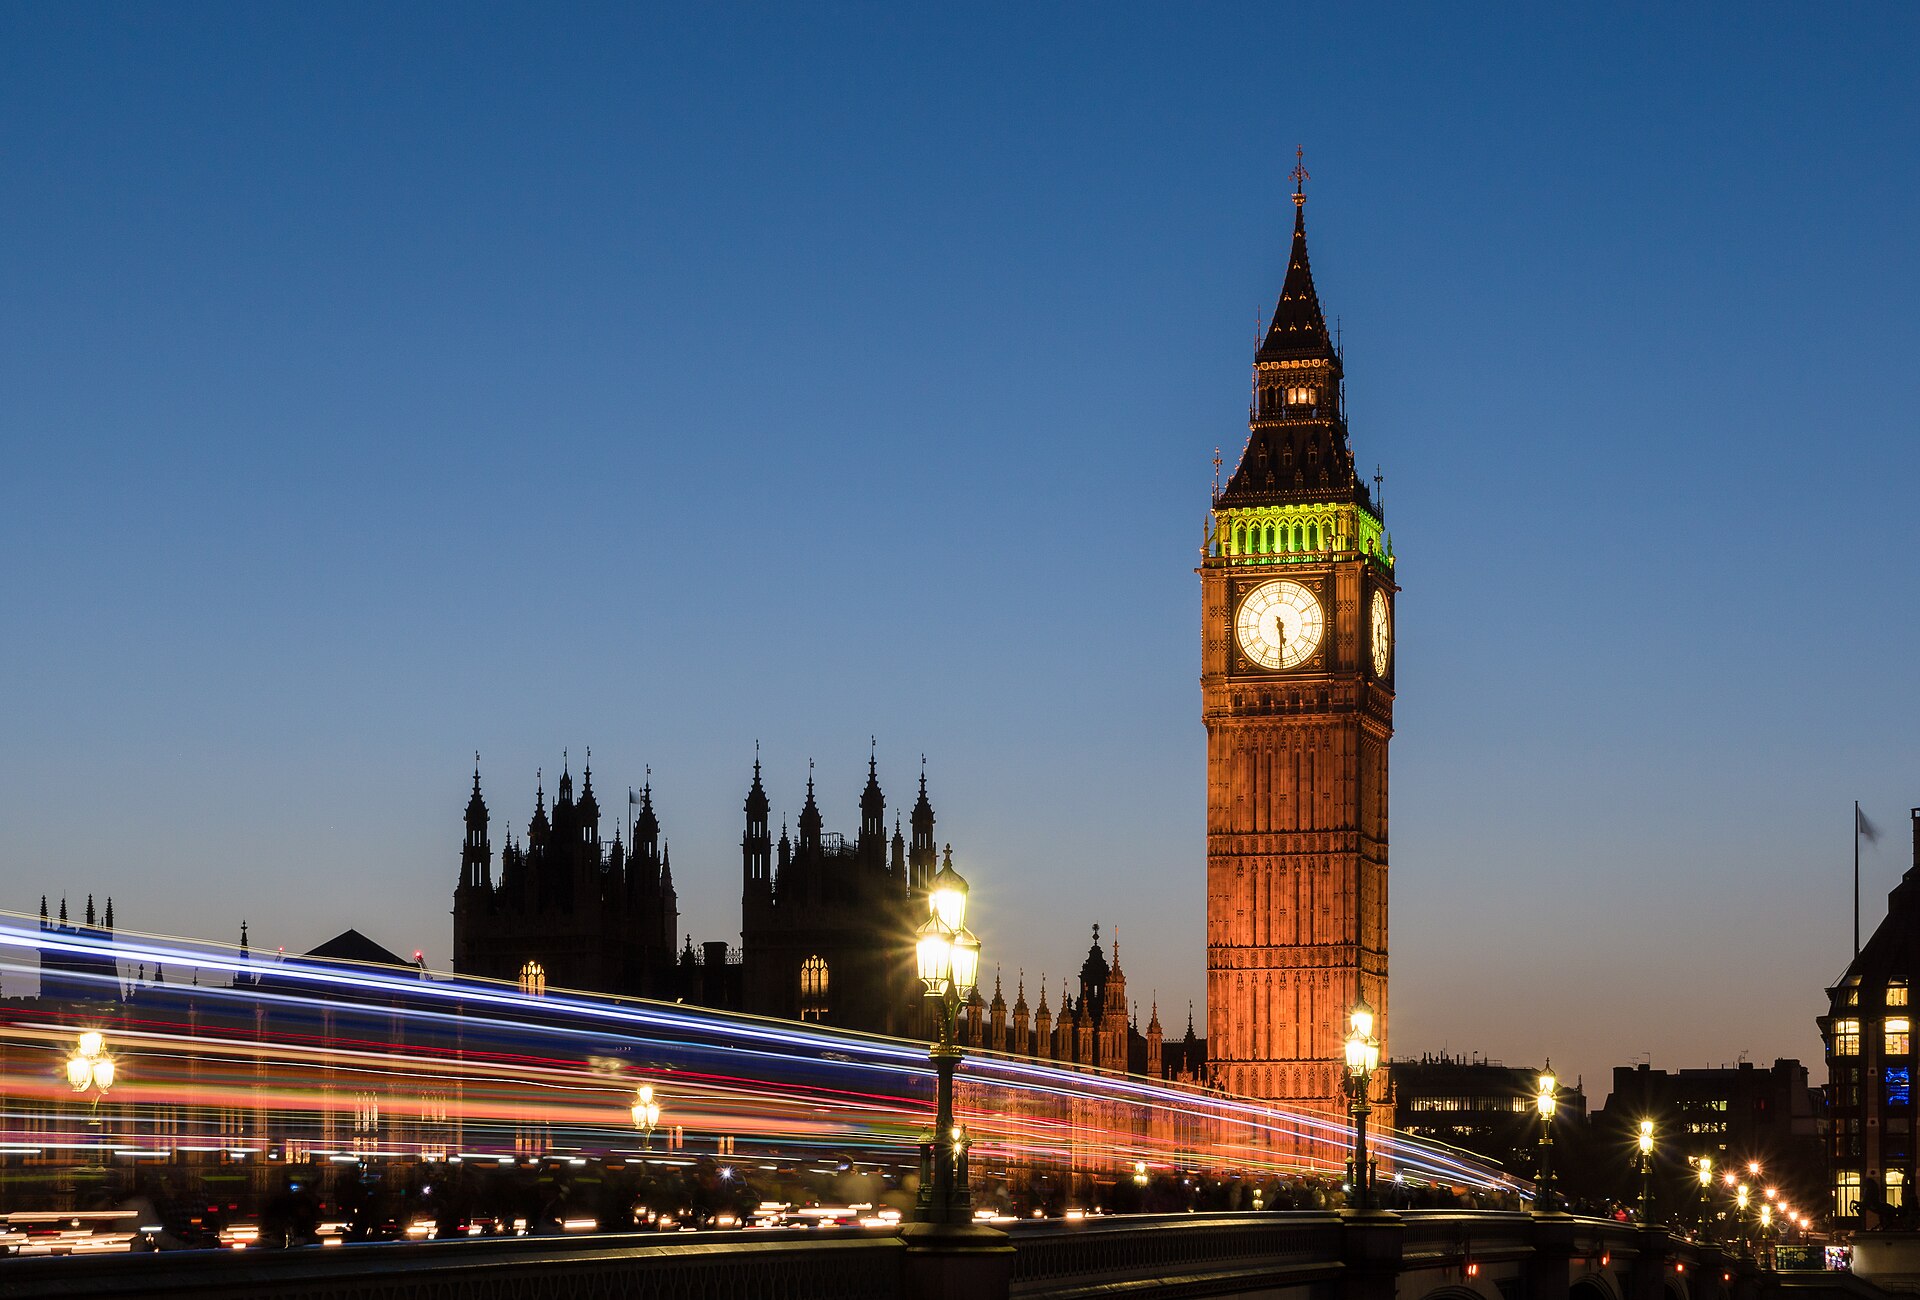
First, the unzip route. I copied the deck, changed the extension to .zip, and opened ppt/media. It held one file, image1.jpg. Compared with the file that went into the deck, it was byte-for-byte identical: same size, same dimensions, same md5 hash. PowerPoint had stored the picture unchanged. That is the best outcome the unzip route can give, and it means the file I searched was the original, not a recompressed copy.
Then I uploaded that extracted file to all three engines on 21 November 2026. The results are below, exactly as each engine showed them. Nothing here is guessed or rounded.
| Engine | What it named the photo | Exact matches | Notes |
|---|---|---|---|
| Google Lens | Elizabeth Tower, also known as Big Ben, London | No headline total; the Exact matches page loaded 243 result links | Top match was the exact Commons file, dated 27 Oct 2014, 5,575 by 3,774 pixels; 1 result removed under a DMCA notice |
| TinEye | Matched by pixels, no name given | 88 results out of 86.8 billion images searched | First indexed 9 September 2012 as shown, which predates the photo, so treat that date with care; top results include the Commons file and copies on other sites |
| Yandex Images | Big Ben London, Houses of Parliament | No total shown; Similar images tab loaded 51 thumbnails | Tags name the place but not the photographer; the Sites tab was empty on two checks |
Lens did the best job of naming the picture. Its AI summary said the image shows the Elizabeth Tower, also known as Big Ben, in London, and described it as the clock tower of the Palace of Westminster on the banks of the River Thames, next to Westminster Bridge. The top exact match was the Commons file itself, dated 27 October 2014 at 5,575 by 3,774 pixels, which is the full-size original. The Exact matches page loaded 243 result links, with one further result removed under a DMCA notice. Lens showed no headline total, so 243 is the count of links loaded on the page, not a number Lens printed.
TinEye found 88 results after searching 86.8 billion images. Its top results were the Commons file in several sizes, a copy on wisgoon.com from October 2015, and a copy on cracked.com. TinEye also said the image was first indexed on 9 September 2012. That date cannot be right for this photo, which was taken on 27 October 2014, so I report it exactly as shown and flag it: TinEye’s first-indexed date is a useful clue, not a fact you should quote without checking. A full-size 5,575 by 3,774 copy, 6.1 MB, also appears on the first page of results.
Yandex named the place but not the photographer. Its tags read “big ben london”, “big ben and the houses of parliament”, “houses of parliament london” and “british houses of parliament”. It did not name Colin. The Similar images tab loaded 51 thumbnails with a Show more button for the rest, and the Search tab listed four sites with information about the image. The dedicated Sites tab, though, was empty on two separate checks, which is a reminder that Yandex’s tabs do not always agree with each other. One SmartCaptcha appeared when I opened Similar images and cleared on the first checkbox click, with no puzzle after it.
What does this test prove? Three things. First, the unzip route really does hand you the original file, so your search starts from the best possible copy. Second, a well-known photo like this one is found by every engine, and each engine adds something different: Lens names it, TinEye dates its copies, Yandex tags the place. Third, a photo that was never posted online would fail all three searches, which is the honest limit of the whole method. The Microsoft Learn thread that answers this question makes the same point: the person asking had local images that were never on the web, and no search engine could have matched them.
Answer capsule: The unzip route returned the original file unchanged, and all three engines matched it. Lens named the tower, TinEye counted 88 copies, Yandex tagged the place.
Does finding the source give me permission to use the photo?
No. Finding where a photo came from and having the right to use it are two different things. A reverse image search tells you the source. It does not grant a licence, and it does not tell you what licence the source used.
Finding the source does not grant a licence. A photo found through a search is still somebody’s copyrighted work. “Found on Google” is not a licence, a public post is not public domain, and a credit line does not replace permission. Check the licence on the source page itself before you reuse the photo anywhere.
The worked example in this guide shows the right way round. The Big Ben photo carries a CC BY-SA 4.0 licence on its Wikimedia Commons page, which allows reuse with credit under the same licence. That is why it appears in this article with its photographer named. If the source page had shown all rights reserved, or a stock licence that forbids reuse, the honest answer would have been to find a different photo or buy a licence.
Three checks cover most cases. First, open the source page the search found and read its licence or terms. Second, if the page is a stock library, check whether the licence is royalty-free, rights-managed, or editorial-only, because each one allows different uses. Third, if there is no licence anywhere, assume you do not have permission. Our full guide to protecting your photos online covers the licence side in depth, and our guide on whether you can use screenshots in a blog post covers the closely related question of reusing images you captured yourself. Both are general information, not legal advice: the rules differ between the US and the UK, and a lawyer is the right person for a case that could cost you money.
Answer capsule: A search finds the source. Only the source page’s licence decides whether you may reuse the photo.
FAQs
Can you reverse image search directly in PowerPoint?
No. PowerPoint has no built-in reverse image search, on desktop or on the web. You must first save the photo out of the deck, then upload it to Google Lens, TinEye, Yandex Images or Bing Visual Search in a browser. The export step is the whole skill; the search itself takes about a minute once the file is saved.
How do I save a picture from PowerPoint as a JPEG?
On desktop, right-click the photo and choose Save as Picture, then pick JPEG in the Save as type list and click Save. On a Mac, Control-click the photo and choose the same command. PowerPoint for the web has no Save as Picture command, so use the unzip route or a screenshot there instead.
How do I extract all images from a PowerPoint file at once?
Copy the deck, change the copy’s extension from .pptx to .zip, and open the zip file. Every picture sits in the ppt/media folder as a separate file. Copy out the ones you want. Microsoft says this works on Windows but not on macOS, where you should use Terminal unzip or The Unarchiver instead.
Why does Save as Picture not appear when I right-click?
The photo is probably a slide background, a shape fill, or buried inside a group of objects, and PowerPoint only offers Save as Picture on a selectable picture. Try clicking the photo once to select it first. If it still will not save, unzip a copy of the .pptx and take the file from ppt/media, or take a screenshot.
Can a reverse image search find a photo that was never online?
No. A reverse image search only matches pictures that a search engine has already indexed somewhere on the web. If the photo came from a camera, a scanner or a private folder and was never posted anywhere, no engine can match it. That is the honest limit of the method, whatever tool you use.
Does finding a photo’s source mean I can reuse it?
No. A reverse image search tells you where a photo came from, not what you may do with it. Read the licence on the source page itself before you reuse the photo. A public post is not public domain, and a credit line does not replace permission. If no licence is shown, assume you do not have permission.