🔎 Reverse Image Search
Image search techniques made simple: upload a photo or paste a URL and search 6 engines at once. 100% free, nothing stored.
🔒 Your image is never stored on our servers longer than 24 hours and is never shared.
Point your phone at the night sky, take a picture, and a free tool can tell you exactly which stars and constellations are in it. You do not need a telescope, a star chart, or any astronomy knowledge to start. This guide shows you how to identify stars in a photo using plate solving, the same technique astrophotographers use to label their images, and it works on an ordinary phone photo taken from a garden or a balcony.
Quick answer: To identify stars in a photo, upload the picture to a free plate-solving service such as nova.astrometry.net. The service matches the star patterns in your image against a star catalogue, then returns an annotated copy with the constellations, stars and deep-sky objects labelled, plus the exact sky coordinates of the centre of your frame.
Plate solving is the process of matching the pattern of stars in a photograph against a reference star catalogue to work out exactly where in the sky the camera was pointing. Once the software knows that, it can name everything in the frame. The rest of this guide walks you through taking a solvable photo, running it through the solver, reading the result, and checking the bright object that does not fit any constellation.
How do you identify stars in a photo?
You identify stars in a photo by plate solving it: upload the image to a solver, let the software match its star pattern to a catalogue, and read the annotated result it returns. The whole job takes a few minutes, and the best-known free service, Astrometry.net, needs no account for an occasional upload and accepts ordinary JPG and PNG files, according to its own site.
There are two different jobs hiding inside this question, and it helps to separate them. The first is naming the stars and constellations in a photo you already took. That is a plate-solving job. The second is working out what you are looking at in the sky right now, live, by pointing your phone at it. That is a planetarium-app job, and it is a different tool for a different moment. This guide covers the first job in depth, and uses the second only as a cross-check at the end.
Before you upload anything, one habit saves most failed attempts: keep the original file. Work on a copy, and keep the unedited original safe, because cropping, rotating and recompressing a night-sky photo can remove the very star pattern the solver needs. If you are used to cleaning up ordinary photos before searching them, the same preparation logic applies, our guide to how to reverse image search a blurry photo explains why the best original copy should always be your starting point.
It is also worth knowing what plate solving cannot do. It cannot identify a single star from a photo that shows only one or two points of light, because the matching works on the pattern of many stars at once. It cannot name a planet, a satellite or an aeroplane, because those move and are not in the star catalogues, and that is exactly why the bright object that will not solve is often the most interesting thing in your picture. We come back to that in the bright-object section below.
What makes a night-sky photo solvable?
A night-sky photo is solvable when it shows enough sharp, round stars for the software to recognise a pattern. As a rough rule, a frame with twenty or more clear stars, spread across the image rather than bunched in one corner, will usually solve. A frame with three stars and a lot of black sky will not, because three stars can match thousands of places in the sky.
Four things make or break a solve, and all four are in your control before you press the shutter:
- Stillness. Star trails are the commonest reason a phone photo fails. Even a one-second wobble stretches each star into a short line, and the solver reads lines, not points. Prop the phone against a wall, a fence post or a beanbag, or use a small tripod, and use the timer so your finger is not touching the phone when the shutter fires.
- Exposure. Let the phone gather light for a few seconds rather than firing a quick flash shot. Most modern phones have a night mode that does this automatically; if yours offers a manual or pro mode, try a 4–10 second exposure at a high ISO and check the result on screen before you move on.
- Focus. Tap the brightest star on the screen to focus on it, and lock the focus if your phone allows it. A photo that is out of focus turns every star into a soft disc, and soft discs match nothing.
- Field of view. A wide shot of a big patch of sky solves more reliably than a tight zoom on one constellation, because it contains more stars and more pattern. If you want a close-up of one group, take the wide shot as well, solve the wide one first, then use its answer to read the close-up.
Clouds, haze and light pollution all reduce the number of usable stars, and a photo taken through a window can add reflections that the solver mistakes for stars. If your first attempt fails, the honest first step is to take a better photo rather than to keep uploading the same one. Solvers fail on trailed and cloudy shots, and this article says so plainly because no amount of re-uploading fixes a photo that never recorded the pattern.
There is also a privacy point worth knowing before you upload. On Astrometry.net, uploads can be visible to other users, so check the visibility choice in the Advanced Settings before you submit, and do not upload a photo whose foreground identifies your home, your car number plate or anyone else. A sky-only crop is the safest thing to send.
How do you plate-solve a photo with nova.astrometry.net?
You plate-solve a photo on nova.astrometry.net by opening the site, choosing your image file, and waiting for the service to return a solved, annotated version. The service is free, and for an occasional web upload it needs no account; a free account adds job history and access to its programming interface, according to the site’s own documentation. Solving usually takes from about thirty seconds to a few minutes, depending on how busy the service is.
Here is the exact workflow, step by step:
- Pick your best photo. Choose the sharpest, widest night-sky shot you have, with the most stars visible. If you took several, pick the one with the least trailing and the most stars spread across the frame.
- Go to nova.astrometry.net and open the Upload tab. The front page shows recently submitted images from other users, which is a useful reminder that uploads can be public.
- Choose the file. Select your JPG or PNG from your phone or computer. You do not need to tell the service where you were or what you were photographing, that is the point of blind solving.
- Check the visibility setting. Open Advanced Settings and choose whether the upload is public or private before you submit.
- Submit and wait. The service works through a queue. Do not close the page; the result appears beside your submission as a link to a results page.
- Open the results page. You will see your photo with constellation lines and labels drawn over it, plus the centre coordinates, the field size and the orientation of the frame.
- Download the annotated image. Save it alongside your original so you can compare the two and keep the labelled version for reference.
That is the whole procedure, and it is deliberately boring: the skill is in the photograph, not in the clicking. Astronomy.com’s guide to identifying deep-sky objects, published on 31 May 2022 and updated on 18 May 2023, describes the same upload-and-wait workflow, then goes further into catalogue databases for faint telescope targets. This guide stops where a beginner needs it to stop: at the annotated result and the names in it.
Worked example: a phone photo of Orion from a back garden
To show what the workflow looks like in practice, here is a worked example built from the documented behaviour of the tool, labelled as an illustrative walk-through because every sky, phone and night is different and your own results will vary.
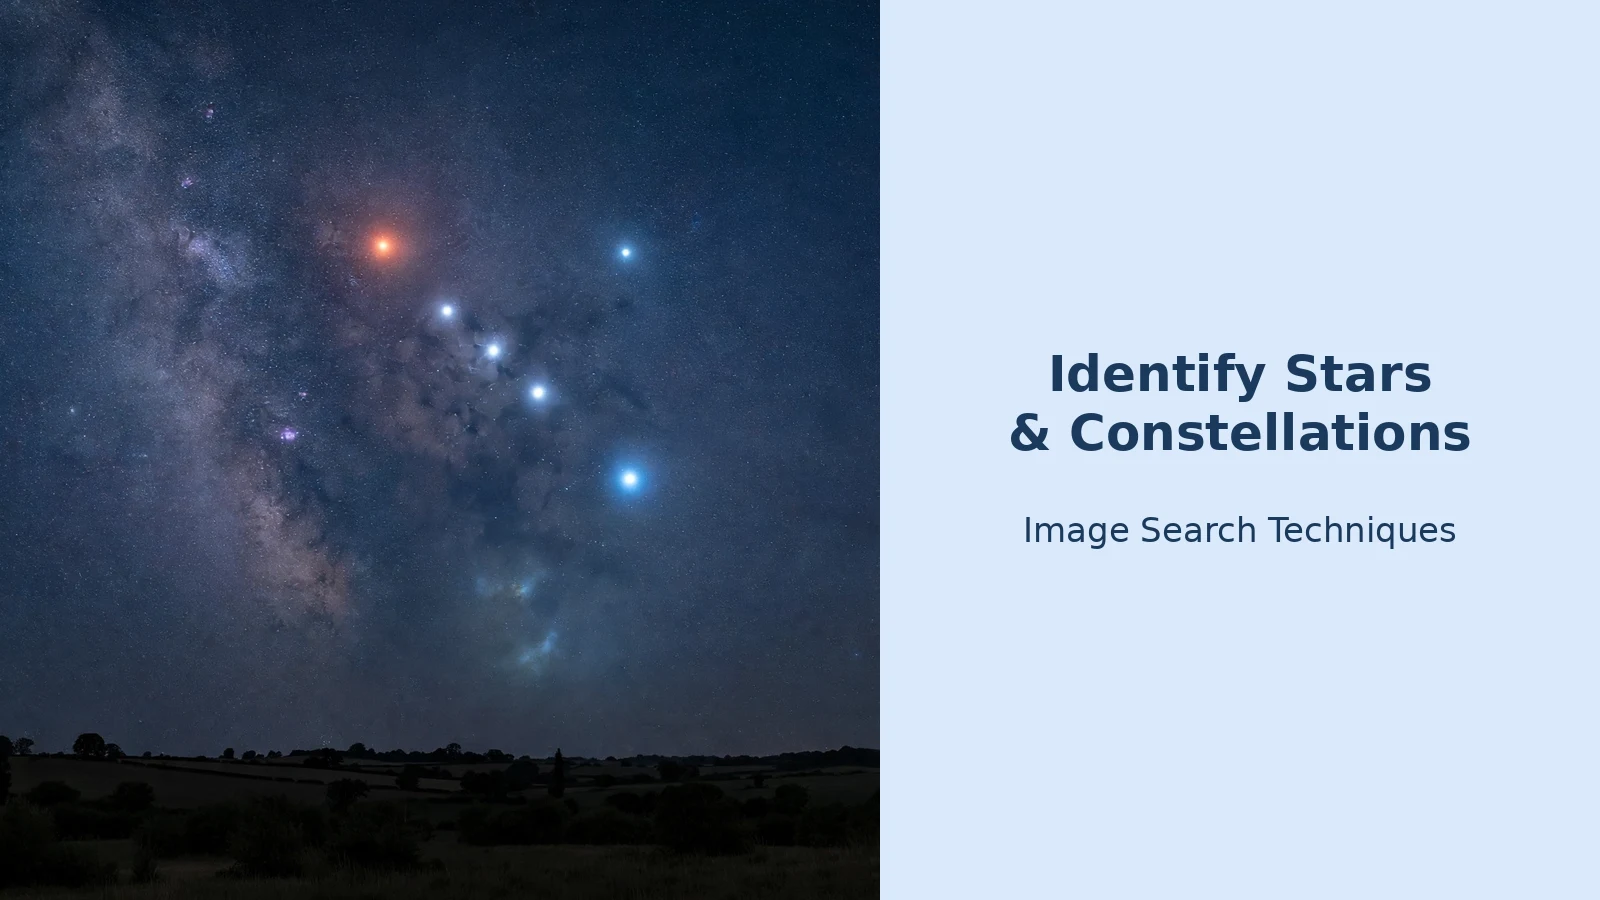
The photo is a handheld phone shot taken from a back garden on a clear winter evening, pointed south-east: a wide frame holding Orion, the most recognisable winter constellation from the UK, with its three belt stars in a short diagonal row, the reddish star Betelgeuse at the top left of the figure, the blue-white star Rigel at the bottom right, and the faint smudge of the Orion Nebula hanging below the belt. The exposure was about five seconds, the phone propped on a garden wall, and the frame also caught a little roofline at the bottom edge.
Uploaded to nova.astrometry.net, a photo like this solves in the usual way: after a short wait the results page shows the same image with green lines joining the stars of Orion, labels on Betelgeuse, Rigel and the three belt stars, and the Orion Nebula marked as M42. The results page also reports the centre of the frame in celestial coordinates, the size of the field in degrees, and the rotation of the image, the three facts that prove the software matched the pattern rather than guessed it. The roofline at the bottom edge does not stop the solve, because the solver works on the stars and ignores the foreground, but cropping the roofline out before uploading gives the software a cleaner frame and is worth doing on a copy.
Two details in this example are worth carrying into your own attempt. First, Orion is the ideal first target for a beginner: its belt is unmistakable, it is bright enough to photograph from a town, and it sits in a rich patch of sky, so the solver has plenty of pattern to work with. Second, the red star and the blue-white star are a genuine identification aid, not decoration: Betelgeuse looks orange-red and Rigel looks blue-white even in a phone photo, and the solver’s labels confirm what the colours already suggest. If your solved image labels a different constellation than you expected, trust the labels and check your direction, it is far more likely that you were facing a different way than you thought than that the solver is wrong.
If the same photo fails to solve, the fixes follow the order in the previous section: check for trailing first, then focus, then whether the frame simply has too few stars. Re-uploading the identical file will not change the answer.
How do you read the solved result?
You read a solved result by starting with the labelled image, then checking the numbers beside it. The labelled image is the answer; the numbers are the proof. The labels name the constellations, the brighter stars and any deep-sky objects in the frame, and the lines join the stars of each constellation so you can see the shape the ancients saw.
The numbers to look for are:
- Centre coordinates. The right ascension and declination of the centre of your frame, the sky’s equivalent of latitude and longitude. You do not need to understand them to use the result, but they are what let you look the same patch of sky up in any star atlas or planetarium app.
- Field size. How wide and tall your photo is, in degrees. A phone’s main camera typically covers tens of degrees across, which is why a whole constellation fits in one frame.
- Orientation. Which way is up in your photo relative to the sky, given as a rotation angle. This matters when you compare your photo with a chart, because a chart is usually drawn with north up and your photo rarely is.
- Objects in the field. The list of named objects the service found inside your frame, usually with catalogue numbers such as M42 for the Orion Nebula or M45 for the Pleiades.
One common beginner mistake is to treat the faintest labelled objects as confirmed sightings. A solver can label a galaxy that is far too faint to see in your photo, because the label comes from the catalogue, not from what your camera recorded. The rule is simple: if you can see the smudge or the star in your original photo, the label describes something real in your image; if you cannot see anything there at all, the label is telling you what lies in that direction, not what you photographed.
For old photographs the same reading skills apply in a different direction: if you are trying to date a family picture by what it shows, the clues in the image itself are the evidence, and our guide to identifying old family photos by places, uniforms and dates shows how to work through them systematically. A night-sky photo is dated by its stars, which move on a fixed schedule; a family photo is dated by clothes, vehicles and studio marks, which change with fashion and trade.
What is that bright object in my night-sky photo?
The bright object in your night-sky photo is most often a planet, and the way to tell is that it will not appear in the solver’s star labels. A planet is a wanderer: it moves against the star background from night to night, so it is not in the fixed star catalogues the solver matches against. If your solved image labels every star around a bright point but leaves that point unnamed, you are probably looking at a planet, most often Venus or Jupiter, the two brightest.
Work through this short checklist before you settle on an answer:
- Is it labelled? If the solver names it as a star, it is a star. Sirius, the brightest star in the night sky, is the usual surprise here: it is a star, it is very bright, and it sits low in the winter sky where beginners often mistake it for something stranger.
- Does it twinkle? Stars twinkle because their light passes through shifting air; planets, which show a tiny disc rather than a point, twinkle far less. In a photo you cannot see twinkling, but if you watched the object while you photographed it, a steady, unblinking light points to a planet.
- Is it near the ecliptic? Planets travel along a narrow band of sky called the ecliptic, roughly the same path the Sun and Moon follow. If the bright object sits in or near a zodiac constellation, a planet is likely; if it sits far from that band, it is more likely a bright star.
- Check it in a planetarium app. This is the one place where Stellarium earns its place in this guide. Stellarium is not a photo solver, it cannot identify a photo, but it is a planetarium: set its date, time and location to match your photo, and it will show you what was in that patch of sky, planets included. The free version covers the stars you will actually photograph, and it is the fastest way to confirm a planet identification. Stellarium’s own site lists a default catalogue of over 600,000 stars, so the match is rarely in doubt.
- Could it be a satellite or an aeroplane? A satellite crossing a long exposure leaves a straight, even streak; an aeroplane leaves a dashed line with regularly spaced lights, often in red and white. A single bright, round point with no trail is neither.
If you want a second opinion on the same photo through a different kind of search, a reverse image search can find whether the same sky, or the same object, has been photographed and discussed before. Our main how to reverse image search guide covers that workflow; it is a poor way to name a star, because the sky looks the same from everywhere, but it is a good way to find out whether a striking bright object has already been explained by someone else.
Which astronomy image solver app should you use?
For identifying the stars in a photo you already took, use nova.astrometry.net first. It is the reference tool that the rest of the field is measured against, it is free, and its annotated results are the clearest for a beginner. The alternatives below are useful in specific situations, not better in general, and one of them is not a solver at all, which is exactly the trap this table exists to prevent.
| Tool | What it does | Cost | Best for | Watch out for |
|---|---|---|---|---|
| nova.astrometry.net | Plate-solves an uploaded photo and returns labelled constellations, stars and coordinates | Free; no account needed for occasional uploads | First attempt on any night-sky photo | Uploads can be visible to others; check visibility settings |
| SkySolver.app | Solves a photo in the browser without uploading it | Free; no account | Quick checks and photos you would rather not upload | Fewer catalogue features than Astrometry.net; a fast second opinion, not a replacement |
| Stellarium | Planetarium app that shows the sky for any date, time and place | Free; paid Plus version adds fainter stars | Confirming a planet, or matching a solved result to the sky on the night | Not a photo solver, it cannot identify a picture |
| Google Lens | Reverse image search for objects, places and products | Free | Finding whether the same image has been published before | Does not plate-solve; it cannot name stars in a sky photo |
Two cautions belong with this table. The first is the Stellarium trap, which the pre-publication checks for this article flagged explicitly: Stellarium is a live-sky app that matches a date and a location, and presenting it as a way to upload a photo is simply wrong. Use it after the solve, to confirm what was in the sky on the night, and never as the solver itself. The second is the Google Lens trap: Lens is excellent at matching objects and places in daylight photos, but a star field is not an object, and it will return star charts and similar-looking skies rather than an identification.
Two more options are worth knowing about. Plate Solver is another web plate solver: upload a sky photo and it labels the constellation figures, the named stars and the Messier and NGC objects in the frame, and it can use the date, time and location of the photo for extra detail. And if you would rather work on your phone, the Star Identification Camera app analyses a saved photo from your gallery or identifies stars live through the camera, which is handy when you are standing under the sky and want an answer on the spot.
If none of the solvers can read your photo, work down this fallback ladder instead of giving up. First, re-shoot with the stillness and exposure advice from the second section, a new photo solves far more often than a re-uploaded one. Second, match the photo by hand against the sky for that date and place in Stellarium: set the date and time, find the brightest stars in your frame, and compare the pattern. Third, ask a community: astronomy forums and local society groups identify photos routinely, and a post that includes the date, the direction you were facing and the camera settings will get a faster, better answer than a bare image. And if you are trying to find out when a photo was taken rather than what it shows, the date clues in the image itself are a separate skill, our guide to when a photo was taken covers it.
When plate solving fails, and what to try next
Plate solving fails most often for reasons you can see in the photo yourself. Star trails from a shaky hand, a thin layer of cloud, a bright Moon washing out the faint stars, or a frame that holds only a handful of stars will all defeat the matcher, because the matcher needs a pattern and the photo did not record one. None of these is a fault in the tool, and none of them is fixed by submitting the same file again.
Before your next attempt, run through this short checklist:
- Trails? Zoom into a bright star. If it is a short line instead of a round point, the camera moved. Use a support and the timer next time.
- Too few stars? Count the clear stars. Fewer than about twenty, and the pattern is too thin to match reliably. Take a wider shot or a longer exposure.
- Cloud or haze? If the sky looks milky on screen, the faint stars are gone. Wait for a clearer night rather than fighting the weather.
- Wrong file? Make sure you uploaded the full-resolution original, not a small preview or a heavily compressed chat copy. Compression throws away the faint stars first.
- Too much foreground? A frame that is mostly roof, trees or streetlight leaves too little sky. Crop to the sky on a copy and try that.
There is one more honest limit to state. A solver identifies the sky; it says nothing about what a star means. There is no astrology in this guide and no “meaning” attached to any constellation, because the constellations are patterns humans drew on the sky, not messages in it. The value of identifying the stars in a photo is practical: knowing what you photographed, when you photographed it, and how to find it again.
If you enjoy this kind of identification, the same habit transfers to the rest of photography: a picture is a record, and the record can be read. Our guide to what this picture is is the general version of the same skill, working out what a photo shows, where it came from, and what it can prove, and the stars are simply the oldest subject it works on. The night sky has one more subject worth naming: our guide to identify a planet from a photo shows how to check whether a bright dot is a planet, using the date, time and a second night.
FAQs
Can I identify stars in a photo with my phone?
Yes. Take a still photo of the sky with your phone, then upload it to a free plate-solving service such as nova.astrometry.net. The service matches the star pattern against a catalogue and returns your photo with the constellations and stars labelled. Support the phone, because star trails are the commonest reason a solve fails.
What is plate solving in astronomy?
Plate solving matches the pattern of stars in a photograph against a reference star catalogue to calculate exactly where the camera was pointing. The result gives the centre coordinates, field of view and rotation of the image, letting software label every star, constellation and catalogued object in the frame. It is the standard method astrophotographers use to identify their images.
How do I use nova.astrometry.net to identify a constellation?
Open nova.astrometry.net, go to the Upload tab, choose your night-sky photo, check the visibility setting, and submit it. After a short wait, open the results page to see your photo with constellation lines and labels drawn over it, plus the centre coordinates and field size. No account is needed for an occasional upload, and JPG and PNG files are accepted.
Why did my night-sky photo fail to solve?
The usual causes are star trails from camera movement, too few visible stars, cloud or haze, or a small, heavily compressed copy of the image. Solvers need a clear pattern of many sharp stars, so re-shoot with the phone supported and a longer exposure rather than re-uploading the same file. A frame with fewer than twenty clear stars will fail.