


🔎 Reverse Image Search
Image search techniques made simple: upload a photo or paste a URL and search 6 engines at once. 100% free, nothing stored.
🔒 Your image is never stored on our servers longer than 24 hours and is never shared.
Your photo is real. You took it yourself, on a real day, with a real camera or phone. Then someone online calls it AI, or a detector flags it, or a client asks for proof it is yours. That is the moment Content Credentials earn their keep. They are a signed record attached to the file, and they travel with it.
To add Content Credentials to photos, sign the file at the point you take it with a signing camera, attach them when you export from Lightroom or Photoshop, or apply them afterwards with Adobe’s free Content Authenticity app. Each route records who made the file, which tool made it, and what changed along the way.
Here is the honest limit, and it belongs in the first screen, not buried at the bottom. A credential added after the fact proves you signed that file on a date. It does not prove the picture came off a camera. Only a camera that signs at the moment of capture can prove that, and very few cameras do it yet. Everything in this guide is built around that difference, because it decides which route is worth your time.
What are Content Credentials? They are a tamper-evident record built on the open C2PA standard, often described as a nutrition label for a file. The record names the creator, the tool that made or edited the file, and the edit history, then seals it with a cryptographic signature. If anyone changes the pixels afterwards, the signature no longer matches, and a verifier says so.
Why add Content Credentials to a photo at all?
Three readers need this, and they are not all photographers. The first is the photographer whose work gets reposted without credit. A signed file carries their name and a link back to them, so a repost that keeps the file intact keeps the credit too. The second is the person whose real photo keeps getting flagged as AI. Social feeds and detectors now guess at AI origin, and a real photo with no provenance has nothing to answer with. The third is anyone who sells or licenses images, where a buyer wants to know what they are paying for.
None of these readers gets a guarantee. A credential is evidence, not a verdict. It helps a human or a platform decide, and it helps you tell your side of the story with something checkable. That is the whole job. If a tool promises you proof your photo is real, it is overselling. Our guide to telling whether an image is AI-generated explains why no single check settles that question, and credentials are one more piece of evidence, not the final word.
The timing matters too. Adobe’s Content Authenticity work moved fast in 2026. The C2PA standard reached version 2.4, the Content Authenticity Initiative passed 6,000 members, and Adobe rolled out Content Authenticity for Enterprise in November 2026. More platforms now display credentials when they find them. Signing your work now means the record is already there when the next platform starts looking for it.
What does a signed photo actually prove?
A Content Credential proves three things, and only three things. First, that a named creator or tool signed this exact file, on a stated date. Second, what the file’s history was, as far as the signing tool recorded it: which app opened it, which edits were made, and which earlier file it came from. Third, whether the file has changed since it was signed, because the signature breaks if the pixels change.
What it does not prove is just as important. It does not prove the scene in front of the lens was real. A photo of a staged scene, a screen, or a print can be signed like any other. It does not prove the person named in the credential pressed the shutter. AI-generated images can carry credentials too: OpenAI has signed its own image output with Content Credentials since 2024, so a credential never means a human took the photo. Our guide to telling if an image was made with ChatGPT shows how that check works in practice. And when the credential is added days or years after the shot, it does not prove the photo came from a camera at all. It proves a file was signed on a date, by a person or tool, and nothing more.
This is why the route matters. A credential signed inside the camera at the moment of capture is the strongest kind, because the chain starts at the sensor. A credential added at export from Lightroom is one step weaker: it proves the file passed through your Lightroom, with your name on it, on a date. A credential added later through Adobe’s web app is weaker still in what it proves, though it is the most useful route for most people, because it works on any photo you already have. Pick the route that matches the claim you want to make, and say plainly which one you used.
There is one more limit to state before the how-to. A credential does not stop anyone copying your photo, and it does not force a platform to show it. Some platforms strip metadata when they recompress an upload, and some never display credentials at all. The record still exists in the file you keep, and in Adobe’s public cloud if you publish it there, but the copy on a social feed may carry nothing. That is a distribution problem, not a signing problem, and the last section of this guide covers it.
Which route should you use?
There are three routes, and they suit different people. The table below is the short version. The sections after it give the steps for each one.
| Route | What it records | What it costs | What survives afterwards |
|---|---|---|---|
| Sign in the camera | Capture, camera model, date, creator, from the sensor onwards | A signing camera, and in Sony’s case a licensed service aimed at newsrooms | The strongest chain, but only a handful of cameras can do it, and the record can still be stripped by a platform that rebuilds the file |
| Export from Lightroom or Photoshop | Edits and activity, producer name, connected accounts, ingredient file | A Creative Cloud subscription for Lightroom or Photoshop | Travels with the exported file; cloud publishing adds a recoverable public copy; the chain breaks if you round-trip through the other app without signing again |
| Adobe Content Authenticity app | Your verified name, social accounts, AI training preference, and the fact you signed it on a date | Free, in public beta, but you need an Adobe ID to sign in | Credentials applied this way are durable and recoverable through an invisible watermark, according to Adobe, so they can survive a screenshot; the signature itself is still only as strong as the date you signed |
Most readers should start with the third route, because it works on photos you already own and costs nothing. Photographers who already pay for Lightroom or Photoshop should use the second route, because it signs the file as part of work they already do. The first route is for people who need the strongest possible chain, which in practice means working press photographers and a few enthusiasts with the right camera.
How do you sign a photo in the camera?
Camera signing is the shortest list in this guide, and that is the point. As of November 2026, two makers have cameras you can actually buy that sign photos at capture, one maker had its service suspended, and the rest are members of the initiative without a shipping consumer camera.
Leica shipped the first signing camera, the M11-P, in October 2023. It signs JPEG and DNG files at capture, with a certificate issued to each body on the production line and held in a secure chip. Signing is on by default on the M11-P. The M11-D and the SL3-S sign too. The plain M11, the Q3 and the SL3 do not, because they lack the secure element Leica says signing needs.
Sony covers the most models. The Alpha 1 II, Alpha 9 III, FX3, FX30 and the PXW-Z300 camcorder shipped with support, and firmware updates added it to the Alpha 1, Alpha 7 IV, Alpha 7S III and Alpha 7R V, plus the 2026 bodies, the Alpha 7 V and Alpha 7R VI. There is a catch that matters for ordinary readers. Sony’s signing runs through its Camera Authenticity Solution, which needs a licence that Sony currently offers to newsrooms and agencies rather than to individual photographers. So the feature exists on the camera, but most owners cannot switch it on for themselves.
Nikon is the cautionary tale. The Z6III gained signing with firmware 2.00 on 27 August 2025, through the Nikon Imaging Cloud and a digital certificate loaded onto the camera. Within about a week, a researcher showed that the camera’s multiple-exposure mode could make it sign a manipulated image it had not really captured, and the forged file still passed the standard verification tools. Nikon suspended its Authenticity Service and invalidated every certificate the programme had issued, so Z6III credentials from that period no longer verify. As of mid-2026 the service had not returned.
Phones are moving faster than cameras here. The Google Pixel 10 signs every photo by default, and the Pixel 11 does the same, at the highest assurance level in the standard. The Samsung Galaxy S25 was the first smartphone line with native support for images created or edited with Galaxy AI. If your phone already signs, you may have credentials on your newest photos without doing anything, which is worth checking before you sign anything by hand.
If you own a signing camera, the steps are short. Turn the feature on in the camera menu, where Leica calls it Content Credentials and Sony calls it part of its authenticity solution. Shoot as normal. Check the first file in a verifier before you rely on it, because a setting buried in a menu is easy to get wrong. Keep the signed original, and treat any copy you edit later as a new file that needs signing again.
How do you add Content Credentials in Lightroom or Photoshop?
This is the route working photographers actually use, because it fits into an export they already do. Adobe’s own help pages, last updated in August 2026, describe it as an opt-in setting, not a default. Nothing is signed unless you ask for it.
In Lightroom on desktop, the steps are as follows. First, finish your edits. Second, select the photo you want to export. Third, open the export dialog and choose Custom Settings, then select the Apply Content Credentials option. Fourth, decide what the credential will contain: your name as producer, your connected social accounts, and whether to include the edits and activity history. Fifth, choose how the credential is stored. Sixth, export.
The storage choice is the part most people skip, and it matters. You get three options. Publish to Content Credentials cloud puts the record in Adobe’s public cloud, keeps the file smaller, and makes the credential recoverable if the file’s own copy is stripped, but the record is public and can appear in search results for matching content. Attach to files embeds everything in the exported file, keeps it private, and makes the file larger. Attach and publish to cloud does both. There is also a plain Do not include option, for exports where you want no credential at all. Set your defaults once under Preferences, then Export, so you do not have to decide on every photo.
In Photoshop, open the image, then open Window, then Content Credentials (Beta), and switch credentials on for that document. When you are done, save with File, then Export, then Export As, and choose the Content Credentials option there. You can turn credentials on or off for a single document by right-clicking or option-clicking its tab.
There is one trap that catches people who use both apps. Editing a photo in Photoshop from inside Lightroom is not supported by Content Credentials, and the chain breaks. Adobe’s own guidance gives the workaround: export the image from Lightroom with Content Credentials after making your changes, open it in Photoshop and turn Content Credentials on before making changes, then save it with File, Export, Export As with Content Credentials. If you want to go back to Lightroom afterwards, import the file Photoshop exported, so the credential survives the round trip. Skip that last import and the record is gone.
Lightroom on mobile works too, on iOS at least. Share the photo, choose Export as, turn the Content Credentials toggle on, pick the information to include and the storage option, then export. Only JPEG export is supported there, so a DNG or TIFF workflow still needs the desktop app.
How do you add Content Credentials to photos with Adobe’s free app?
Adobe’s Content Authenticity app is the route for everyone else. It is a free web app, still in public beta as of November 2026, and it signs files you already have, whether or not they were made with Adobe software. You will find it at contentauthenticity.adobe.com. Adobe’s own step-by-step guide to applying credentials covers the same screens, if you want the official version beside this one.
Before anything else, know the sign-in position, because we checked it on 13 November 2026 and it is not optional. The home page offers a Get started button, and it opens a sign-in dialog at once. The choices are Continue with Google, Continue with Facebook, Continue with Apple, Continue with Microsoft, Continue with LINE, Continue with Kakao, or Continue with email. There is no guest mode, no skip link, and no way to reach the Apply screen without signing in. That matters if you avoid accounts, and it is worth knowing before you gather your files. Signing in gives you an Adobe ID, which is the account the credential is tied to.
Once you are in, the steps are simple. First, open Preferences, in the upper left, and set up what your credentials will say. You can verify your name through LinkedIn, which adds a check that the name is yours. You can connect social accounts, including Behance, Instagram, LinkedIn and X, so the credential links back to you. You can also add a statement asking generative AI models not to train on your content. That preference is honoured by Adobe Firefly, and Adobe says it is working to grow adoption among other model makers, but it is a request, not a lock. No setting here can force a model maker to comply.
Second, go to Apply and upload your files. You can apply credentials to up to 50 JPG or PNG files at once, each no larger than 20 MB. Choose what to include, preview what the credential will look like, then click Apply. Third, download the signed files. This step is easy to miss, and Adobe is blunt about it: the app does not store copies of your files, so if you close the page without downloading, the signed versions are gone and you have to do it again.
Two details from Adobe’s own help pages are worth keeping. Applying credentials is desktop only, so the Apply screen does not work on a phone. And credentials must be applied before publishing. You cannot add them to content already posted online; you sign the file, then post the signed file.
The app also has an Inspect tool, which reads a file and shows whatever credentials it carries. That is the checking side of the same system. Our guide to checking a photo’s Content Credentials walks through the checking steps, so this article stays on the creator side and does not repeat them.
We tested it: a real photo, checked three ways
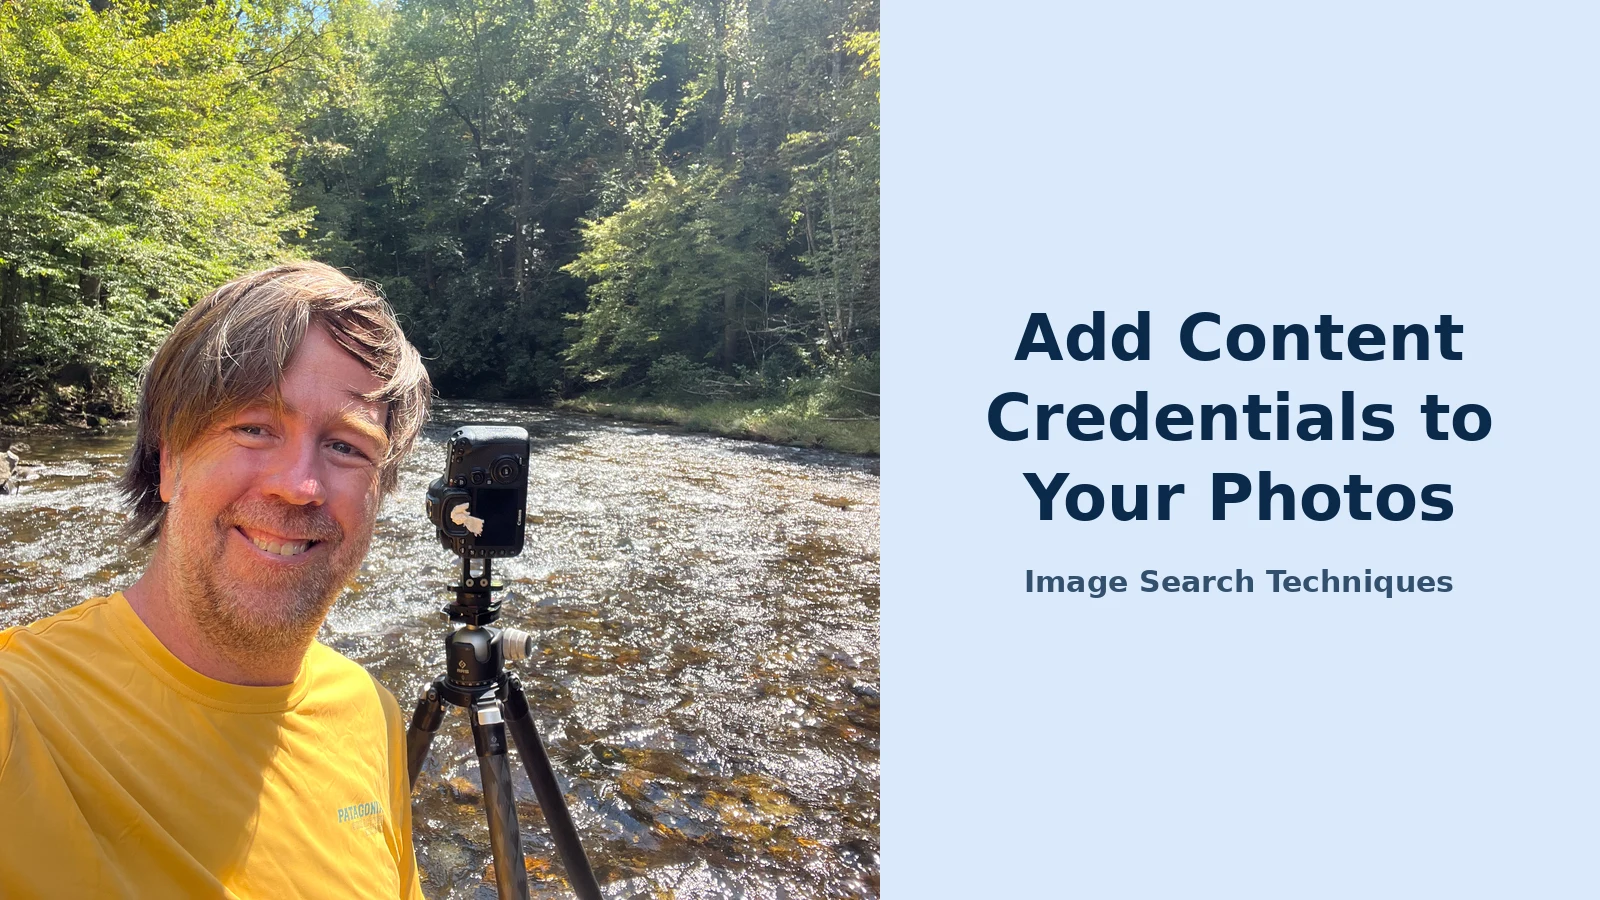
A guide like this is only useful if the routes behave the way the help pages say they do, so we tested the claim on a real photo. The photo is a Wikimedia Commons picture of photographer Will Thomas on location in Western North Carolina, beside a stream with his camera on a tripod. It is a real photograph, released under a CC BY 4.0 licence, and we used the same file for this article’s banner. The file is 4032 by 3024 pixels and just over 11 MB.
First, we looked inside the file itself. Its bytes contain a full C2PA manifest, signed by Lightroom Classic 15.3. The manifest names the ingredient file it came from, IMG_1410.heic, and records the action as opening a pre-existing file. The photo’s own metadata fills in the rest: it was taken on 20 September 2022 on an iPhone 13 Pro Max, and the signed export was made in Lightroom Classic 15.3 on 21 May 2026. The creator named in the file is Will Thomas. That is the honest limit in concrete form. The credential proves the file was signed in May 2026. It does not prove the photo came off a camera, because it did not: it came off a phone in 2022, and was signed four years later at export. The signature is real, and so is the gap.
Second, we ran the photo through the official verifier, which now lives at verify.contentauthenticity.org. The page takes a file upload only, with no URL paste field, so we uploaded the exact original file. The verdict, quoted word for word, was “This asset has content credentials”, dated May 21, 2026. The details read: “Issued by Adobe Inc.”, “App or device used: Lightroom Classic 15.3”, action “Opened, Opened a pre-existing file”, ingredient “IMG_1410.heic, No Content Credential”, and under the credential itself, “Legacy trust” and “Issued on May 21, 2026 at 7:41 PM GMT+5”. No person’s name appeared in the verdict. The verifier confirmed the signature, and it also showed the limit: the ingredient file, the original phone photo, carries no credential of its own.
Third, we ran the same photo through our free reverse image search tool, to see what the open web knows about a signed photo. The tool loaded the 11 MB original without complaint, even though its own note says 8 MB maximum. Google Lens needed a CAPTCHA clear first, then failed on the original URL twice with “No image at the URL”, and only worked when we gave it the same photo through a 1024 pixel version. Its verdict was “No exact matches found”, and its AI Overview described the yellow Patagonia shirt instead of naming the photographer. TinEye searched its 86.7 billion images and found 0 matches. Bing did not run a search at all: its button opened only the generic Bing Images homepage. Yandex ran, but tagged the man as “thomas heaton”, a different photographer, and listed similar images of other photographers with tripods by rivers. Pinterest did not run a visual search either; its button opened a keyword search for the host domain and returned unrelated pins. The Search All button, with all six engines selected, opened only one tab, Google Lens.
Put the three checks together and the lesson is plain. The signed file proves its own history to anyone who opens it in a verifier. The open web knows nothing about it at all. Reverse image search and Content Credentials answer different questions, and neither one replaces the other. A reverse search tells you where a photo has been seen. A credential tells you what the file claims about itself. You need both, and you should not expect either to do the other’s job.
What survives after you post the photo?
This is where most people lose their credentials, and it is usually their own workflow that does it. A credential attached to a file is metadata, and most platforms rebuild the file when you upload it. Recompression can drop the manifest. A screenshot creates a brand new file with no record at all. A crop that cuts the visible mark off a Samsung photo removes that mark, though the file’s credential may survive if the platform keeps it. The rule is simple: the signed file you keep is the evidence. The copy on a feed is not.
Adobe’s app route has one advantage here. Credentials applied with the Content Authenticity app are durable and recoverable, according to Adobe, because the app hides an invisible watermark in the pixels as well as writing the manifest. That is why Adobe calls them screenshot-proof: the watermark can carry the record even when the file is rebuilt. Credentials attached by Lightroom or Photoshop export do not get that watermark unless you also run the file through the app, so they are easier to lose. If durability matters to you, the app is the safer finish, even if you did the editing in Lightroom.
Publishing the credential to Adobe’s public Content Credentials cloud is the other safety net. A cloud-published record can be recovered by a verifier even if the file copy in front of it has been stripped, because the verifier can match the image against the cloud record. The trade is privacy: the record is public, and it can appear in search results for matching content. If you do not want that, attach the credential to the file only, and accept that a stripped copy loses it.
Three habits keep your credentials alive. Sign the file before you post it, never after, because you cannot add a credential to a copy that is already online. Keep the signed original in your own archive, with the file name and date unchanged, so you can always produce it. And check a posted copy in a verifier once, so you know whether that platform keeps the record or drops it. If it drops it, say so in the caption or the listing, and link to the verifier result for the original.
What should you do when your real photo still gets called AI?
Even a signed photo can be called AI, because detectors guess and people repeat the guess. A credential helps, but only if you show it instead of just mentioning it. Link the verifier result for the original file, not a screenshot of it, so anyone can check it themselves. Name the tool and the date in the open, the way the verifier does: signed in Lightroom Classic on a date, or signed in the camera on a date. Keep the ingredient trail: the RAW file, the phone original, or the earlier export the signed file came from. That trail is what separates a signed photo from a signed screenshot of someone else’s work.
If the flag came from a platform, use its own route. Most platforms with an AI label have an appeal or dispute step, and a credential is the evidence that step asks for. If the flag came from a person, the credential usually ends the argument faster than a debate about pixels. And if the photo is being used to claim you faked something, keep the signed original untouched and let the verifier speak. Editing the file to add a caption or a watermark after signing breaks the signature, so make those changes first and sign last.
One last point, for photographers who sell work. A credential is not a copyright registration and it is not legal advice. It is a signed statement about a file, and it helps in a dispute, but it does not replace registration, contracts, or a proper licence. Our complete guide to protecting your photos online covers the rest of that job, from watermarking to takedowns, and this article is only the signing part of it.
Start with one photo, not your whole library. Pick a photo that has already been questioned, or one you are about to publish somewhere that matters. Run it through the app, download the signed file, check it in the verifier, and keep the original. Once you have done it once, the whole process takes a few minutes, and the next photo is just a repeat. The credential will not prove everything, but it will prove something real, and that is more than an unsigned photo can say.
Can I add Content Credentials to a photo I took years ago?
Yes. The Adobe Content Authenticity app signs any JPG or PNG you already own, and Lightroom or Photoshop can sign an old photo at export. The credential records the date you signed it, not the date you took it, so be honest about that gap. Only a camera that signs at capture can prove when the photo was taken.
Do Content Credentials prove my photo is real and not AI?
No, not on their own. A credential proves a named creator signed this file on a date, and that it has not changed since. It does not prove the scene was real: a signed file can show a staged scene, a screen, or an AI image. Treat it as supporting evidence, and judge the photo itself on its own merits.
Will Content Credentials survive if someone screenshots my photo?
It depends how the credential was added. Credentials from Adobe’s app carry an invisible watermark, so Adobe says they can survive a screenshot and be recovered. A plain manifest attached by Lightroom or Photoshop has no watermark, and a screenshot creates a new file with no record at all. Check the posted copy in a verifier to see what survived.
Is the Adobe Content Authenticity app free, and do I need an account?
Yes, the app is free and still in public beta as of November 2026. You do need an account: the Apply screen asks you to sign in with an Adobe ID, using Google, Facebook, Apple, Microsoft, or email, and there is no guest mode. You can upload up to 50 JPG or PNG files, each 20 MB or less.






