🔎 Reverse Image Search
Image search techniques made simple: upload a photo or paste a URL and search 6 engines at once. 100% free, nothing stored.
🔒 Your image is never stored on our servers longer than 24 hours and is never shared.
Short answer: Yes, you can restore old photos with AI in ChatGPT or Gemini, but only in the right order: photograph the print properly, repair the damage first, and colourise last. Every prompt below carries a keep-faces line, because AI does not recover lost detail, it invents it.
AI photo restoration has become the default way to rescue a faded family print. Upload a scan, paste a prompt, and seconds later the scratches are gone and the colours are back. The results look convincing, which is exactly the problem. A restored photo is not your original photo repaired. It is a new image the model drew, guided by your original. Where the original is damaged, the model fills the gap with its best guess, and when the gap is a face, the guess can quietly turn your grandmother into a stranger.
This guide shows you how to restore old photos with AI without letting that happen. It covers the safe sequence, copy-ready prompt lines for both ChatGPT and Gemini, the current model names for each app (checked today, 12 November 2026), and a genuinely performed worked example on a real 1920 family portrait. The rule that runs through everything: filled-in detail is invented, not recovered, so never present an AI-restored face as the person’s true likeness.
What does AI actually do to an old photo?
AI restoration is not repair in the darkroom sense. A traditional restorer works on the pixels that exist. An image model studies your whole photo, works out what it shows, and then generates a brand new image that matches your request. The scratches disappear because the model redrew the surface, not because it cleaned it.
That distinction decides everything about how you should use these tools. Damage that sits on top of the photo (scratches, dust, creases, fading, a yellow cast) is usually repaired well, because the model has plenty of undamaged photo around it to work from. Damage that removes part of the photo (a torn corner across a face, a water stain over an eye, a missing chunk of a group portrait) forces the model to guess, and its guess is drawn from millions of other faces, not from your family.
So the honest way to describe an AI restoration is this: it is a reconstruction. The repaired areas are plausible, not proven. That does not make it useless (a reconstruction is exactly what you want on a wall or in a gift) but it means three things are non-negotiable. Keep the untouched original scan as your master file. Check every restored face against that original at full size. And label the restored file as AI-restored, so nobody in the family mistakes it for the untouched photograph in fifty years’ time.
One more boundary before you start: do not use a restored photo as evidence of who someone was. If a face was damaged and the model rebuilt it, the rebuilt face is the model’s idea of a face, not a record of your relative. The same caution applies to text in the photo, dates, house numbers, handwriting on the back, which models frequently redraw as convincing nonsense.
Which model edits your photo in ChatGPT and Gemini right now?
Both apps changed their image engines in the last few weeks, and most guides ranking today still name the old ones. Here is the position as it stands on 12 November 2026, checked against each company’s own pages.
ChatGPT edits photos with Images 2.6, which OpenAI launched on 4 November 2026. In the API the two models are called GPT-Image-2.6 Flare, the faster one, and GPT-Image-2.6 Sunburst, the more detailed one. In the ChatGPT app itself you do not pick a model. You upload a photo in a chat and describe the change. OpenAI says Images 2.6 generates images 50% faster than before, and that people now create 4 billion images a week across ChatGPT, Codex and the API. The update is available globally in ChatGPT across all subscription tiers, free included, though OpenAI notes some features are still rolling out, so your account may not show every new control yet.
Gemini edits photos with Nano Banana 2, Google’s image model, on the free plan. A Google AI plan (Plus, Pro or Ultra) unlocks Nano Banana 2.1, the newer model, and paid subscribers can also regenerate an image with Nano Banana Pro, the highest-quality variant, through a “Redo with Pro” button. Google’s own Gemini Apps help page confirms the current model is Nano Banana 2 and states plainly that editing images is not available to users under 18: you must be 18 or over, and signed in to a personal Google account, to edit a photo in Gemini.
| ChatGPT | Gemini | |
|---|---|---|
| Model that edits your photo | Images 2.6 (GPT-Image-2.6 Flare / Sunburst in the API) | Nano Banana 2 free; Nano Banana 2.1 on a Google AI plan; Nano Banana Pro via “Redo with Pro” |
| Sign-in needed | Yes: a ChatGPT account, free or paid | Yes: a Google account, and 18 or over to edit |
| Targeted fix on one spot | Selection tool in the app: highlight one area, ask for a repair there | Describe the spot in words; no brush or mask tool in the app |
| Visible mark on the result | None on the image itself | A small Gemini sparkle in a corner, which can be switched off in Settings > Media Watermark where the law allows |
| Invisible provenance | C2PA Content Credentials attached to images ChatGPT creates | Invisible SynthID watermark in images it creates or edits |
| Daily allowance | A small number of image generations a day on the free plan; OpenAI publishes no fixed number | Free-plan limits apply; Google publishes no fixed number, and paid plans raise the ceiling |
Two practical consequences follow. First, if a guide tells you ChatGPT uses GPT Image 1.5 or Gemini uses the original Nano Banana, it is out of date. Both were superseded in the autumn of 2026. Second, neither app lets you edit a photo without signing in. You need a free account in both cases, and in Gemini you also need to be 18 or over. That matters for the worked example below, and it matters for privacy: a family photo you upload leaves your device, so check each app’s data controls before uploading a photo you would not want used for training. Our guide to identify a photo with ChatGPT and Gemini explains where those controls live.
How do you photograph or scan the print properly?
Every restoration is limited by the file you upload. A blurry phone snapshot gives the model blurry information, and it will invent the missing detail. Spend five minutes here and every later step gets easier.
Use a flatbed scanner if you have one. Scan at 600 DPI in colour, even for black and white photos: colour mode captures stains and fading that a greyscale scan throws away, and you can always convert later. For a small print, 1200 DPI is worth it. Save the untouched scan as your master file with a clear name, such as grandma-wedding-1962-ORIGINAL, and never edit or overwrite it. Work only on copies.
No scanner? Use your phone carefully. Lay the photo flat on a table near a window in daylight, turn the flash off, hold the phone directly above and parallel to the photo, and tap to focus. Glare from a flash or a lamp is the number one cause of failed phone captures. Google’s free PhotoScan app does the same job with guided captures that cut out glare, if you would rather not fuss with angles.
Flatten a curled photo gently under a heavy book for a few hours. Never force a brittle photo flat, and never tape or glue an original. Crop out the table, your fingers and the background, but keep the full photo including its edges and white border. The border helps the model understand the image. And handle damaged prints with dry hands: if a photo is wet, air-dry it face up on paper towels and do not freeze it.
Before you upload anything, run one check that costs nothing: reverse-search the photo. If the same image already circulates online (a relative may have posted it, or it may be a known historical photograph) you will learn what the undamaged version looks like and whether your print is the only copy. Our guide to how to reverse image search walks through the method, and Google reverse image search is the fastest first try. If the print shows people or places you cannot name at all, start by identifying what is in the photo before you restore it.
What is the safe sequence to restore old photos with AI?
The sequence is the Ranking Asset of this guide, and it is the whole method in one place: photograph the print properly, repair the damage, and colourise last. Each step is a separate prompt, each result is checked before the next step begins, and every prompt carries a keep-faces line. A single prompt that asks for repair, sharpening, colour and a print-ready crop in one go almost guarantees a redrawn photo.
| Step | Do this | Check before moving on |
|---|---|---|
| 0. Capture | Scan at 600 DPI in colour, or photograph flat in daylight with no flash. Save the untouched master file. | The scan is sharp, square-on, and shows the whole print including its border. |
| 1. Repair | One prompt: remove scratches, dust, creases, stains and fading only. Keep the photo black and white if it started that way. | Faces, expressions and clothing match the original exactly at full size. |
| 2. Targeted fixes | One prompt per remaining problem: a torn corner, a faded patch, a soft face. In ChatGPT, use the selection tool to mark the spot. | Only the named area changed; nothing else drifted. |
| 3. Face check | Compare the result side by side with the original. If a face drifted, use the correction prompt in the same chat. | A relative who knew the person says it still looks like them. |
| 4. Colourise LAST | Only after the repair is approved. Supply real colours from family memory; let the model guess only what nobody remembers. | Colours are muted and period-appropriate, not bright and modern. |
| 5. Label and save | Save as a new file named “AI restored” or “AI colourised”. Never overwrite the master. | The filename says what it is, so nobody mistakes it for the original. |
Here are the prompt lines, written for the job. Paste them under your uploaded photo, replacing anything in brackets. The preserve line in each one is the part that protects the people in the picture: keep it exactly as written.
Prompt 1: the master repair prompt (both apps).
Restore this old photograph. Remove the scratches, dust, creases, stains and fading. Keep every face, expression, hairstyle and item of clothing exactly as it is in the original. Keep the background, the framing and every object where it is. Do not smooth skin, do not make anyone look younger, do not beautify anyone, and do not add or remove anything. Keep the natural film grain and the original framing.
Prompt 2: fix a torn old photo (one corner or edge).
This photo is missing a torn piece at the [top right corner]. Rebuild only the missing area by continuing the background pattern, colours and lighting around it. Keep the rebuilt area simple and plain. Do not add any new person, object or decoration, and leave the rest of the photo completely unchanged. Anything rebuilt here is a guess, so keep it minimal.
Prompt 3: the face-drift correction (reply in the same chat, do not start over).
The restored version changed a face. The person in the new version does not match the original photo. Redo the restoration and keep every face exactly as it appears in the uploaded original: same face shape, same eyes, same expression, same age. Fix only the damage, nothing else. If a detail is not visible in the original, leave it soft instead of inventing it.
Prompt 4: colourise a black and white photo with Gemini (run only after the repair is approved).
Colourise this restored black and white photo with soft, realistic colours that fit its era. Known colours: hair [colour], eyes [colour], clothing [colours], background [colours]. For anything I have not listed, choose muted, natural tones instead of bright modern colours. Keep every face, detail and the original film grain unchanged. Only add colour, nothing else.
A note on the two apps’ differences: ChatGPT’s selection tool lets you highlight one damaged area (a scratch across a cheek, for example) and ask for a repair in just that spot, which is the safest way to fix a face. Gemini has no brush or mask tool in the app, so you name the spot in words instead (“the crease across the top left corner”) and rely on the model’s consistency, which is what Nano Banana was built for. In practice, try Gemini first for a straightforward repair, and use ChatGPT as the second opinion when a single stubborn spot needs targeted work.
ChatGPT or Gemini: which should you use for old photos?
Both tools can do this job, and for a precious family photo the honest answer is to try both and keep the version that respects the faces. But they are not identical, and the differences matter for restoration specifically.
Gemini’s strength is consistency: changing one thing while the rest of the photo, especially a face, stays put. That is the headline claim Google makes for Nano Banana, and it is the quality that matters most when a face is at stake. Its weakness is control: without a selection tool, a targeted fix depends on the model understanding which spot you mean. It also marks its results: a small sparkle in a corner, plus the invisible SynthID watermark. The sparkle can be switched off in Settings > Media Watermark in places where the law allows, but the SynthID mark cannot be removed, and should not be.
ChatGPT’s strength is precision: the selection tool and the newer Images 2.6 engine’s focus on keeping characters and details consistent across edits. Its weakness is that it redraws the whole picture by design (it studies your image, then generates a brand new one) so faces can drift more between versions, and you will sometimes need the correction prompt. It leaves no visible mark on the image, but it does attach C2PA Content Credentials, so a tool that reads provenance can still tell the image came from an AI.
On cost, both are free to start: ChatGPT’s free plan allows a small number of image generations a day, and Gemini’s free plan includes Nano Banana 2 editing with its own limits. Neither company publishes a fixed daily number, so the notice inside the app is the real cap on any given day. A paid plan buys you more edits, not a smarter editing engine in ChatGPT; in Gemini, a Google AI plan buys the newer Nano Banana 2.1 model and the Pro regeneration option. For one or two precious photos, either free plan is enough. For a shoebox of thirty, Gemini’s larger free allowance is the practical choice, and that is also when the discipline of one fix per prompt matters most, because a batch done in a hurry is a batch of invented faces.
If you would rather not prompt at all, dedicated tools such as MyHeritage also restore old photos: its free tier covers a few photos, marked with a small logo, with a subscription after that. The same rules apply (repair before colour, check every face, keep the original) because a dedicated restorer redraws the photo too.
Worked example: a 1920 family portrait, tested today
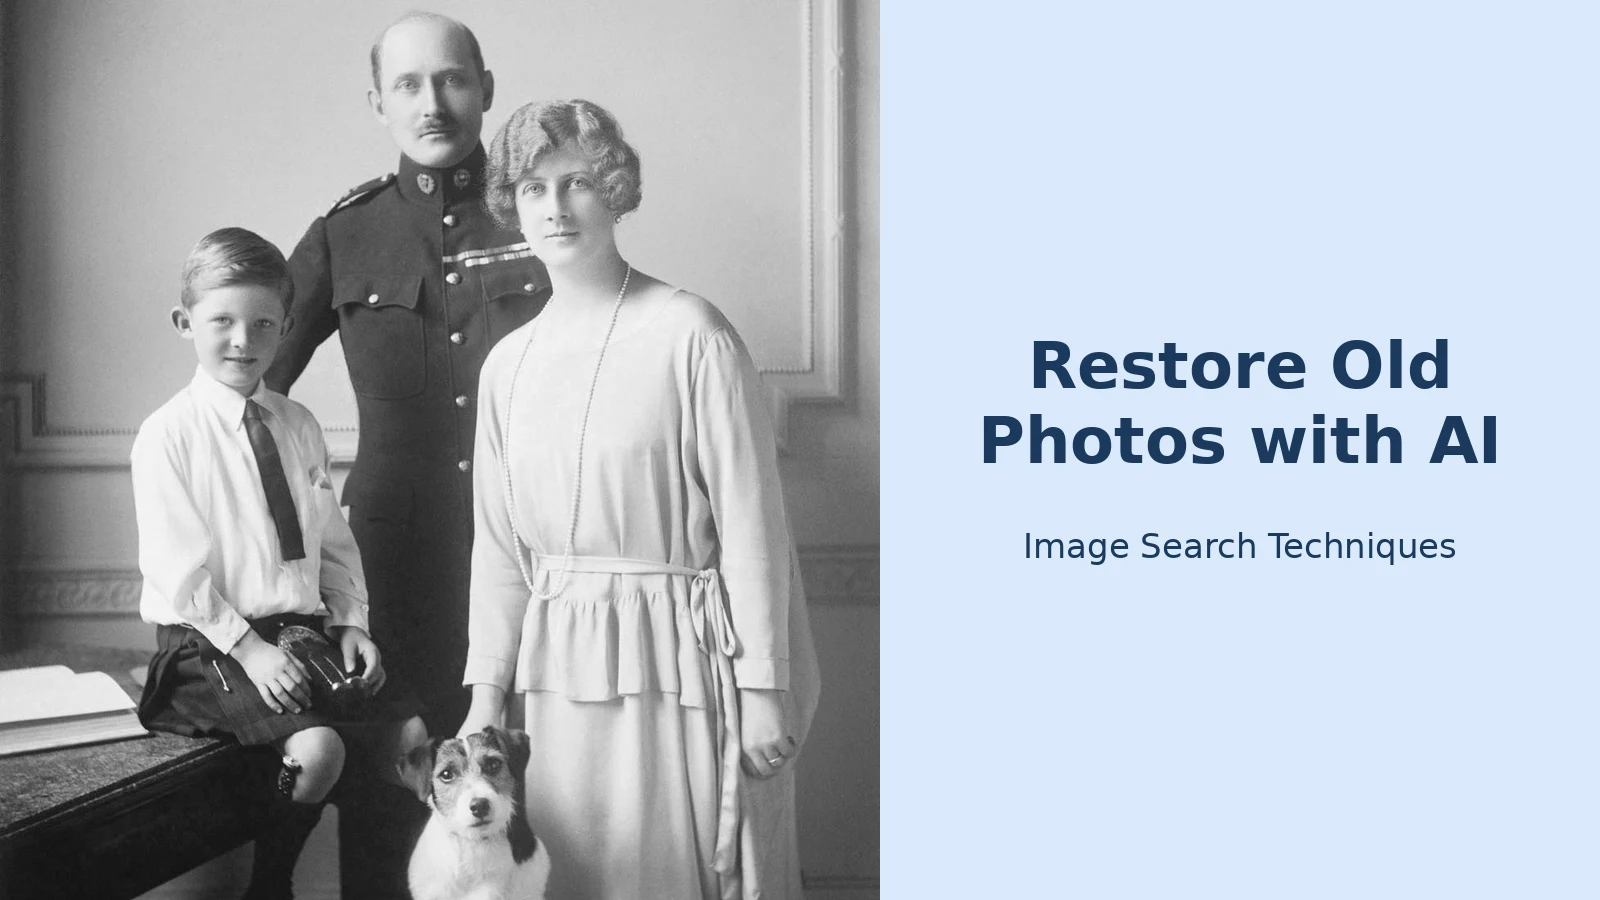
To keep this guide honest, I ran the method on a real photograph instead of describing it in the abstract: a public-domain family portrait from 1920 on Wikimedia Commons, showing Prince Arthur of Connaught with Princess Alexandra, Prince Alistair and the dog Vimy. It is a group portrait, which is the highest-risk case for restoration, because a model can blend features between people standing close together.
First, the provenance check. I ran the photo through Yandex Images by URL on 12 November 2026. Yandex recognised it and returned copies on Pinterest, all captioned as Prince and Princess Arthur of Connaught. The identification was right, but the original Commons file did not appear among the visible results. That is a useful warning in itself: a reverse search finds the copies that circulate, not necessarily the original, so a match proves the photo is known, not that you have found its source.
Second, the access check. I opened both apps signed out on 12 November 2026. In ChatGPT, the photo picker opens without signing in (“Add photos” is enabled) but “Create image” sits greyed out under a “Log in to use…” heading, so no edit can actually run until you sign in. In Gemini, the wall is total: every upload and creation tool is greyed out behind a “Sign in to try tools” button. And Google Lens, the third check, failed outright: after a “detected unusual traffic” block was cleared, Lens reported “No image at the URL” twice for this Commons file. It could not fetch the image at all. So the honest state of the test is this: the photo was identified by Yandex, not by Lens, and the restoration step itself was not run, because editing needs a signed-in account in both apps and this run does not sign in to personal accounts.
What I did not do is also worth stating. I did not upload this photo to either app, because both require a signed-in account and this run does not sign in to personal accounts. I did not invent a restored version of it, and the banner for this article uses the untouched 1920 photograph itself (not an AI-restored copy) because presenting a restored face as the real one would break the rule this article exists to teach.
How do you check the result before you keep it?
Put the restored image and the original scan side by side, zoom to full size, and walk through this list. It takes two minutes and it is the step that separates a restoration from a fabrication.
- Eyes and teeth: the most common places for AI to invent detail. They should match the original exactly.
- Hands and jewellery: rings, watches and fingers are frequent failure points. Count them.
- Text and numbers: signs, house numbers, dates and handwriting are often redrawn as nonsense. Never trust restored text.
- Edges of people: hairlines and shoulders should not melt into the background.
- Group photos: check that faces have not been blended. Each person should keep their own features and expression.
- The family test: show the result to a relative who knew the person and ask one question: does this look like them? If they hesitate, use the correction prompt or accept a lighter restoration.
If a face drifted, reply in the same chat with the correction prompt from the sequence above. Do not start a new chat. The model needs the original in context to compare against. If the second try still changes the face, stop: keep the lightly repaired version, or keep the plain scan. A photo with its scratches is worth more than a photo with someone else’s face.
One check deserves a section of its own: how to tell if an image is AI-generated is the skill that lets you spot the tells (too-smooth skin, over-sharpened eyes, invented jewellery) in your own restored photo before anyone else has to point them out. Run your restored version through that checklist as well.
What should you do with the restored photo?
Save the restored version under a new name that says what it is (“Grandma Ruth 1946 – AI restored”, for example) and keep the untouched master file beside it. If you colourised a black and white photo, say so in the filename: the colours are informed guesses, and a future family member should not have to wonder whether Grandma’s dress really was dark green.
Print from the restored file, not from a screenshot of it, and if the result still looks soft at print size, run it through a dedicated upscaler afterwards rather than asking the editor to invent more detail. An upscaler sharpens what is there; another edit round invents what is not.
Before you share a restored family photo anywhere public, remember it now carries provenance marks (C2PA data from ChatGPT, a SynthID watermark from Gemini) and that those marks are a good thing: they let anyone check that the image was AI-edited. Do not try to remove them. And if the photo shows a living person, ask them first. Restoration is a technical act, but sharing someone’s face is a personal one.
Finally, keep your expectations in the right place. AI restoration is at its best on surface damage (scratches, dust, fading, a yellow cast) and at its weakest exactly where it matters most: a damaged face, tiny faces in a large group, handwriting and fine patterns like lace or medals. When the damage is severe, a professional restorer with Photoshop is still the better spend, and a plain scan with its history intact is always better than a confident invention. The goal is not a perfect photo. It is a photo your family can still trust.
Can I restore old photos with AI for free?
Yes. ChatGPT and Gemini both offer free plans that include photo editing, so you can restore old photos with AI without paying. ChatGPT allows a small number of image generations a day free, and Gemini includes Nano Banana 2 editing free. Neither company publishes a fixed daily number, so the limit inside the app is the real one.
Why did AI change the face in my old photo?
Because AI restoration redraws the whole photo instead of cleaning it. Where the original face is damaged, faded or soft, the model has no detail to work from, so it fills the gap with a plausible face drawn from other photos. Use the correction prompt in the same chat, and if the face still drifts, keep the lightly repaired version.
Should I colourise a black and white photo with Gemini?
Yes, but only after the repair is approved, and only with real colours where you know them. Ask family what they remember (hair and eye colour, a uniform, a dress) because the model guesses anything you leave blank. Keep colours muted and period-appropriate, and save the colourised copy under a new name.
Is it safe to upload family photos to ChatGPT or Gemini?
Both apps need a signed-in account, and Gemini requires you to be 18 or over to edit photos. Your upload leaves your device, so check each app’s data controls before uploading a photo you would not want used for training. Never upload a real ID document to any photo tool, and ask living relatives before sharing their restored photo publicly.