🔎 Reverse Image Search
Image search techniques made simple: upload a photo or paste a URL and search 6 engines at once. 100% free, nothing stored.
🔒 Your image is never stored on our servers longer than 24 hours and is never shared.
A photo lands in your inbox. It might be a product shot in a sales email, a profile picture from a stranger, or a photo a seller sent to prove something is real. Before you trust it, you can reverse image search a photo in an email to check where that photo has appeared before. The check takes about two minutes, and it starts with getting the photo out of the email.
Save the photo from the email first, then upload it to Google Lens. Download the attachment, or right-click an inline photo and save it. Lens shows where the image appears online. If Lens finds nothing, try TinEye or Yandex. A match tells you the photo is reused. It never proves who sent the email.
This guide walks through the whole job: getting the photo out of Gmail, Outlook or Apple Mail, searching it on Lens, TinEye and Yandex, and reading the results without being fooled by them. If you are new to this kind of check, our main reverse image search guide explains the engines first.
What does a reverse image search tell you about an email photo?
A reverse image search shows you other pages that use the same image, and when they posted it. That is all it does, and that is enough to catch most email photo tricks. A product photo that also appears on a shop website was probably lifted from that shop. A profile picture that also appears on someone else’s social media account was probably stolen. A news photo reused in a different story is out of context, whatever the email claims.
What it cannot do is tell you who sent the email. The sender’s name, the reply address and the message headers are a different check, and a photo search does not touch them. A scammer can send a genuine photo, and an honest seller can send a photo that has been used elsewhere. The search answers one question only: has this image appeared before, and where?
That split is the whole point of this guide. You are checking the photo, not the sender’s story. A match on a stock library or another seller’s listing is a warning about the story in the email. A photo with no matches proves nothing on its own. It might be new, it might be cropped, or it might never have been indexed.
Check the photo, not the sender’s story. A match on another site means the image is reused. No match means the search found nothing, not that the photo is genuine. Never reply to a suspicious sender, and never click a link in the message to verify anything.
One short answer per section follows in this guide, so you can skim it and still leave with the facts. The short answer here is this: a reverse image search checks the photo, not the sender. It tells you where the image has been used before, and nothing about who sent it.
How do you get the photo out of the email?
An email photo arrives in one of two forms, and the form decides the route. An attachment is a separate file joined to the message. An inline photo sits inside the message body, and the mail app may show it without ever giving you the file. You need the file on your device before any search engine can take it, so the first step is always extraction.
The table below is the whole extraction job in one place. It covers the three mail apps most readers use, on computer and on phone, and it says what each route keeps: the original file or a compressed copy.
| App | Attached photo | Inline photo | What you keep |
|---|---|---|---|
| Gmail, computer | Hover the attachment, click Download | Right-click the photo, save it | Original file |
| Gmail, phone | Tap the attachment, tap Download | Touch and hold, Save to Photos | Original file |
| Outlook, web | More actions, then Download | Open the image, then Download | Original file |
| Outlook, desktop | Attachment arrow, then Save As | Right-click, then Save as Picture | Original file |
| Apple Mail, Mac | Attach button, click the file name | No named save route, use a screenshot | Original file, or screenshot only |
| Apple Mail, iPhone | Touch and hold, then Save Image | Touch and hold, then Save Image | Full-size copy |
Gmail is the best documented of the three. Gmail’s own page on opening and downloading attachments covers all three platforms. On a computer, hover over the attachment at the bottom of the email and click the Download icon. On Android, tap Download. On an iPhone or iPad, tap the attachment to open it, then tap Download at the bottom. For an inline photo on a computer, right-click the photo and save it. On Android, touch and hold the photo, tap View image, tap the photo, tap More, then Save. On an iPhone, touch and hold the image and tap Save to Photos.
Two Gmail caveats are worth knowing before you start. First, photos may not save if Gmail lacks photo permission on your phone. On an iPhone, that is Settings, then Privacy and Security, then Photos, then Gmail, and “None” blocks saving. Second, if the email arrived in confidential mode, you cannot download the attachment at all, and you cannot forward, copy or print the message either. In that case the screenshot route below is your only option.
Outlook keeps attachments simple and inline images fiddly. On Outlook on the web, select the message, then next to the attachment choose More actions and Download, or Save to OneDrive, or Download all. Drag and drop to a folder works too. In classic Outlook on a desktop, click the drop-down arrow on the attachment icon and choose Save As, or Save All Attachments. In the new Outlook, the attachment offers Download or Save to OneDrive. For an inline image, classic Outlook lets you right-click the picture and choose Save as Picture, then type a file name and save. In the new Outlook and on the web, open the image in a separate window with Shift and Enter, then choose the Download button. Note that Microsoft’s general attachments page does not cover inline images at all. The inline route comes from Microsoft’s own screen-reader article, which is the only official Microsoft page that names it.
Apple Mail is the awkward one, and only on the Mac. On a Mac, hover over the message header, click the Attach button (the paper clip), then click the name of the attachment, or Save All, choose where to save it, and click Save. File, then Save Attachments does the same job, and dragging an attachment to the desktop or a folder works too. If an attachment is too large, the header may offer Download Later or Download Now. But for an inline image on the Mac, Apple’s own Mail guide names no save route. It says some attachments, such as images, are displayed directly in the message, and Control-clicking one offers only View as Icon or View in Place. There is no Save Image menu named there, so do not go looking for one. On an iPhone, the same touch and hold route covers both forms: touch and hold the attachment, then choose Save Image to save it to Photos, or Save to Files. You can also tap a photo attachment to view it, then tap Share and choose Save Image or Save to Files.
When saving fails or is blocked, take a screenshot of the photo instead. On Windows, press Win, Shift and S and drag around the photo. On a Mac, press Shift, Cmd and 4 and drag around it. On an iPhone, press the side button and volume up together. On Android, press power and volume down together. Then crop the screenshot tight to the photo itself, with no inbox, no subject line and no other message text in the frame. A screenshot is lower quality than the original file, so use it only when saving is blocked. Our guide to reverse searching a screenshot covers the full method, including the quality loss to expect.
Photos shared in workplace chat need the same save-first routine, and email is not the only place they arrive. Our Teams guide covers images shared in a Teams chat, where the file lives in the chat Files tab or OneDrive instead of an inbox.
The short answer here is this: get the original file when you can. An attachment download keeps the full photo, and a screenshot is the fallback when saving is blocked. One caution: a downloaded attachment is usually the original file, so any location data the sender’s camera recorded can survive in it. Check the file before you share it onward.
How do you reverse image search a photo in an email on a computer?
Once the photo is saved on your computer, the search itself is quick. Start with Google Lens, because it has the widest index for this job. Go to lens.google.com, click Search by image, and upload the saved file. You can also go to images.google.com and click the camera icon in the search bar, which now opens Lens. If the photo is already open in Chrome, right-click it and choose Search image with Google, which sends it straight to Lens. Google’s own instructions for searching with an image describe the same upload route.
Read the Lens results in order. Exact matches come first: pages using the same image, usually with the size each copy was posted at. Then come visually similar images, which are near matches rather than the same file. Click an exact match to see the page it came from, and check the date it was posted. A product photo that first appeared on a shop site three years ago did not come from the seller who emailed it to you yesterday.
If Lens finds nothing, try TinEye next. Go to tineye.com, upload the file, or paste the image address if the photo is already online. TinEye searches its own index of tens of billions of images and is good at finding the earliest posting of a picture. Then try Yandex Images: go to yandex.com/images, click the camera icon, and upload the file. Yandex tags what the picture contains, lists the sizes it has seen, and lists the sites using it. Each engine indexes different pages, so a zero on one engine is never the final word.
The short answer here is this: upload the saved file to Lens first. If Lens finds nothing, try TinEye, then Yandex, because each engine indexes different pages.
How do you reverse search the photo on a phone?
On a phone the routine is the same, with one extra step at the start: the photo must be in your gallery before any search app can use it. The email app cannot search the photo directly. In the Gmail app, download the attachment, or long-press an inline image and tap Save Image. On Android, touch and hold the photo, tap View image, tap the photo, tap More, then Save. On an iPhone, touch and hold the image and tap Save to Photos. In Apple Mail on an iPhone, touch and hold the attachment and choose Save Image or Save to Files.
Then open the Google app or Chrome, tap the camera icon in the search bar, and pick the photo from your gallery. Lens runs the search and shows the same exact matches and visually similar images as on a computer. The results page is smaller, so tap into an exact match to see the site and the date it was posted. If Lens finds nothing on your phone, save the photo to a computer and try TinEye and Yandex there, since TinEye’s upload page is easier to use on a desktop browser.
The same save-then-search routine works for photos in chat apps, not just email. We have a separate guide for reverse searching a photo from WhatsApp, where the save step is a long-press on the image in the chat.
The short answer here is this: on a phone, save the photo to your gallery first. The Google app and Chrome both offer Lens from the search bar.
What did our worked example find?
To test this properly, we ran a real photo through the whole routine, twice: once as an email attachment and once as an inline image. The photo is a product shot of a Mr. Coffee 12-cup programmable coffeemaker, taken from Wikimedia Commons. The file is “Mr. Coffee machine.jpg”, by Angela CoffeeRank, licensed CC BY 2.0, uploaded on 4 January 2022, at 2160 by 2160 pixels. It is the kind of photo a sales email might carry: a clean product shot, no people, no watermark.
First we treated it as an attachment and uploaded the original file, exactly as downloaded. Then we treated it as an inline image, the way a mail app compresses one: we shrank it to 800 by 800 pixels and saved it at quality 72, which is a typical inline copy. Both versions went to Google Lens, TinEye and Yandex as file uploads, signed out, on 21 November 2026. The results are in the table below.
| Engine | Attachment, original file | Inline, compressed copy |
|---|---|---|
| Google Lens | 9 exact matches, 60 visual matches | 9 exact matches, 60 visual matches |
| TinEye | Blocked, no results seen | Blocked, no results seen |
| Yandex Images | 13 sizes, 20 sites, 25 similar | 13 sizes, 20 sites, 26 similar |
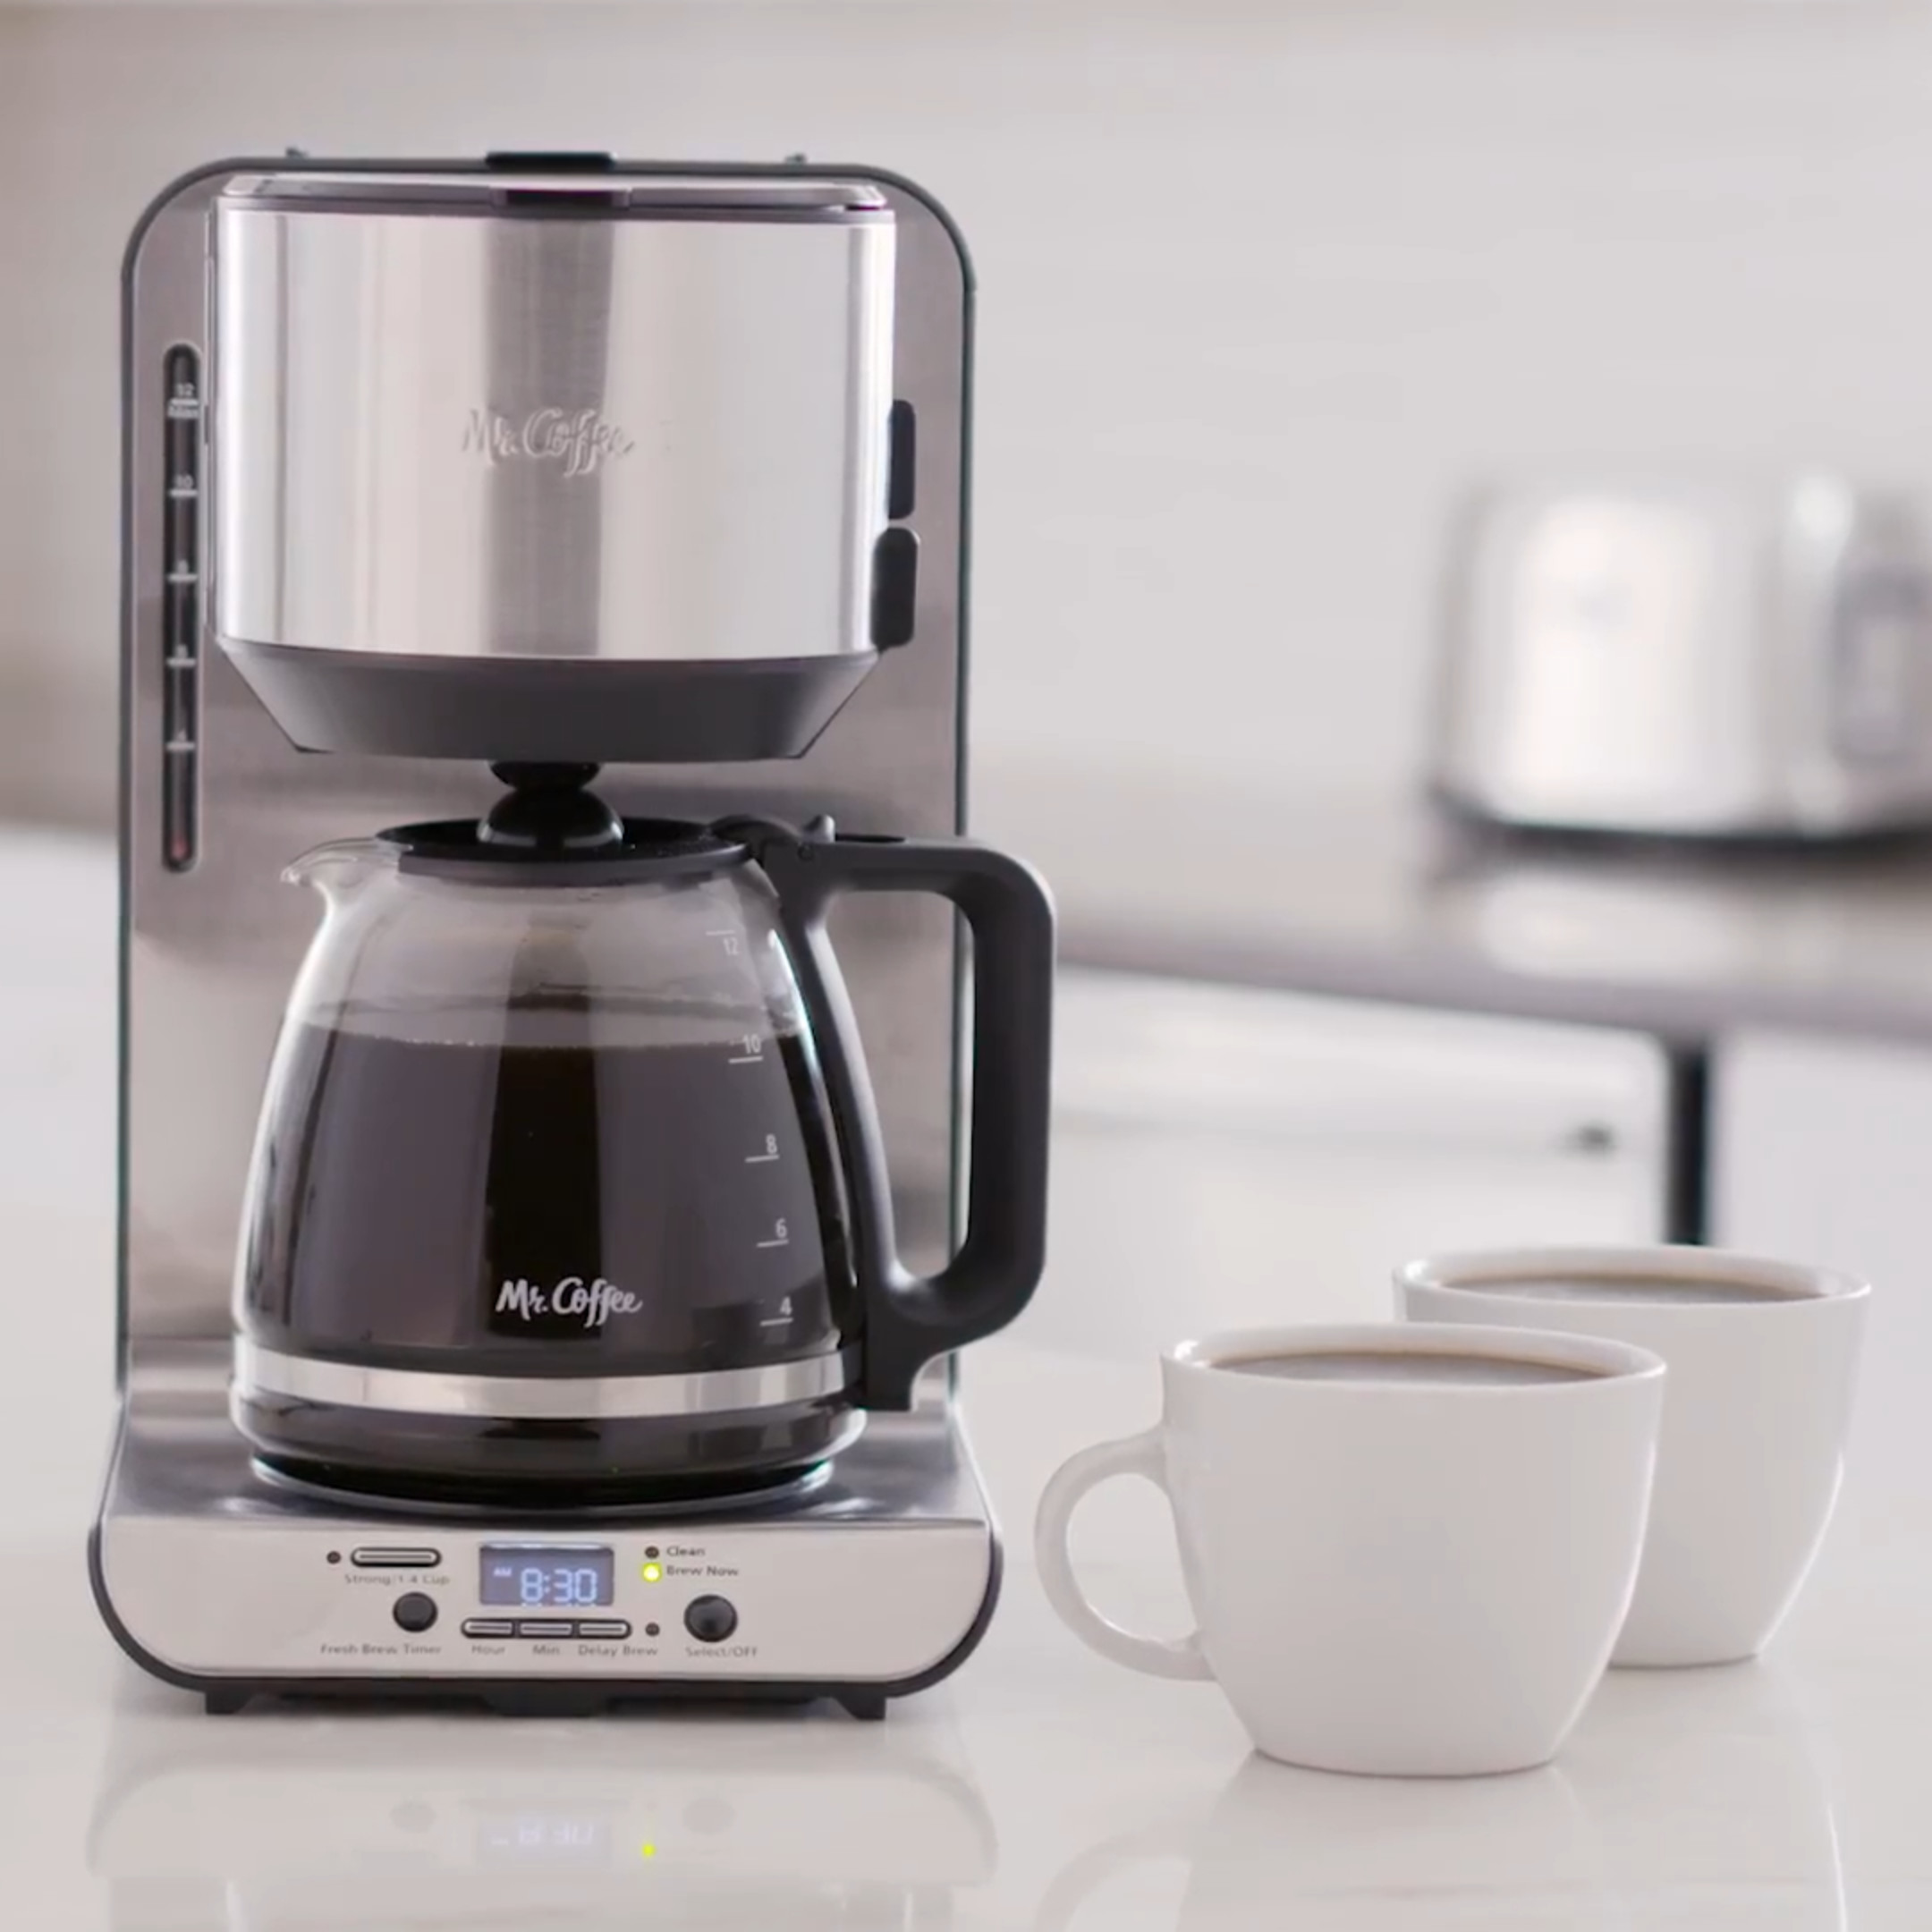
The photo above is the worked example itself: the Mr. Coffee machine photo by Angela CoffeeRank, CC BY 2.0, via Wikimedia Commons.
Google Lens named the object on both versions: a Mr. Coffee 12-Cup Programmable Coffeemaker, similar to the BVMC-FBX39 or FLX series. Its 9 exact matches were all the same image, on Wikidata, Wikipedia, Wikiwand, the Wikimedia Commons file page itself at full size, the Commons Mr. Coffee category, Arabic Wikipedia, Portuguese Wikipedia under “Cafe coado”, the Arabic Wikipedia file page, and Urdu Wikipedia. Its 60 visual matches were mostly listings for the same machine on Amazon, Walmart, Best Buy and Target, plus the Mr Coffee site and a Consumer Reports review, with other drip machines mixed in. The inline copy gave the same 9 exact matches in the same order, and the same 60 visual matches with only small changes in order and extras.
Yandex was just as consistent. It tagged both versions with the same five labels, including “mr coffee maker” and “drip coffee maker”. It listed the same 13 sizes for both, from 2160 by 2160 down to 220 by 220, and the same 20 sites, including Wikipedia in three languages, the Commons file page, Wikiwand, Wikiquote, MSN, and a YouTube video on using the BVMC-FBX39. The only difference was the count of similar images shown at first: 25 for the original and 26 for the inline copy, with one extra Sunbeam entry in the second list.
TinEye produced no results at all, for either version. Its search page showed a Cloudflare human check, “Verify you are human”, and the check failed seven times across two browsers. Each click showed “Verifying” and then reset to an unchecked box with “Verification failed”. No puzzle was ever offered, and no results page was ever reached. That is a failure, not a zero. TinEye does not save search images, so each reload lost the pending search. We report it as blocked, and we do not pretend it searched the photo.
Two honest notes belong here. First, Lens called the machine “similar to” the BVMC-FBX39. That is a guess drawn from listings, not a confirmed model. The model code on the label or the box decides the exact model, and a photo alone cannot confirm it. Second, the compression test had a clear result: shrinking the photo to 800 by 800 at quality 72 changed nothing on Lens or Yandex. The exact matches, the sites and the sizes were identical. At this level, an inline copy searches just as well as the original file. Heavier compression or a tight crop would be a different test, and could change the result.
The short answer here is this: the original and the compressed copy returned the same matches on Lens and Yandex. At this size, compression did not change the result.
What if the search finds nothing, and how do you read the results safely?
No exact matches is a common result, and it means less than most people think. Try the obvious fixes first. Crop the photo tighter, so the search engine sees the subject and not the inbox around it. Try a screenshot of the photo at full size if the saved copy is small. Try Yandex after Lens, and TinEye after Yandex. Try searching a distinctive part of the image, such as a logo or a label, cropped on its own. A photo that is cropped, flipped, heavily edited or simply new may have no indexed copy anywhere, and a zero never proves the photo is genuine.
When the search does find matches, read them with care. A match on a stock photo site, a shop, or another person’s profile means the image is reused, and the story in the email should be treated with suspicion. Check the date of the earliest match: a photo first posted years ago cannot be a photo the sender took yesterday. Check the site it came from: a product shot on the maker’s own site is a different story from the same shot on a stranger’s listing. If the email claims to be from a bank, a delivery firm or a government body, do not use any contact detail in the message. Check through the organisation’s own website, or the number on the back of your card. Our photo scams guide covers the full set of letter, text and screenshot tricks, and the safe checks for each one.
Finally, keep the safety rules short and fixed. Never reply to a suspicious sender. Never click a link in the message to verify anything. Never send money, gift cards or personal details because a photo checked out. Save the image file only, and do not open any other attachment type from a message you do not trust. The photo check is one tool, and it works best next to those rules, not instead of them.
The short answer here is this: no matches is not a clean bill of health, and a match is not proof of who sent the email. Read the result, then check the sender through a route you trust.
FAQs
Do I have to download the photo from the email first?
In most cases, yes. A search engine needs the image file on your device, so download the attachment or save the inline photo first. The one shortcut is on a computer in Chrome: right-click an inline image that is already open in the browser and choose Search image with Google, which sends it straight to Lens.
Can I reverse search a photo in the Gmail app on my phone?
Yes. In the Gmail app, download the attachment, or long-press an inline image and tap Save Image. On Android, touch and hold the photo, tap View image, tap the photo, tap More, then Save. Then open the Google app or Chrome, tap the camera icon in the search bar, and pick the photo from your gallery.
Why does TinEye show a human check instead of results?
TinEye uses a Cloudflare human check to block bots, and that check can fail even for a real person. In our worked example it failed seven times across two browsers, so no results page was ever reached. That is a block, not a zero. Try again later, or use Lens or Yandex for that photo instead.
Does compressing an inline image change the search results?
In our test, no. We searched the same photo twice: once as the original 2160 by 2160 file, and once shrunk to 800 by 800 at quality 72, the way a mail app compresses an inline image. Lens gave the same 9 exact matches both times, and Yandex gave the same 13 sizes and 20 sites.
What does it mean if the photo appears on a stock photo site?
It means the image is reused, and the sender probably did not take it. A product shot on a stock library or a shop site was lifted from there, whatever the email claims. Treat the sender’s story with suspicion, check the date of the earliest match, and do not send money or personal details because the photo looked genuine.
Can a reverse image search prove who sent the email?
No. A reverse image search only shows where the photo has appeared before. It says nothing about the sender’s name, the reply address or the message headers. A genuine photo can arrive from a scammer, and a reused photo can arrive from an honest seller. Check the sender through a route you trust, such as the organisation’s own website.