


🔎 Reverse Image Search
Image search techniques made simple: upload a photo or paste a URL and search 6 engines at once. 100% free, nothing stored.
🔒 Your image is never stored on our servers longer than 24 hours and is never shared.
Your UK visa photo upload failed, and the error message probably told you very little. The fix is usually boring, which is good news. GOV.UK checks the file before it checks the face, so a photo that looks fine can still be refused for being the wrong format, the wrong size, or a mirrored selfie.
Your UK visa photo upload failed because the file breaks one of GOV.UK’s rules, not because the photo looks wrong. The US system works differently: our DS-160 photo upload failed guide covers the State Department file rules, a square JPEG between 600 and 1200 pixels and 240 kB or less. The upload accepts JPG or JPEG only, at least 600 by 750 pixels, between 50KB and 6MB, vertical and not mirrored. Fix the file first, then the picture. Most failures clear in one re-export from the original photo.
The GOV.UK photo upload is the step in a UK visa application where you supply a digital photo of your face, either in the online form or through the UK Immigration: ID Check app. It runs two separate checks. The first is technical: file type, pixels, file size and orientation. The second is visual: background, framing, expression and glasses. This guide works through them in the order GOV.UK presents them, so you fix the real blocker first instead of guessing.
What does the GOV.UK photo upload actually check?
The upload checks the file first, and it is strict about all four file rules. GOV.UK’s own guidance, Take a photo of your face for a visa application or permission, lists them plainly. If any one of them fails, the upload stops there, and nothing about the picture itself gets judged.
| File rule | What GOV.UK requires | What gets rejected |
|---|---|---|
| File type | JPG or JPEG only | HEIC, PNG, WebP, PDF, screenshots saved as PNG |
| Pixels | At least 600 wide and 750 tall | Small crops, thumbnails, low resolution exports |
| File size | At least 50KB and no more than 6MB | Over compressed files under 50KB, full resolution camera files over 6MB |
| Orientation | Vertical, not mirrored or flipped | Sideways photos, front camera selfies saved mirrored |
Once the file passes, the picture itself has to meet a second set of rules. It must be in colour, clear and in focus, taken in a well lit room, and it must not be altered by software or filters. It has to show your head, shoulders and upper body against a plain light coloured background, with nothing else in the frame. It must not be a scan or a photo of another photo of you, and it must not be the same photo that is in your passport or identity card.
Your face has to be clearly visible, looking straight at the camera, with a plain expression and your mouth closed. Your eyes must be open and visible, with no hair in front of them and no shadows on your face or behind you. You can wear a head covering only for religious or medical reasons. GOV.UK also says to get someone else to take the photo, because a held out phone at arm’s length is how most framing and shadow problems start. Glasses are allowed only if you have to wear them, and they cannot be sunglasses or tinted, with your eyes clear of frames, glare and shadow.
If the upload fails, work out which of the two checks failed before you change anything. A file error is a format, size or orientation problem. A picture error is a background, framing or expression problem. Fixing the wrong one wastes an afternoon. The rest of this guide takes the errors in the order you are most likely to meet them, and the face search and photo privacy guide covers the wider question of what happens to photos of you once they are online.
Why does it say my file is the wrong type?
The wrong file type is the most common reason a UK visa photo upload fails, and it is also the easiest to fix. GOV.UK accepts JPG or JPEG only. That single rule catches three everyday mistakes.
The first is HEIC. iPhones save photos as HEIC by default, and GOV.UK does not accept it. The photo looks perfect on your phone and the upload still refuses it. Convert the file to JPEG before you upload, and do it from the original photo rather than from a copy that has already been through an app. On an iPhone, open Settings, then Camera, then Formats, and choose Most Compatible, so future photos save as JPEG. For the photo you already have, open it in Photos, tap Share, and choose Save to Files, which exports a JPEG, or export it from the Photos app on a Mac or from iCloud on a computer.
The second is PNG. Plenty of photo tool sites say the UK accepts PNG, and at least one ranking guide, PassLens, lists the UK row as “JPG or PNG, at least 600 by 750 px, usually 50 KB to 6 MB”. That PNG claim is wrong. GOV.UK’s own page says “a jpg or jpeg file”, and nothing else. If a tool exported your photo as a PNG, convert it to JPEG and upload again. Do not trust a tool site’s file type list over the GOV.UK page itself, and check the GOV.UK page again on the day you apply, because the rules are the ones that count.
The third is a PDF or a screenshot. A scan of a printed photo saved as a PDF is not a JPG, and a screenshot of your photo is not the photo. Screenshots add extra pixels, lose detail, and often save as PNG. GOV.UK also refuses a photo of another photo outright, so a screenshot of your passport photo fails twice over. Use the original digital file, in JPEG, every time.
One quick test before you upload again: open the exported file in a normal browser or image viewer. If it opens upright, in colour, and the file name ends in .jpg or .jpeg, the format is right. If your phone still saves HEIC, change the setting first, then take a fresh photo, because converting an old HEIC after the fact is one more step where quality can drop.
What if my photo is too big or too small?
GOV.UK wants the file between 50KB and 6MB. That window is generous, so landing outside it tells you something specific about the file.
Over 6MB usually means you uploaded the full resolution file straight from a modern phone camera. Those files run 8MB, 12MB or more. Shrink it once, from the original, to around 1MB to 2MB. Export at JPEG quality 80 to 85, keep the pixels above 600 by 750, and stop there. A file around 1MB is comfortably inside the window and still sharp enough for every check GOV.UK runs.
Under 50KB usually means the file was compressed too hard, often by a messaging app. A photo sent through WhatsApp or Messenger arrives smaller, softer and sometimes cropped, and a file that started at 3MB can come back at 40KB. That is below the floor, and the upload refuses it. Go back to the original file on the phone or camera that took it, and export a fresh copy. Never try to fix a small file by saving it again at higher quality, because the lost detail does not come back.
Do not keep re-saving the same JPEG. Every save adds compression marks, and a photo saved five times looks worse than the same photo exported once from the original. If a resize or a crop did not work, return to the original file and start the export again. That one habit fixes most size errors, and it is the same reason the worked example later in this guide uses an untouched original file.
Why do mirrored selfies get rejected?
A mirrored selfie is the quietest failure on this list, because the photo looks normal to the person who took it. Front cameras show you a mirror image while you frame the shot, and some phones save that mirrored version as the file. GOV.UK says the photo “must not be mirrored or flipped”, so the upload refuses it, and the error rarely explains why.
The fix depends on the phone. On an iPhone, open Settings, then Camera, and switch off Mirror Front Camera, then take the photo again. If the photo already exists, open it in Photos, tap Edit, tap the crop button, then tap the flip icon at the top left, and save. On Android, the setting sits in the camera app, usually under Settings, then Save options or Mirror photo, and the wording varies by maker, so check the camera settings on your own phone rather than following a button path from another model. Samsung calls it Save pictures as previewed. Google Pixel phones save the unmirrored version by default in recent versions.
The surest way to avoid the problem is to stop taking selfies for this photo at all. GOV.UK says to get another person to take it, and that advice exists for this exact reason. A photo taken by someone else with the rear camera is never mirrored, the framing is better, and the phone can sit still. Stand against a plain light wall, face a window for even light, and let the other person hold the phone at your eye level, about an arm and a half away.
Before you upload, check the mirror question with one look. If there is text anywhere in the frame, a poster or a book spine, read it. If the letters run backwards, the photo is mirrored. Flip it once in your photo editor and save a fresh copy, then upload that copy.
What does “photo too close” or “photo too far” mean?
GOV.UK does not give a head height percentage for the digital visa photo, which is different from the passport print rules. What it does say is that the photo must show your head, shoulders and upper body, and that your facial features must be clearly visible. That is the whole framing rule, and it is easier to meet than most people expect.
Too close means the frame cuts off your shoulders, or your head fills the whole picture so the shoulders never appear. Step back until the frame holds your head, your shoulders and a little of your upper chest, with a small amount of plain wall visible around you. Too far means your head is a small shape in a big room, and the face is too small to read clearly. Step closer until your head and shoulders fill most of the frame. A good check is that you can see both shoulders and the top of your chest, and the top of your head sits a short way below the top edge, not touching it.
Background problems are the other half of this error. A patterned curtain, a bookshelf or a doorway behind you fails the plain light coloured background rule, and a shadow on the wall behind you fails the no shadows rule. Stand in front of a plain white or pale wall, face the light, and check the wall behind you in the preview before you take the shot. If your own shadow falls on the wall, move closer to the wall or turn slightly so the light falls evenly.
Glasses cause a surprising number of rejections. GOV.UK says do not wear them unless you have to, and if you do, your eyes must be seen clearly, with no glare, reflection or shadow from the frames. Take the photo once with glasses and once without, and compare the two. If the no glasses shot is sharper and your eyes are clearer, use that one, provided you can wear no glasses for the photo itself. The same framing rules apply to other UK photo checks, and our passport photo rejected guide walks through the same background and glasses failures on the passport side, where the print rules are stricter.
My UK visa photo upload failed, but the file passes every rule. What now?
If the file is a JPEG, at least 600 by 750 pixels, between 50KB and 6MB, vertical and not mirrored, and the upload still fails, the problem is probably not the photo. Work through the boring checks before you retake anything.
First, try another browser. The GOV.UK upload works in current Chrome, Edge, Firefox and Safari, but an old browser version or a strict extension can block the upload silently. Turn off ad blockers and privacy extensions for the GOV.UK page, or open a private window and try again. Second, try another device. A phone upload that fails on mobile data sometimes works on Wi-Fi, and a desktop upload sometimes works where a phone upload stalls. Third, check the file name. A long file name with spaces, brackets or non English characters can trip an upload form. Rename the file to something short and plain, like visa-photo.jpg, and try again.
Fourth, re-export from the original instead of re-uploading the same file. A file that has passed through three apps can carry odd metadata or a damaged header that reads fine in a viewer but fails a strict upload check. Export a fresh JPEG from the original photo and upload that. Fifth, check the route. Some applicants are not asked to upload a photo at all. Your application tells you whether to use the UK Immigration: ID Check app or to attend an appointment, and uploading a photo into the wrong step is a common dead end. If your route uses the ID Check app, the photo step happens inside the app, under the same GOV.UK rules, and the app guides the capture itself.
If the upload still fails after all of that, do not pay a photo tool site to fix it. The rules are public and short, and a paid checker cannot approve a photo for you. Note the exact error message, the file size and the pixel dimensions, and use the help route on the GOV.UK page. The eVisa side of the same system has its own photo step, and our UK eVisa photo guide covers that sibling process in one place, without mixing its rules into this one.
Do I need a printed photo for the visa application centre?
For most applicants, no. GOV.UK’s own guide to applying for a visa says you provide your biometric information, fingerprints and photograph, usually by going to a visa application centre run by an external company, and you find out when you start the application whether you can use the UK Immigration: ID Check app instead. At the centre, staff take your photograph with your fingerprints. You do not bring a printed photo, and your appointment confirmation lists what to bring: the confirmation itself, your passport or travel document, and supporting documents you have not already uploaded.
That is the correction to one claim in this article’s own brief, which described a second rule set for a printed photo taken to a visa application centre. In practice the centre captures the photo, so there is no printed photo rule set to follow for the standard route. If your appointment letter specifically asks you to bring printed photos, follow the letter, and the print size to use is the UK passport standard of 45 by 35 mm, printed to a professional standard. But do not bring prints unasked, and do not assume a route that asks for a digital upload also wants prints.
The distinction matters because the two photo steps are judged differently. The digital upload is judged against the GOV.UK file and picture rules in this guide. The centre capture is judged by the staff member and the camera at the appointment, against the same picture rules, and you cannot fix a bad centre photo by re-uploading a file. If the centre photo comes out wrong, say so at the appointment, while you are still there.
Children under five still attend the appointment to have a photograph taken, though they do not give fingerprints. Children under sixteen must go with an adult over eighteen. That is GOV.UK’s rule, stated on the same how to apply for a visa to come to the UK page, and it is worth knowing before the day, because a missed appointment can mean starting the application again. The photo rules for other UK documents are set separately, and councils apply their own photo rules to a Blue Badge, which our Blue Badge photo rules guide covers council by council.
Worked example: one famous portrait, tested two ways
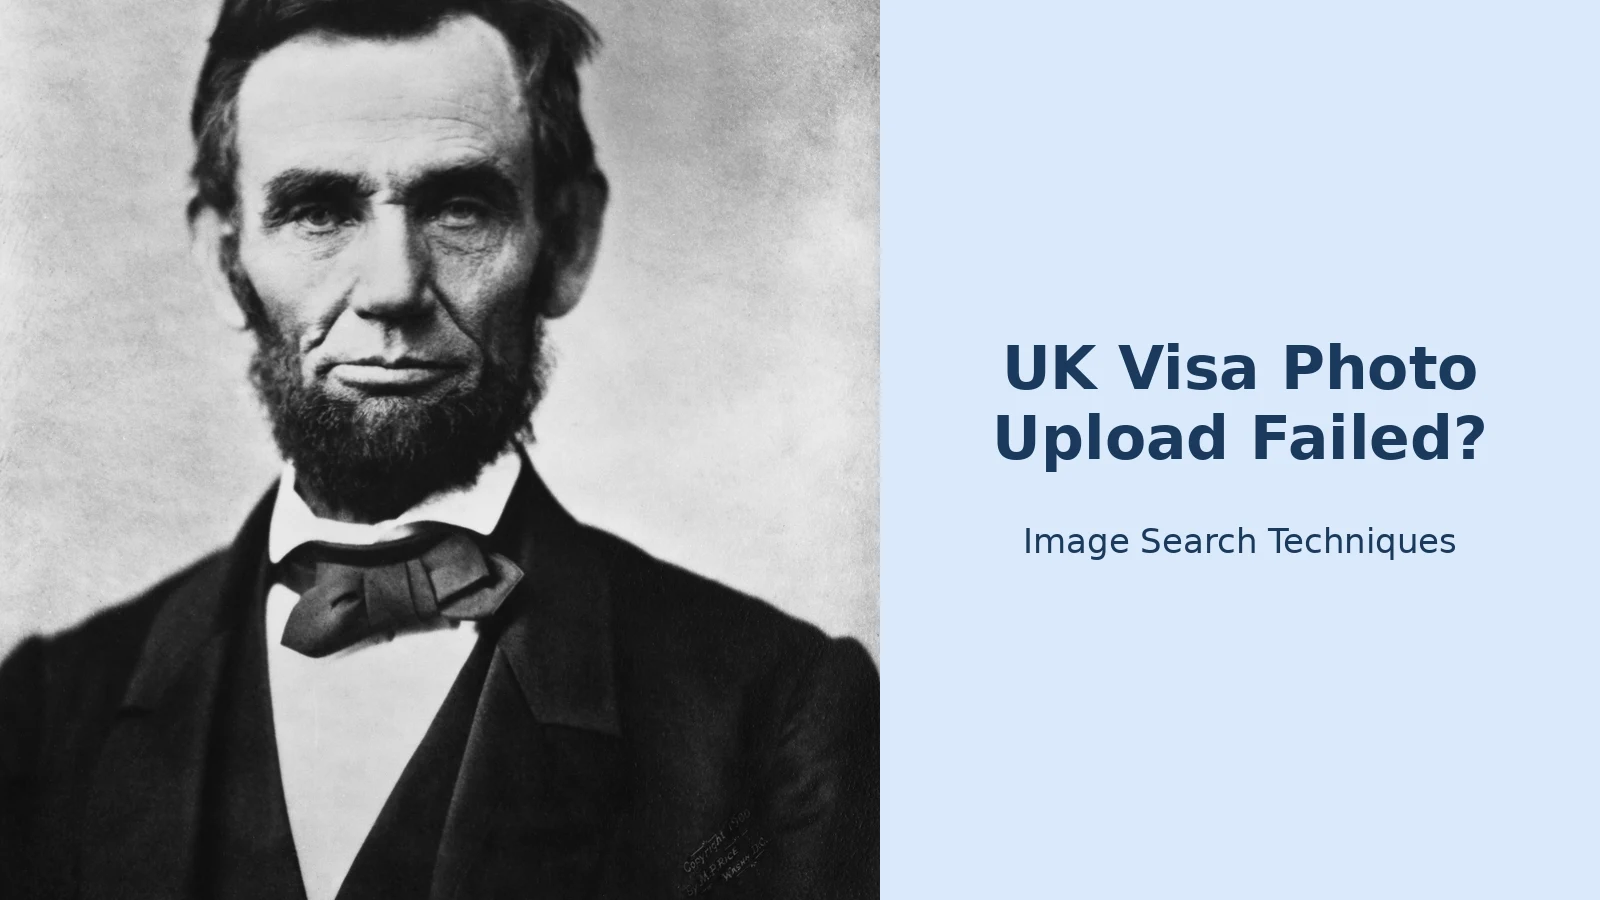
To show how the two GOV.UK checks differ, I tested a photo that passes one check completely and fails the other. The photo is a famous public domain portrait of Abraham Lincoln, the Alexander Gardner portrait with “Copyright 1900 by M. P. Rice” printed in the corner. The file I used is a JPEG, 2850 by 3742 pixels, about 2.7MB, in portrait orientation. Nobody could submit this photo for a visa, which is exactly why it is a useful test: the file rules and the picture rules give opposite answers.
First, the file audit, against the four GOV.UK file rules.
| File rule | This file | Result |
|---|---|---|
| File type | JPEG | Pass |
| Pixels | 2850 by 3742, above the 600 by 750 floor | Pass |
| File size | About 2.7MB, inside the 50KB to 6MB window | Pass |
| Orientation | Vertical, not mirrored | Pass |
Second, the picture audit, against the GOV.UK picture rules. Here the same file fails, and it fails on the rules that matter most. The portrait is black and white, and GOV.UK requires colour. It is a scan of a portrait made in the 1860s, so it is not a current photo of the applicant, and it is a photo of another photo, which GOV.UK refuses outright. There is printed text in the corner of the image. What passes is the framing: head, shoulders and upper body are shown, the face looks straight at the camera with a plain expression and a closed mouth, and the background is plain and light.
That split is the point. A file can pass every technical check and still be the wrong photo entirely, and a photo that looks right can still fail on a technicality. When your upload fails, check which of the two audits your photo fails, and fix that one. You can also run a photo through reverse image search to find where it has appeared before, which is what our how to reverse image search guide explains step by step. I ran this portrait through the site’s own reverse search tool to see what the engines make of it.
I ran this portrait through the site’s own reverse image search tool on 13 November 2026, uploading the same file. The tool’s “search all engines” button only opened Google Lens, so I ran the other engines one by one from the tool page. Here is what each one actually did.
| Engine | What happened | What it found |
|---|---|---|
| Google Lens | Ran, no CAPTCHA | Named it: Lincoln, November 1863, Alexander Gardner; top match Wikipedia; exact-size copy at Boston Herald, 2850 by 3742 |
| Bing | Ran, no CAPTCHA | Top match the POTUS presidents page; pages with this image included Guideposts, eBay, Pinterest and Fine Art America |
| Yandex | Ran, no CAPTCHA | Named it “abraham lincoln”; 18 other sizes, largest 2000 by 3221; the exact 2850 by 3742 size was not among them |
| TinEye | Ran after one retry; the first check failed and a reload passed | 37,023 results from 86.7 billion images; first indexed 5 February 2008; top result a Shutterstock stock copy |
| The tool button is not a real search; a genuine Pinterest Lens upload ran instead | 18 pin cards; top result an untitled pin showing the same portrait |
Two tool quirks are worth knowing. The Google and Lens buttons open the same Lens page, so they are one engine, not two. And the tool’s Pinterest button opens a keyword search for the site’s own domain, not a search of your image, so a Pinterest result only counts if you upload the image inside Pinterest itself.
The lesson from that search is simple. Reverse search can tell you where a photo has been used, and for a famous portrait it will find copies everywhere, but it cannot tell you whether GOV.UK will accept the photo. That decision belongs to the file rules and the picture rules above, and no search engine can make it for you.
Mistakes that waste an afternoon
Most failed uploads are fixed by one of the sections above, but a few habits keep causing the same failure twice. The first is trusting a photo tool site over GOV.UK. Tool sites sell a service, and their spec pages go stale. The PassLens PNG error in this guide is one example, and there are others that still quote a 10MB ceiling or a square crop that GOV.UK never asked for. Read the GOV.UK page on the day you apply, and treat every other page as a hint, not a rule.
The second is paying for a photo checker. No third party checker can approve a photo for GOV.UK, and a green tick from a paid tool means nothing to the upload form. The rules fit on one page, and you can check them yourself in two minutes with the file open in front of you.
The third is sending the photo to yourself through a messaging app. WhatsApp, Messenger and similar apps compress photos on the way through, and the file that arrives can be under 50KB, cropped, or stripped of quality. Always work from the original file on the device that took the photo, and export a fresh JPEG from it.
The fourth is re-saving the same JPEG after every failed attempt. Each save adds compression marks, so the fifth version of a photo looks worse than the first. If an export did not work, go back to the original and export again, rather than patching the file that already failed.
The fifth is using your passport photo. GOV.UK says the visa photo must not be the same photo that is in your passport or identity card, even if it is recent and well lit. Take a fresh photo for the visa application. It takes five minutes against a plain wall, and it removes one more reason for the upload to refuse the file.
Work through the checks in order: file type, pixels, size, orientation, then background, framing, glasses and shadows. Most uploads fail on the first check they meet, so fixing the errors in GOV.UK’s order gets you through fastest, and a fresh export from the original photo clears most of what is left. Australia’s ETA app runs the same checks in a different order, with a chip read in the middle, and our guide to Australian ETA app photo problems works through its scan and selfie failures in the same way.
Why does GOV.UK reject my UK visa photo upload?
GOV.UK rejects the upload when the file breaks one of its rules: wrong format, too few pixels, under 50KB or over 6MB, sideways or mirrored. The picture can also fail on background, framing, shadows or glasses. Check the file rules first, because the upload tests the file before it tests the face.
Can I upload a PNG photo for a UK visa?
No. GOV.UK accepts JPG or JPEG only, and a PNG file is refused even if the picture itself is perfect. Some photo tool sites wrongly list PNG as accepted for the UK, so do not trust their file type lists. Convert the photo to JPEG from the original file and upload the JPEG.
Can I use a selfie for my UK visa photo?
You can, but GOV.UK advises against it, and selfies cause the most common failures. Front cameras can save a mirrored image, the framing is often too close, and shadows fall on the wall behind you. Ask someone else to take the photo with the rear camera, against a plain light wall, in daylight.
What size does a UK visa photo have to be?
The digital photo must be at least 600 pixels wide and 750 pixels tall, and the file must be between 50KB and 6MB. There is no upper pixel limit in the GOV.UK rules, so a phone photo is fine once it is exported as a JPEG inside the size window. Check the pixel count before you upload.
Do I need to bring a printed photo to the visa application centre?
Usually not. At most visa application centres, staff take your photograph with your fingerprints at the appointment, and your confirmation letter lists what to bring. Bring printed photos only if your appointment letter specifically asks for them. If it does, use the UK passport print size of 45 by 35 mm.
Can I use the same photo as my passport for a UK visa?
No. GOV.UK says the photo must not be the same photo that is in your passport or identity card, even if that photo is recent and well lit. Take a fresh photo for the visa application, against a plain light background, and keep it separate from your passport photo.






