


🔎 Reverse Image Search
Image search techniques made simple: upload a photo or paste a URL and search 6 engines at once. 100% free, nothing stored.
🔒 Your image is never stored on our servers longer than 24 hours and is never shared.
Your UK passport photo was rejected because it failed one of HM Passport Office’s photo rules, usually the background, the light, your expression, or the file itself. China works to a different size again: our guide to China visa photo requirements gives the 33 x 48 mm print, the COVA digital file rules, and the visa-free check for UK and Canadian passports. Read the checker’s message, fix the one thing it names, and send a fresh photo taken in the last month. CitizenCard works the same way but with a bigger minimum file: our CitizenCard photo rejected guide explains the 1280 by 720 trap and the PASS card rules. Your application is paused, not cancelled, and your fee is safe. A London travel pass works the same fix-and-resubmit way but with its own rules: our guide to a Freedom Pass photo rejected explains London Councils’ four rules and how to resubmit.
If your photo was rejected by the US State Department instead, the rules and the fix are different. For a visa photo rather than a passport photo, the spec differs again: our US visa photo requirements guide gives the 2 by 2 inch size, the 600 by 600 upload and the glasses ban. Our US passport photo rejected guide walks through the 90-day resubmission workflow, from reading the letter to mailing the new photo.
A rejected passport photo feels personal. The photo looks fine to you, the checker disagrees, and the message it gives you is short. This guide decodes that message. It is built from the two sources that actually decide your photo: the public rules on GOV.UK, and HM Passport Office’s own examiner guidance, version 51.0, published for Home Office staff on 19 January 2026. Where the two disagree with what photo-tool blogs say, the official wording wins here.
One thing to know before you start: a passport photo is one of the most sensitive pictures you will ever hand over, so it is worth knowing how your photos are used and shared. Our face search and photo privacy guide covers that side of the problem. This article covers the photo itself.
What does the HMPO photo checker actually check?
When you apply online, the GOV.UK service runs your photo through an automated technical check before it accepts it. The check measures the size of the photo, your distance from the camera, your eye position and any head tilt, plus contrast, focus and brightness. It then shows you the photo and, if there are errors, the reason for the result and tips on how to correct it.
The checker is a first screen, not a decision. An examiner at HM Passport Office still looks at the photo later and must reject it if it does not meet the standards, even if the checker let it through. The reverse is also true. A photo the checker flags can still be accepted if the examiner decides it meets the rules, which is why the override route exists. That is covered in detail below.
The rules the checker is built around are published on GOV.UK’s passport photo page. For a digital photo, your picture must be clear and in focus, in colour, unaltered by computer software, at least 600 pixels wide and 750 pixels tall, and between 50KB and 10MB. It must contain no other objects or people, sit against a plain light-coloured background in clear contrast to it, and show no red eye. If you take it on your own device, include your head, shoulders and upper body, and do not crop it. The service crops it for you.
In the photo itself you must face forwards and look straight at the camera, hold a plain expression with your mouth closed, keep your eyes open and visible, keep hair out of your eyes, wear no head covering unless it is for religious or medical reasons, and have no shadows on your face or behind you. Your photo must have been taken in the last month, and you need a new one for every new passport, even if your appearance has not changed.
For paper applications the numbers are different. You need two identical printed photos, 45 millimetres high by 35 millimetres wide, on plain white photographic paper with no border. The United States works differently again: a green card photo is 2 x 2 inches, and which form you file decides whether you send prints at all, as our guide to US Green Card photo requirements explains, including the December 2025 change that stopped USCIS using photos you send. The image of you, from the crown of your head to your chin, must measure between 29 and 34 millimetres. Schengen visas use a larger head in the same size print, so one photo will not pass both sets of rules: our Schengen visa photo requirements explain the 32 to 36 mm rule. Canada uses the same 35 by 45 mm frame with a 31 to 36 mm head: our Canada visa photo requirements explain the IRCC rules and the biometrics trap. The Canadian passport photo is a different size from the visa photo: our guide to the Canada passport photo requirements works through the 50 by 70 mm print and the back of the photo. GOV.UK says photos from a booth or shop are more likely to be approved than a photo taken using your own device, but a booth photo can still be rejected. The booth controls the file, the frame and the background. It does not control your expression, your head angle, or whether your glasses catch its flash.
Why was my passport photo rejected? Decode the checker’s message
HM Passport Office does not publish the exact wording of its checker warnings, so no honest guide can quote them word for word. What it does publish is the rule set the check is built around, and its examiner guidance describes what happens when the check finds a problem. The table below decodes each type of warning from that published material: what it usually means, what caused it, the exact fix, and whether you can carry on with the photo anyway.
| What the checker flags | Real cause | Exact fix | Can you carry on? |
|---|---|---|---|
| Background not plain, or not light enough | Patterned wallpaper, a dark wall, a door frame or an object in shot. Pale hair or a white top against a cream wall also fails, because there is no edge for the system to find. | Use a bare light wall, cream or light grey. Stand at least a metre from it so your shadow falls away from the wall. Change to a darker top if your hair is pale. | No. Retake it. |
| Eyes not visible, or face not found | Hair across an eye, glasses glare, eyes outside the vertical band the system needs, or looking away from the lens. | Pin hair back. Take glasses off if you can. Put the camera at eye height, about 1.5 metres away, and look straight at the lens. | Only if a medical or religious reason stops you meeting the rule. Explain it when asked. |
| Shadows on your face or behind you | A window behind you, a single lamp overhead, or standing too close to the wall. | Face the window instead of standing with it behind you. Use soft light from the front. Step a metre away from the wall. | No. Retake it. |
| Head too small, too large, or off centre | Standing too far from the camera, a selfie taken at arm’s length, or a photo you cropped yourself before uploading. | Prop the camera at eye height, about 1.5 metres away. Upload the whole photo, head, shoulders and upper body, and let the service crop it. | No. Retake it. |
| File too small, too large, or wrong format | Under 600 by 750 pixels, under 50KB, over 10MB, or not a colour JPEG. Messaging apps are the usual cause: they squeeze a photo below 50KB when they send it. | Use the original file straight from the camera, not a copy sent through WhatsApp or email. Re-export it at full quality if you must. | No. Fix the file. |
| Photo looks edited or filtered | Beauty mode, skin smoothing, an AI enhancement, a filter that changes how you look, or a black and white image. | Turn off beauty mode and any automatic enhancement, then re-shoot in colour. Editing the background to remove a shadow is allowed. Enhancing your face is not. An AI-generated headshot is never acceptable for a passport photo: see our guide to AI headshot apps and your selfies. | No. Retake it. |
| Glasses glare, or frames cover your eyes | Strong lenses catching the flash, or frames hiding part of an eye. | Take your glasses off if you can. If you must wear them, they cannot be sunglasses or tinted, and your eyes must be clear of glare, reflection and shadow. | Only with a medical reason, and the examiner still decides. |
| Mouth open, or smiling | A wide smile, a pout or a frown changes the shape of your face, and the system cannot read it reliably. | Hold a plain expression with your mouth closed. A relaxed mouth with teeth showing, or lips slightly open without distorting your face, is accepted. | Only if a medical condition stops you closing your mouth. |
| Photo looks flipped, or mirrored | A front camera setting flipped the image left to right. This causes problems at border control. | Turn off the mirror or flip setting on your phone, then re-shoot. Check a distinguishing mark, like a mole, is on the correct side. | The examiner will phone you about this one. Confirm it is a true likeness, or send a new photo. |
| Bar across the photo | A white, grey or black bar at the edge of a digital photo. Before 8 December 2025, a white bar at the bottom of a child’s photo was tolerated if it did not cover the face. Since then it is not accepted at all. The age rules behind that change are covered in our guide to baby and child passport photos, which sets out what changes at age 1 and age 6. | Re-export the photo without the bar, or take a fresh one. Check the whole frame, including the edges, before you submit. | No. Retake it. |
| Someone else in the frame, or a hand visible | Another person in shot, or a parent’s hand or arm supporting a baby or young child. | The child must be alone in the picture. Support the head from behind the sheet, not in frame. Since December 2025 a visible hand sends the case to the Exceptions Handling Team. | No. Retake it. |
| Photo too old | Taken more than a month before you submitted it. A date stamp on the image gives it away. | Take a fresh photo on the day you reply. Once HM Passport Office has your photo, it stays valid for 12 months for an adult and 6 months for a child. | No. A new photo is the only fix. |
Two of those rows deserve a closer look, because they are the ones that send people back to take an identical photo. The first is eye position. The examiner guidance says the system will have problems finding correct eye positions unless your eyes sit in the top 40 percent to 70 percent of the photo. A photo can look perfectly framed while your eyes sit too low, usually because the camera was above eye height. Lower the camera or raise yourself, and the same face passes.
The second is contrast. A pale-haired person in a white top against a cream wall looks clean and bright, which is exactly the problem. There is no edge for the system to find between you and the wall. Change the top, or change the wall to light grey, and the failure disappears.
When can you carry on with a flagged photo, and what does the examiner do?
You can carry on with a photo the checker flagged, but only in two situations the examiner guidance names. The first is when you think the reason for the result is not correct. The second is when you cannot meet the rules because of a religious or medical reason. In both cases you must explain why in the mandatory drop-down box before you submit, and you must give the reason in the free text field as well.
Carrying on is not approval. When you override a warning, the system creates a photo standards task and your note appears on the examiner’s review screen. The examiner must still reject the photo if it does not meet the standards. That is the rule in black and white in version 51.0 of the guidance.
So when is it worth overriding? When the flag is wrong about your photo, or when a genuine condition makes the rule impossible for you. The guidance gives examiners room here. For a disability, they may waive the rules on eyes looking at the camera, eye position, mouth closed, neutral expression, facing the camera, and even the background, where a medical aid such as a wheelchair is visible. They must still be able to capture your face, and they must record the decision. For visual impairment, a photo with eyes shut may be accepted, and permanent or long-term eye patches are accepted, but temporary ones are not, and tinted glasses must come off.
For anything else, retaking costs a few minutes. An examiner rejecting the photo later costs days, because your application pauses until you supply a new photo and it resumes. If you have already had more than two photos fail, the guidance says the examiner must phone you to explain the problem before asking for another one. Use that call. Ask exactly what is wrong with the photo on screen, not what the message said.
What changed in December 2025?
This is the part most guides get wrong, because the version numbers changed twice in two months. Here is the position as it stands on GOV.UK today, 12 November 2026.
On 8 December 2025, HM Passport Office released version 49.0 of its Photo Standards guidance. Three operational changes took effect that day. First, the grace period for children’s photos with a white, grey or black bar across the bottom ended. From that date, examiners are instructed to reject any photo containing a bar, whatever the applicant’s age, and to record the error with their Quality and Examination Support team. Second, examiners were told to refer cases to the Exceptions Handling Team where it is clear the photo was not taken within the last month. The one-month rule existed before, but it became an escalation trigger rather than a matter left to the officer’s judgement. Third, child passport photos in which a parent’s hand or arm is visible must now be referred to the Exceptions Handling Team, rather than decided by the examiner.
Version 49.0 was then superseded. The current guidance on GOV.UK is version 51.0, published for Home Office staff on 19 January 2026, and the GOV.UK publication page was last updated on 4 March 2026 in the bars in photos section. That is the version this article is written against, and it is the one to cite if a tool site quotes you an older number. The December 2025 changes are all still in force inside it, including the bar rule and the hand rule.
For children, the December change matters most. The relaxations for young children still stand: children under six do not have to look directly at the camera or hold a plain expression, and babies under one do not have to have their eyes open. But the bar and the supporting hand are now hard fails, and the photo must still be a true likeness, in colour, taken in the last month, against a plain light background, with the child alone in the frame. The rules change again at ages one and six, so a child’s photo needs its own check against the age bands, not the adult list above.
Do I have to take my glasses off for a passport photo?
Short answer: take them off if you can. GOV.UK says do not wear glasses in your photo unless you have to. If you must wear them, they cannot be sunglasses or tinted glasses, and your eyes must not be covered by the frames or any glare, reflection or shadow.
Some photo-tool sites describe this as a total ban in force since November 2022. That overstates it. The examiner guidance is more precise, and it is worth knowing the detail if you cannot take your glasses off. Both eyes must be clearly visible, and the frames may sit over the eye socket or eyelids as long as they do not hide the eyes in any way, meaning the white and the pupil must be visible. Glasses can cause glare or reflection, in particular strong lenses, and if the glare covers the eye you must remove them, because the system may not be able to locate the correct eye positions.
Glasses can also distort the face through the lens at the side. Here the guidance gives the examiner a clear test. If the photo has passed the automatic checks, the system has identified the eye positions, so the examiner can accept it. If the photo has failed the automatic check, the examiner must accept it if there is no visible distortion or glare, and reject it if there is visible distortion or glare, recording the reason. So a glasses photo that passes the checker is normally fine, and a glasses photo that fails the checker is decided by what the examiner can see.
The practical route is simple. Take the photo without glasses first and see if it passes. If you need glasses to see the camera, take them off for the shot and have the person helping you check the frame on screen. If you genuinely cannot remove them, keep them on, make sure there is no glare, and be ready to explain the medical reason in the override box if the checker flags it.
My photo code will not work. What now?
A photo code is the string a booth or shop gives you with your photos. You type it into the online application and HM Passport Office retrieves the digital photo the booth took. A code standardises the file, not the sitting. It does not guarantee acceptance, and the checker still runs on the photo it retrieves.
Work through these in order when a code fails.
The code will not retrieve any photo. Check you entered it exactly, character by character. Codes mix letters and numbers that look alike, and a single wrong character is enough. Retype it slowly rather than pasting it from a message, and check for a space at the start or end. If it still fails, contact the booth or shop that gave you the code. HM Passport Office asks suppliers to tell customers how to contact them if there is a problem with a digital photo, so the shop is the right first call, not the Passport Office.
The code has expired. HM Passport Office sets no validity period for photo codes, so the code itself does not expire. What expires is the photo. Your photo must have been taken in the last month, and the examiner guidance says a photo that has clearly not been taken in the last month must be rejected. A code from a booth visit three months ago retrieves a photo that is already too old. Take a new photo and get a new code.
The code is for the wrong product. A code is tied to the photo the booth took for a specific purpose. A code issued for a visa photo, a driving licence photo, or a printed set will not retrieve a passport photo. A visa photo upload has its own rules and failure messages, covered in our guide to a failed UK visa photo upload. If you used a booth, check the receipt or the printout to see what the code was sold for. If it says anything other than a UK passport digital photo, it is the wrong code, and you need a new sitting.
The code works but the photo is rejected. This is the commonest case, and it means the file is fine but the picture is not. The booth got the technical properties right and something in the sitting failed: your expression, your head angle, glasses glare, or where you sat on the stool. Work through the decoder table above against the message you were given, and re-shoot with the fix it points to. Paying for another booth session without changing the sitting will give you the same result.
You lost the code. There is no way to look a code up from HM Passport Office, because the code lives with the booth or shop that issued it. Go back to the shop with the receipt. If you took the photo on your own device during the application, there is no code at all, and you simply take a new photo in the application.
What happens after HM Passport Office rejects your photo?
Your application is not cancelled and your fee is not lost. HM Passport Office contacts you to request a replacement photo, your application pauses until you supply one, and it then continues. The cost of a rejection is time, and how much time depends on how quickly you respond and how well the second photo does.
The fee is safe. A standard adult passport costs £102 online or £115.50 by post, and a child passport costs £66.50 online or £80 by post, according to GOV.UK’s fees guidance, version 63.0, published for Home Office staff on 25 September 2026. None of that is forfeited by a photo rejection. What a rejection can force is an escalation. If it pushes you past a travel date, the urgent services are the only way to buy speed, and they are not cheap: the 1 Week Fast Track service is £192 for an adult and £156.50 for a child, and the 1 Day Premium service is £239.50 for an adult renewal only. An urgent service cannot make a non-compliant photo acceptable. It buys a faster process once you have supplied a photo that passes.
Do not cancel and reapply. Reapplying loses your place in the queue and costs the fee again. A rejection pauses your application rather than ending it. Supply the replacement photo instead, and do it the same day if you can. The photo you send must have been taken in the last month on the day you send it, so a photo taken during the original application may already be too old by the time you get around to replying. Take the new one fresh. It takes fifteen minutes and it removes an entire class of second rejection.
There is no formal appeal for a photo. The practical response is to supply a compliant replacement. If you believe the photo meets the standard and a condition or disability makes an aspect of it impossible, explain the circumstances when you respond. The examiner guidance provides for judgement, particularly around children and medical conditions.
If you already have travel booked, the order matters. First, do not cancel and reapply. Second, supply the replacement photo immediately, because every day between the request and your response is a day added to the timeline, and it is the only part of the process entirely within your control. Third, only then consider an urgent service, and check what appointments actually exist before you build a plan around one. Fourth, do not book non-refundable travel against an in-progress application next time. GOV.UK’s standing guidance is not to book travel until you have the passport in your hand.
What about a rejected driving licence photo?
DVLA follows the same photo standard as HM Passport Office, and the same principle applies: you are asked to supply another one. Railcards work the same way on a smaller scale: each card has its own file rules, and our guide to railcard photo rules lists them card by card. The same standard applies to a driving licence too, and our DVLA driving licence photo rules cover the spec, the fees and the rejection fixes. A driving licence photo can also fail inside the GOV.UK One Login app, where the app photographs the licence itself rather than asking you to upload one: our guide to a GOV.UK One Login identity check that failed covers the glare, framing and chip-scan fixes for that check. The wrinkle is that a photocard renewal has a deadline attached. A photocard must be renewed every 10 years, and GOV.UK warns that failing to renew with a recent and true likeness can carry a fine of up to £1,000. Do not let a rejected photo drift.
Renewing online costs £14, or £17 by post, and when you renew online you can use your passport photo or upload a new one. The photo in your UKVI account follows a different set of rules again: our guide to UK eVisa photo rules explains the three differences, including the lower 6MB limit and the ban on reusing your passport photo. That reuse is worth a second thought. Passports and photocards both run for ten years, and the two cycles are almost never aligned. If your passport was issued seven years ago, its photo is at least seven years old, and putting it on a licence you will carry for another ten means an eventual seventeen-year-old likeness on a document used to identify you. Reuse it if your passport photo is recent and still looks like you. Upload a new one if it is more than two or three years old, or if your appearance has changed. If your photo no longer looks like you, GOV.UK says you need to renew your licence to update it, which costs the same £14 online.
The same checker logic applies to the licence photo, so the decoder table above works for it too. The one difference is the countersignature. For a passport paper application that needs one, only one of your two printed photos is signed on the back. The other must remain blank. Do not sign the back of a driving licence renewal photo at all.
How do I check a photo before I send it? A worked example
Before you submit, check the photo against the written rules, not your impression. Most rejections are of photos the applicant thought looked fine, which is precisely why looking fine is not the test. Here is a real photo put through the checks this article teaches, so you can see what the checks catch and what they miss.
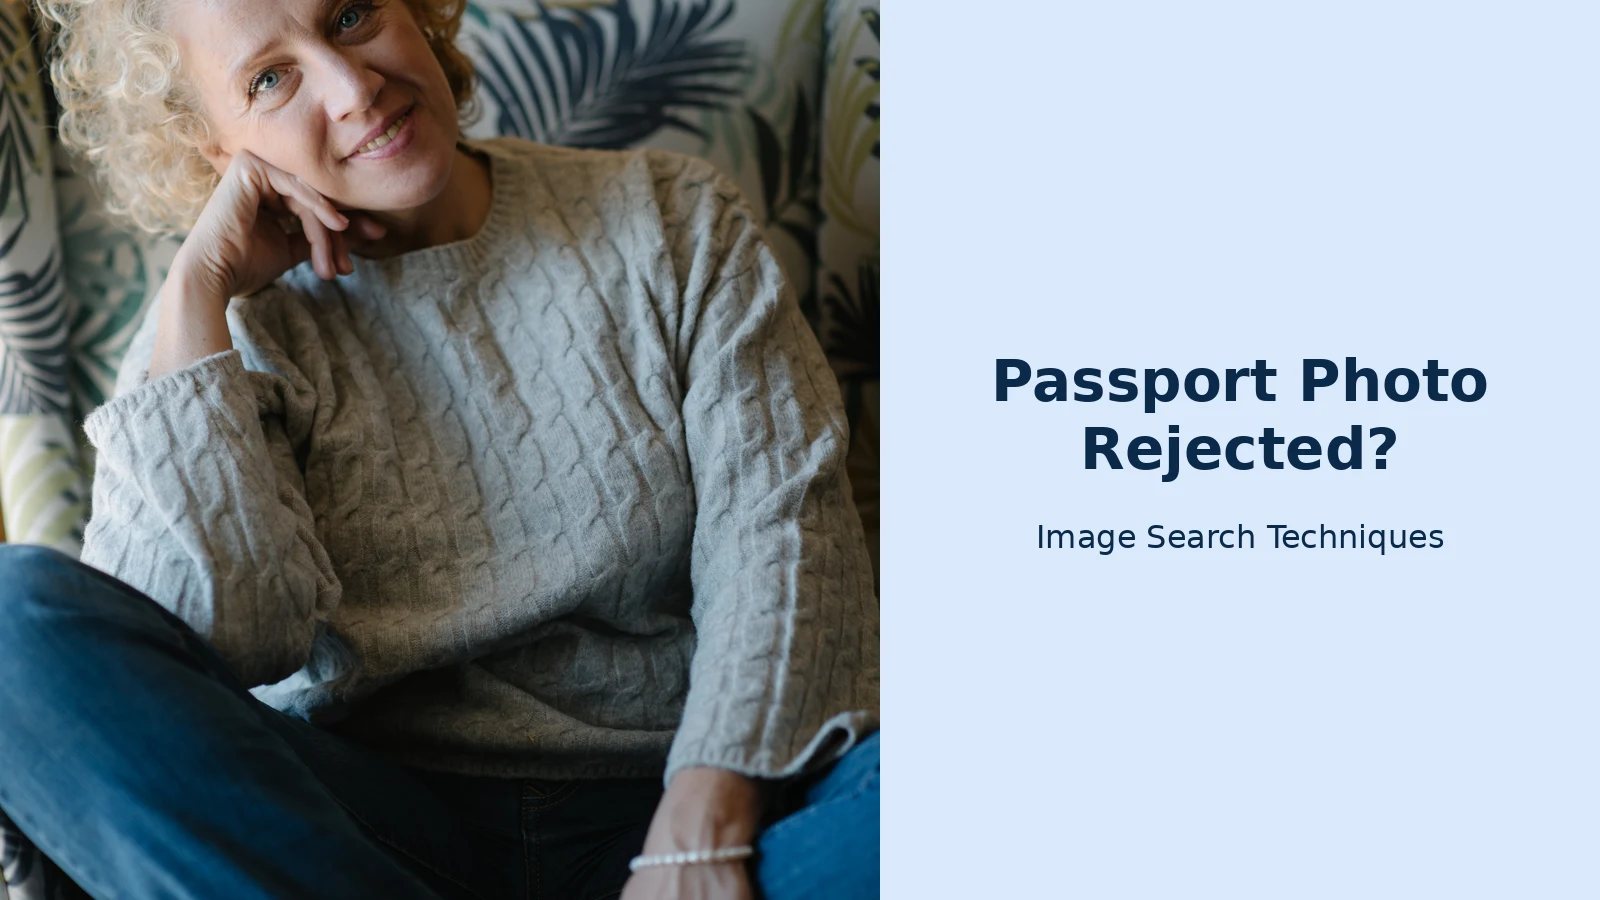
The test photo is a real portrait from Wikimedia Commons: a smiling senior woman with curly hair, photographed by Shixart1985 and shared under a CC BY 2.0 licence. It is a good test case precisely because it looks like a decent photo. It is sharp, well lit, and the woman is facing the camera. It would also fail a UK passport application twice over, and the two failures show the two different kinds of check.
First, the file check, measured on 12 November 2026. The full-resolution file is 4,912 by 7,360 pixels, which clears the 600 by 750 pixel floor easily. But it is 18,210,030 bytes, about 17.4MB, which is well over the 10MB ceiling in the digital rules. A phone portrait at full resolution can cross that ceiling without looking any different on screen. The fix is to export a smaller copy at full quality, not to send the original through a messaging app, which would squeeze it below the 50KB floor instead. The file also fails on appearance: the woman is smiling, her head is not square to a plain background, and the shot is a portrait, not a passport photo. The file check catches the size. Only your eyes catch the rest.
Second, the reverse image search check, run on the same photo through the free tool on this site, imagesearchtechniques.co.uk, on 12 November 2026 between 18:33 and 18:41 UTC. The tool loaded the photo by its URL without trouble: the preview showed the file name and the dimensions, 4,912 by 7,360 pixels. Then each engine was opened one by one. Google Lens failed outright. It redirected to a Google Search AI Mode page, showed a generated description of the image, and both the Visual matches and Exact matches tabs returned the same error: “Something went wrong. No image at the URL. Try again with a different URL or image.” Zero results, no source, no name. TinEye searched and found nothing: 0 matches out of the 86.7 billion images it says it has indexed, with the note that it has yet to crawl any pages where this image appears. Bing did not run a search at all. The tool’s link landed on the generic Bing Images homepage. Yandex was the only engine that returned matches: 40 similar-image thumbnails and 20 sites, but not the Wikimedia Commons file page, and no name for the woman in the photo. One of its 20 sites was a Wikipedia page for a Swedish children’s writer, but that page’s own portrait is a different photograph, so it is a lead, not an identification. Pinterest did not reverse-search the image either. Its link ran a keyword search for the text “domain:upload.wikimedia.org” and returned 28 unrelated pins.
The lesson from both checks is the same. A photo can pass one test and fail another, and the checker only tests what it is built to test. The file numbers are objective: pixels, kilobytes, colour. The appearance rules need your eyes and the published list. Run both before you submit, and read the result the checker gives you as a pointer to the rule, not as a verdict on the photo. If you want to run the same reverse search on a photo of your own, our guide to reverse image search walks through each engine step by step.
Your pre-flight checklist before you resubmit
Use this list on the new photo, at full size on a computer screen, not as a thumbnail on your phone. The numbers in this list are the UK ones. Other countries set their own: our guide to Irish passport photo requirements works through the DFA sizes for online and paper applications, so do not use the UK figures for an Irish application. Glare, soft focus, a hair across an eye and a faint shadow are all invisible at 200 pixels wide and obvious at full resolution.
- File: at least 600 by 750 pixels, between 50KB and 10MB, colour JPEG, taken in the last month, from the original camera file.
- Background: plain, light, cream or light grey, nothing in frame, and you standing at least a metre from the wall.
- Light: soft daylight from the front, flash off, no shadow on your face or behind you.
- Position: camera at eye height, about 1.5 metres away, head square and level, eyes in the top half of the frame.
- Face: plain expression, mouth closed, eyes open and visible, hair back, no head covering unless religious or medical.
- Glasses: off if you can. If you must wear them, no tint, no glare, and both eyes fully visible.
- Phone settings: beauty mode and automatic enhancement off, mirror or flip off, no filters.
- Frame: head, shoulders and upper body in shot, uncropped, nobody else in the picture, no bar at the edge.
- Code: if you used a booth, check the code is for a UK passport digital photo and was issued for a photo taken in the last month.
- Read the checker’s message: fix the one thing it names, then run through this list again before you submit, because the commonest way to fail twice is to re-take the photo in the same place, in the same light, in the same position, having changed only the thing you were told about.
One last check, on the photo as a file rather than a picture. If you want to see what information travels with an image before you upload it anywhere, our guide to removing EXIF and location data from photos shows you how to inspect it. And if the same official-photo problem turns up in another application, the same approach works there too: the UK ETA app photo guide decodes a different checker built on the same rules. New Zealand shows the same lesson with different numbers: our guide to the New Zealand passport photo requirements explains the DIA digital specs, the paper forms that ban a white background, and how to check your photo with the official checker before you apply. The Australian ETA app photo guide covers the same pattern for Australia, where the chip read and the live selfie cause most failures. For an Australian passport rather than an ETA, the photo rules are different again: our Australian passport photo requirements guide gives the 35 to 40 by 45 to 50 mm size and the 32 to 36 mm head height. For anything the checker cannot tell you, the examiner guidance itself is the final word, and it is published in full as the HMPO Photo Standards caseworker guidance on GOV.UK.
Official photos follow the same pattern elsewhere too. Councils disagree about how recent a Blue Badge photo must be even though the national standard is fixed, and our guide to Blue Badge photo rules sets out the differences council by council. Bus passes follow the same pattern, and our guide to bus pass photo rules compares eight English councils side by side. A CSCS card photo follows the same pattern, with its own two-route twist: the test-centre photo is usually reused, and you only upload your own when you apply through an approved alternative, as our CSCS card photo requirements guide explains. The SIA licence photo follows the same pattern too: our guide to SIA licence photo requirements sets out the Security Industry Authority’s six rules and the three routes your photo can take. The NHS Login photo ID check follows the same pattern too: our guide to fixing a failed NHS Login photo ID check covers the ID photo rules, the face record step and the no-photo-ID route.
If the photo is for a Scottish Young Scot card rather than a passport, the rules are close but not identical. See our guide to Young Scot NEC photo rules and rejection fixes. The German rules split by where you apply, which is unusual among passport guides: see German passport photo requirements, which works through the 35 by 45 mm spec, the digital only rule inside Germany since 1 May 2025, and the two printed photos needed abroad. If the photo was AI-generated or AI-edited, the fix is different, because no edit will save it: see can I use an AI photo for my passport, which compares the five authorities and runs a real photo against an AI portrait.
FAQs
Can I appeal a passport photo rejection?
There is no formal appeal for a photo rejection. The practical response is to supply a replacement photo that meets the rules. If a condition or disability makes one part of the standard impossible for you, explain it when you respond. The examiner guidance allows judgement in those cases, but the photo must still be a true likeness.
How long does a rejected passport photo delay my application?
The delay lasts from the moment HM Passport Office asks for a new photo until it receives one it can accept, so it is largely in your hands. Reply the same day if you can. The new photo must have been taken in the last month, so one taken during the original application may already be too old.
Does a photo code guarantee my photo will be accepted?
No. A code tells HM Passport Office where to retrieve the photo a booth or shop took. The checker and the examiner apply the same rules. A code from a photo taken over a month ago retrieves a photo that is already too old, so check it character by character and ask the shop if it will not retrieve anything.
Can I use the same photo for my driving licence?
DVLA uses the same photo standard, and when you renew your photocard online you can use your passport photo or upload a new one. Think about the photo’s age first: if your passport was issued years ago, its photo is years old too. Renewal costs £14 online, and driving on an expired photocard risks a fine of up to £1,000.






