


🔎 Reverse Image Search
Image search techniques made simple: upload a photo or paste a URL and search 6 engines at once. 100% free, nothing stored.
🔒 Your image is never stored on our servers longer than 24 hours and is never shared.
You have a photo of a mountain and no name to go with it. It might be a shot from a walking holiday, a view from a train window, or a picture a friend sent with the caption “guess where”. The question is simple: which peak is this?
To identify a mountain from a photo, start with a reverse image search, then read the photo itself: the ridge line, the snow line, the shape of the summit and what sits below it. Check the name you get against a peak database such as PeakVisor or Wikipedia. One engine naming a peak is a lead, not proof.
This guide shows the whole method. It covers what to read in a mountain photo before you search, a real test on a 2019 photograph of the Matterhorn with honest results from all four reverse search engines, and the database check that turns a likely name into a confirmed one. It also covers the peak identifier apps Google’s AI Overview recommends, and what to do when every engine comes back blank.
Ridge line and snow line, plainly defined. The ridge line is the sharp edge where two faces of a mountain meet, running down from the summit. The snow line is the height above which snow stays on the ground through the summer. Both are useful clues. A ridge line gives a peak its silhouette, and a snow line that sits high or low tells you something about the height and the season the photo was taken in.
Can You Identify a Mountain from a Photo?
Yes, in most cases, as long as the peak is a known one and the photo is clear. Famous peaks are photographed thousands of times, so a reverse image search has plenty of published copies to match against. A sharp photo of the Matterhorn, Mount Fuji or Kilimanjaro will usually be named by at least one engine. An unnamed ridge in a remote range, or a peak photographed from an unusual angle in bad light, is much harder, because few matching copies exist online.
Three things decide whether it works. First, the photo itself. A sharp, well lit shot with the summit in frame and something below it, a lake, a village, a path, gives every engine its best chance. A hazy shot of a distant ridge, a peak half hidden by cloud, or a tiny crop from a wide panorama gives them almost nothing to work with.
Second, how famous the peak is. The Matterhorn is one of the most photographed mountains on earth. A local hill with no name on the map may never have been published online at all, and no engine can name a photo that was never published.
Third, which engine you use. They do not all behave the same way on mountains, and one engine failing proves nothing. In the worked example later in this article, two of the four engines returned nothing at all for the most famous peak in the Alps, while a third named it correctly. Run more than one, every time.
The same approach works beyond mountains. Our guide to finding an item by image applies the same reverse search steps to products and objects, and the statue guide shows how it works on another kind of landmark.
Answer capsule: Yes, you can identify a mountain from a photo when the peak is known and the photo is clear. Reverse search it on more than one engine, read the ridge line and the setting, then confirm the name in a peak database.
What Can You Read in a Mountain Photo?
Before you search, read the photo. A mountain photo carries more clues than most people notice, and the clues narrow the search before you type anything.
Start with the shape of the summit. Is it a sharp pyramid, a flat top, a rounded dome, or a jagged saw edge? The Matterhorn is a near symmetrical pyramid with four steep faces meeting at a point, and that shape alone rules out most other peaks. A flat topped mountain suggests a different geology entirely, often a mesa or a plateau edge rather than a young folded range.
Next, follow the ridge lines down from the summit. Are they straight and clean, or broken and rocky? Do they run in one direction or several? A peak with one long ridge looks very different from a peak with four ridges running in four directions, and the pattern is often enough to tell two similar summits apart.
Then look at the snow line. Where does the snow start, and does it sit in gullies or cover whole faces? A peak photographed in March will carry far more snow than the same peak in September, so note the season. Our test photo was taken in March 2019, and the snow reaches well down the faces, which fits a high Alpine peak in late winter.
Finally, read what sits below the peak. A lake, a village, a ski lift, a hut, a road or a distinctive building can place a mountain in a valley even when the summit itself is not distinctive. The town of Zermatt sits below the Matterhorn, and a photo that shows the peak above rooftops is already halfway to an answer.
Answer capsule: Read the summit shape, the ridge lines, the snow line and whatever sits below the peak. Those four reads narrow the search before any engine runs, and they are what you check a result against afterwards.
How Do You Reverse Search a Mountain Photo?
Reverse image search is the fastest way to identify a mountain from a photo, because it compares your copy against published copies of the same peak. Work through the engines in order, and write down what each one finds.
- Use the best copy you have. The original file beats a screenshot, and a screenshot beats a photo of a screen. Social media strips detail when it compresses an image, so go back to the original if you can.
- Crop it tight. Cut out the sky, the foreground and anything that is not the mountain. A tight crop of the peak and its ridges gives the engines a cleaner target. Keep the summit and at least one ridge in frame.
- Search Google Lens first. Open Google Lens, upload the photo or paste its link, and look at the exact matches. Lens is often strongest on exact copies of a published photo.
- Then try TinEye. TinEye is best at finding where a photo is published, and it tells you how many images it searched. A result that links to a Wikimedia Commons file page or a Wikipedia article usually carries the peak name in the caption.
- Then try Yandex. Yandex is often the strongest engine on landscapes and frequently prints a name tag for a famous peak. Read the tags it shows, and check the sizes and sites tabs for the original page.
- Then try Bing. Bing visual search sometimes finds matches the others miss, and sometimes finds nothing at all. A blank from Bing means nothing on its own.
- Compare, do not trust one result. If two engines agree on a name and the shape, ridge lines and setting match your photo, you have a likely identification. If they disagree, believe the one whose result you can check, not the one that sounds most confident.
If you want the full step by step for any of these engines, our guide to how to reverse image search walks through each one, and the Google reverse image search guide covers Lens in detail. If you want to try the search now, the free reverse image search tool on our homepage searches six engines at once.
Answer capsule: Use the best copy, crop it tight, then run Lens, TinEye, Yandex and Bing in turn. Compare their results and check any name against the photo itself before you believe it.
Worked example: the Matterhorn, March 2019
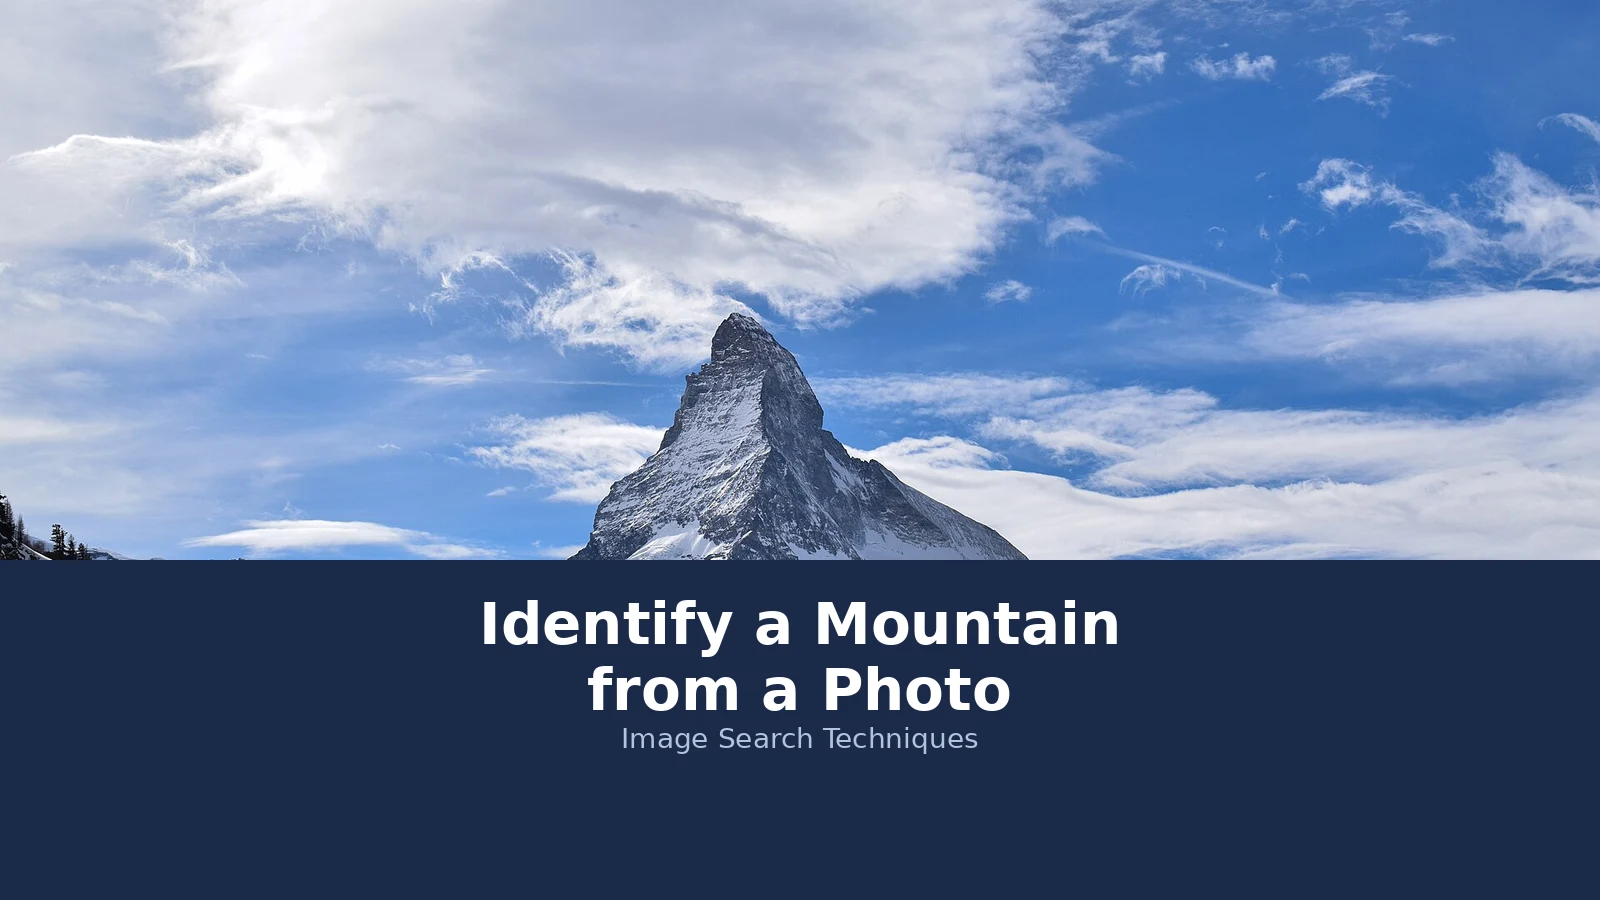
We ran this method for real on 18 November 2026, on a photograph of the Matterhorn taken in March 2019 by Liridon and published on Wikimedia Commons under a CC BY-SA 4.0 licence. The file is 5,827 by 3,885 pixels and 11.1 MB. We searched by image URL on all four engines, logged out, with no sign in anywhere. Here is exactly what happened.
| Engine | Named the peak? | Linked the Commons page? | What it returned |
|---|---|---|---|
| Google Lens | No | No | 0 results. Three attempts, all failed with “Expired visual search” and “No image at the URL”. |
| TinEye | No, the name appears only in file names | Yes | 24 results over 86.8 billion images searched. One result is the Commons file page itself, dated 9 December 2025. |
| Yandex | Yes | No, but Czech and Catalan file pages listed | Named it exactly: “matterhorn peak” and “zermatt switzerland”. 17 other sizes, 16 sites. |
| Bing | No | No | 0 results. The upload toast appeared, but no results page ever rendered. |
The score is one engine out of four naming the peak, and one out of four linking the Commons file page. That is an honest result, and it matches a pattern we have seen before. When we ran the same four engines on a statue photograph the day before, Lens failed three times with the same “No image at the URL” message, TinEye found 13 results, Yandex named the statue, and Bing returned nothing after the same upload toast. These look like repeatable engine behaviours, not one off glitches.
Two lessons follow. First, Lens failing on a famous peak proves nothing about the photo. It failed on the most photographed mountain in the Alps. Second, TinEye finding the Commons page is useful even when it names nothing itself, because the file page carries the author, the date, the licence and the caption that names the peak. The name was there to be read, just not in TinEye’s own words.
Answer capsule: In our Matterhorn test, Yandex named the peak, TinEye linked the source page, and Lens and Bing returned nothing. One engine failing is normal, which is why you always run more than one.
What Is the Peak-Read Table?
The peak-read table is the check that turns a guessed name into a confirmed one. Run the reverse search first, then work down the table row by row, comparing each read against the peak you think you have found. A name that passes all six rows is confirmed. A name that fails two or more rows is probably wrong, however confident the engine sounded.
| What to read | What it tells you | Matterhorn check |
|---|---|---|
| Reverse search result | Whether a published copy exists, and what it is captioned | Yandex named it. TinEye linked the Commons file page, which captions it as the Matterhorn. |
| Summit shape | The peak’s outline, the first thing to compare | Near symmetrical pyramid with four steep faces. Matches the classic Matterhorn silhouette. |
| Ridge lines | How many ridges run from the summit, and in which directions | Sharp ridges run down from the point in several directions, with the Hornli ridge the best known. |
| Snow line | Height and season, and whether the snow pattern fits | Photo taken in March, snow well down the faces. Fits a 4,478 metre Alpine peak in late winter. |
| Setting | Valley, lake, town or buildings that place the peak | Blue sky and high Alpine light, no town in frame, so the setting alone does not settle it. |
| Peak database check | Height, location and first ascent, checked against an authoritative source | PeakVisor lists the Matterhorn at 14,692 feet, which matches Wikipedia’s 4,478 metres. |
Notice what the table does. It does not ask you to trust one engine. It asks you to check the shape, the ridges, the snow and the setting against the name, and then to check the name against a database. When we did that for the test photo, every row pointed the same way, so the identification is confirmed. If Yandex had named the Matterhorn but the summit shape had been a flat top, the table would have caught the mistake.
Answer capsule: Work the peak-read table row by row after the reverse search. A name that passes the shape, ridge, snow, setting and database rows is confirmed. A name that fails two rows is probably wrong.
How Do You Check a Peak in a Mountain Database?
A reverse search gives you a name. A peak database tells you whether that name fits the facts. The two checks together are much stronger than either one alone.
Start with PeakVisor. Type the name into the search box on the PeakVisor home page, which asks you to find a peak, a range, a hut, a ski resort or a route. Pick the peak entry, not a route. When we searched for the Matterhorn, the first result was the peak itself, “Matterhorn, Italy, Switzerland, Alps, 14,692 ft”, followed by same named routes and viewpoints, including the Klein Matterhorn at 12,756 feet. A reader who clicks a route by mistake gets the wrong height and the wrong place, so check that the entry you opened is the peak.
Then cross check the height on Wikipedia. The Matterhorn page gives the summit as 4,478 metres, or 14,692 feet, above sea level. PeakVisor’s 14,692 feet agrees exactly, which is what you want to see. If two independent sources give different heights for the same name, stop and check whether you have the right peak, or whether one source is listing a subsidiary summit.
While you are on the Wikipedia page, read the location and the history too. The Matterhorn straddles the border between Switzerland and Italy in the Pennine Alps. It overlooks the Swiss town of Zermatt to the north east and the Italian town of Breuil-Cervinia to the south. The first ascent was on 14 July 1865, by a party led by Edward Whymper, and four members of the party died on the descent. Those facts are useful twice over. They confirm the identification, and they give you the setting to check against your photo: a shot from the Zermatt side shows the north east face, a shot from Cervinia shows the south face, and the two look different.
PeakFinder is a good second database. It builds a 3D panorama from your position and labels the peaks around you, and it works offline, which matters on a mountain with no signal. If PeakVisor and PeakFinder agree on a name, and the height matches Wikipedia, the identification is as solid as it gets without standing on the summit yourself.
Answer capsule: Check the name in PeakVisor, pick the peak entry rather than a route, then cross check the height on Wikipedia. Two sources agreeing on height and location confirms the name.
What If Your Photo Has No Location?
Many mountain photos arrive with no location at all. A friend sends a picture, a screenshot has no metadata, or the photo was downloaded from social media, which strips the location data when it uploads. You can still identify the peak, but the method changes.
First, check the file itself. A photo taken on a phone often carries GPS coordinates in its EXIF data, which is the metadata stored inside the image file. On a computer, right click the file and open its properties or details to see whether a location is recorded. On a phone, open the photo details in your gallery app. If the coordinates are there, paste them into a map and you will know exactly where the photographer stood, which narrows the peaks in frame to a handful.
If the file has no location, describe the scene as a text search. Search for the distinctive details you can see: the shape of the summit, a lake name if you can read a sign, a hut, a valley name, or the town below. A text search for “pyramid peak above Zermatt” finds the Matterhorn at once, and the same approach works for less famous peaks when you have a place name to pair with the shape.
Be aware that some tools need a location to work at all. PeakVisor’s photo tool asks you to choose where the photo was taken, because it matches the photo against a 3D terrain model built from that viewpoint. Without a location it cannot label the peaks. That is a limit of the tool, not a failure of your photo. In that case, reverse search is the better route, because the engines match the image itself rather than a viewpoint.
Finally, watch out for lookalikes. Many peaks share a shape from one angle. A pyramid summit in the Alps, a pyramid summit in the Himalayas and a pyramid summit in the Andes can look alike in a tight crop, and a single engine match from one angle is not proof. The peak-read table exists for this reason. If the setting, the snow line and the height do not fit, the name is wrong, however similar the silhouette looks.
Answer capsule: Check the file for GPS data first. If there is none, search the scene as text and lean on reverse search, because some identifier apps need a location. Never trust a single angle match on a lookalike peak.
Are Peak Identifier Apps Worth Using?
Yes, for a different job than reverse search. The AI Overview for this question recommends apps first, and it is right that they do something the engines cannot: they name the peaks in a photo you took yourself, even when that photo was never published anywhere. The four tools it names are PeakVisor, PeakFinder, Peakr and FriendHike, and they work in different ways.
PeakVisor identifies peaks through the camera or from a photo, using GPS and a 3D terrain model. Point the camera at a ridge and it labels the peaks live. Its website also lets you upload a photo and label the peaks in three steps: import the photo, adjust the viewpoint, and share the result. Two limits matter. The website accepts at most three photos, each 5 MB or smaller, in JPEG, PNG or GIF format. Our 11.1 MB Matterhorn test file is too big for it, so shrink a copy before you upload. And live camera identification is a PRO feature, listed at $40 a year or $10 a month on the web. The app has 4.6 stars from more than 13,000 ratings on the App Store.
PeakFinder works the same way, with a 3D panorama built from your position, and it works offline, which is its main strength. On a mountain with no phone signal, an app that needs the internet is useless, and PeakFinder keeps working because the terrain model lives on the phone.
Peakr takes a simpler approach. It uses an image and location data and returns peaks with a probability for each one, so you can see how sure it is. FriendHike works from a photo alone: upload a JPG, PNG or HEIC image and it cross-references the picture against a database of named peaks using GPS and compass data. Both are worth trying when PeakVisor and PeakFinder are not available, but read the probability rather than the top answer. A peak listed at 40 percent is a guess, not an identification.
All four tools share the same limits, and the AI Overview states them plainly. They work less well in poor light, when there are few landmarks in frame, or when the peaks are a great distance away. A hazy ridge at dusk will defeat a 3D terrain match just as surely as it defeats a reverse search. And none of them replaces the database check. An app can name a peak, but only a second source that agrees on the height and the location confirms it.
The competitor to beat here is PeakVisor’s own 2018 guide, which covers its own tool only. It has no reverse search test, no peak-read table, no database cross check, no troubleshooting for failed searches, and no fallback for a photo with no location. Our method covers all of those, and the worked example above shows what each engine really does on a real photo, including the failures.
Answer capsule: Peak identifier apps are worth using for photos you took yourself, because they work from the camera and GPS rather than published copies. PeakVisor and PeakFinder are the strongest, but mind the 5 MB upload limit and the PRO price for live camera identification.
What Should You Do When the Engines Find Nothing?
A blank result is the most common outcome in mountain identification, and it is also the most misunderstood. A blank proves nothing. It does not mean the peak has no name, and it does not mean your photo is unidentifiable. It means that engine, on that copy, found no published match. In our test, two engines returned nothing for the most famous peak in the Alps, and the photo was published on one of the largest image sites on the internet.
Work through the fixes in order. First, improve the photo. Crop it tighter around the summit, straighten it if it is tilted, and brighten a dark copy. A photo that is too dark or too small fails for technical reasons, not because the peak is unknown.
Second, use the original file rather than a screenshot. A screenshot of a photo loses detail at every step, and a photo of a screen is worse again. Go back to the original file, and if the file is a large one, keep it large. Shrinking a 5,827 pixel wide photo to a small thumbnail throws away the ridge detail the engines match on.
Third, try another engine. Our test shows why. Lens and Bing found nothing, while Yandex named the peak and TinEye found the source page. If you had stopped after Lens, you would have concluded the peak was unidentifiable, and you would have been wrong.
Fourth, search the setting as text. Describe what you can see: the shape, the valley, the lake, the town, the season. A text search often finds a walking guide or a photo page that names the peak, even when the image search fails.
Finally, ask people who know the area. A walking or mountaineering forum, a local tourist office, or a friend who has walked that valley can often name a peak from a photo at a glance. Give them the best copy you have, and tell them where you think the photo was taken, even roughly. A rough location plus a clear photo is usually enough for someone who knows the ground.
If four engines, a text search and a local expert all come back empty, say the identification cannot be confirmed. Do not fill the gap with the nearest lookalike, and do not repeat a guessed name as fact. An honest “unknown” is better than a wrong name that someone else repeats.
Answer capsule: A blank proves nothing, so improve the photo, use the original file, try another engine, search the setting as text, and ask someone who knows the area. If all of that fails, say the peak cannot be confirmed.
FAQs
Can Google Lens identify a mountain from a photo?
Sometimes, but not reliably. Lens matches your photo against published copies, and it works best on famous peaks with many photos online. In our test on a 2019 Matterhorn photograph, Lens failed three times and returned no results at all. Always run TinEye, Yandex and Bing as well, and confirm any name against the peak-read table.
What is the best app to identify a mountain from a photo?
PeakVisor and PeakFinder are the strongest choices. PeakVisor labels peaks through the camera or from an uploaded photo, using GPS and a 3D terrain model. PeakFinder works offline, which matters on a mountain with no signal. Live camera identification in PeakVisor is a PRO feature, listed at $40 a year or $10 a month.
Can I identify a mountain from a photo with no location?
Yes, sometimes. Reverse image search matches the picture itself, so it does not need to know where the photo was taken. Check the file for GPS data first, because a phone photo often carries it. If there is none, search the scene as text. PeakVisor’s photo tool does need a location, so use the engines instead when you have none.
How do I identify a mountain from a photo on my phone?
Open Google Lens from the Google app or your gallery, upload the clearest copy, and crop it tight around the summit. Run TinEye and Yandex from the browser as well, because Lens often fails on its own. For a photo you took yourself, PeakVisor or PeakFinder can label the peaks through the camera, using GPS and a 3D terrain model.
Why does reverse image search find nothing for my mountain photo?
A blank usually means the photo was never published online, or the engine could not read your copy. It does not mean the peak has no name. Crop it tight, brighten a dark copy, and use the original file rather than a screenshot. Then try another engine. In our Matterhorn test, two engines found nothing while Yandex named the peak.
How can I be sure the peak name is right?
Check the name twice. First, compare the summit shape, ridge lines, snow line and setting in your photo against captioned photos of that peak. Second, check the height and location in a peak database such as PeakVisor or Wikipedia. When two sources agree on the height and the place, the name is confirmed.






