🔎 Reverse Image Search
Image search techniques made simple: upload a photo or paste a URL and search 6 engines at once. 100% free, nothing stored.
🔒 Your image is never stored on our servers longer than 24 hours and is never shared.
Deposit dispute photo evidence is a dated, labelled set of move-in and check-out photographs that shows an adjudicator how a room looked at the start and end of a tenancy. Photos win when they are paired by angle, date stamped and emailed to the landlord within a week, because the landlord must prove any damage beyond fair wear and tear.
Most deposit rows are not about wrecked flats. They are about a scuffed wall, a stained carpet or a chipped worktop, and about who pays for it. The landlord says you caused it. You say it was already there. Without photos, that argument is one person’s word against another’s. With a good set of photos, it is a short argument, and usually a short one in your favour.
This guide is about the photographic method, not the paperwork. The deposit form and the inventory matter, and they get a short section of their own. But the photos are the evidence an adjudicator actually looks at. You will learn what to photograph in each room, how to shoot the same angle twice so the pair proves a change, and how to turn the whole set into dated evidence inside your first week. This is general information, not legal advice. If your case is complicated, speak to a solicitor or your local Citizens Advice.
Before you move in, it also pays to check the property itself. Our guide to rental listing scams and property photos shows how to spot a listing whose pictures do not match the real flat, which is the first deposit problem worth avoiding.
How does an adjudicator judge deposit dispute photo evidence?
When a deposit dispute reaches a scheme, an independent adjudicator decides it on the papers only. They never visit the property. That is the rule across the deposit schemes, and it shapes everything in this guide. The adjudicator sees your photos, the landlord’s photos, the inventory and the written statements. Nothing else. If a photo is not in that bundle, it does not exist for the decision.
The burden of proof sits with the landlord. To win a deduction, the landlord must prove four things: the condition at check-in, the condition at check-out, that the difference is damage beyond fair wear and tear, and that the cost claimed is reasonable. Your photos attack the first two points directly. A dated check-in photo of a marked wall, next to a check-out photo from the same angle showing the same mark, breaks the landlord’s chain at the first link.
Adjudicators judge photos on three tests. The first is date. Mydeposits warns that if photographic or video evidence is not date stamped, an adjudicator cannot verify when it was taken. The Deposit Protection Service says check-in photos should be date stamped to prove they were taken on the check-in date. A photo with no date is a photo the adjudicator may simply set aside.
The second test is comparability. The Tenancy Deposit Scheme says photographs taken at the end of a tenancy are only helpful if there are comparable photographs taken at the beginning. One wide shot of a clean kitchen at check-in and one close-up of a stain at check-out do not compare. Two shots from the same spot, at the same height, of the same wall, do. That is why the paired-angle method in this guide matters more than the number of photos you take.
The third test is support. The Deposit Protection Service says a check-in report that is not signed and is not supported by photographs is unlikely to carry sufficient evidential weight. The Tenancy Deposit Scheme recommends reports as locked PDF documents with all photographs dated digitally, and says photographs are best used as an addition to, not a substitute for, the written word. The scheme also says photos should be clearly labelled with the date, the time, the room, and briefly what the photograph aims to show. A photo with a label beats a photo without one, every time.
Put the three tests together and the standard is plain. Dated, labelled, paired with a matching shot, and backed by the written inventory. That is the whole method. The rest of this guide is how to produce it without spending a weekend on it.
What should you photograph in each room?
Start before you unpack a single box. Photograph the empty rooms first, then the details. An empty room gives the adjudicator the full picture. A close-up gives them the proof. You need both, and the table below is the shot list to work through. It takes about half an hour in a two-bedroom flat, and it is the best half hour you will spend on the tenancy.
| Room or area | Wide shots | Close-ups and detail | What to note |
|---|---|---|---|
| Entrance and hall | Both ends of the hall, front door from inside | Door frame, locks, paint scuffs, flooring joins | Existing marks on the door and walls |
| Living room | Each corner looking across the room | Walls behind where furniture will sit, carpet stains, curtains | Marks hidden by sofas and shelves |
| Kitchen | Full run of units, both directions | Worktop chips, hob, sink, inside the oven and fridge | Appliance condition and any missing shelves |
| Bathroom | Whole room from the door | Grout, sealant, taps, toilet base, shower screen, extractor fan | Mould, limescale and cracked tiles |
| Bedrooms | Each corner, wardrobe doors open and shut | Walls, carpet edges, window frames, built-in furniture | Fading, marks and any damp patches |
| Windows and doors | Each window from inside the room | Handles, locks, seals, cracked panes, condensation | Which windows open and which stick |
| Garden and outside | Whole garden, fences, shed, bins area | Broken fence panels, paving, gate hinges, drains | State of lawns and planting at move-in |
| Meters and safety | Each meter with its reading visible | Smoke alarms, carbon monoxide alarm, boiler display | Readings, alarm test button, boiler error codes |
Two rooms deserve extra care. In the kitchen, open the oven and the fridge and photograph inside them. The competitor guides mention appliances, but few tell you to photograph the inside of the oven, and that is where cleaning deductions are most often argued. In the bathroom, photograph the grout and the sealant around the bath. Mould on sealant is the classic check-out row, and a dated photo of the same sealant at check-in ends it.
Photograph the walls behind furniture too, before the furniture goes in. Once your sofa is against a wall, you cannot prove the scuff behind it was already there. The same goes for floors under beds and rugs. Move-in day is the only day the flat is empty. Use it.
Take a short narrated video walkthrough as well, room by room, naming each room as you enter it. Video is a useful backup, but it does not replace still photos. An adjudicator can compare two stills side by side in seconds. Scrubbing through a video to find the same wall takes far longer, and a long video may never be watched in full. Shoot the stills first, then the video.
How does the paired-angle method work?
The paired-angle method is simple. You photograph each wall and each feature from the same spot at check-in and again at check-out, so the two pictures can sit side by side and the adjudicator can see at a glance whether anything changed. A single photo says “this mark existed”. A pair says “this mark existed, and nothing changed”. The second claim is the one that wins.
Most tenants take plenty of move-in photos and almost no check-out photos from the same angles. That is the mistake this method fixes. It costs nothing extra. It only needs a little discipline on the day you move out, when you are tired and in a hurry. Do it before the removal van arrives, not after.
- Pick your fixed points on move-in day. Stand in each corner of a room and take one wide shot across it. Those four corners are your fixed points. Write them down if you need to, for example “living room, corner by the window” and “living room, corner by the door”.
- Shoot wide first, then close. From each fixed point, take the wide shot, then step closer and photograph any mark or fault in that view. The wide shot shows where the mark is. The close-up shows what it is. Neither works alone.
- Mark the spot in the photo. Put a coin, a key or your hand next to a mark for scale. A stain with nothing beside it could be the size of a coin or the size of a dinner plate. Adjudicators notice scale, and a coin costs you nothing.
- Keep the camera at the same height both times. Hold the phone at chest height for wide shots and at the mark’s height for close-ups. If the check-in shot is taken standing and the check-out shot is taken crouching, the pair is harder to compare, and harder to compare means weaker evidence.
- Repeat the exact shots at check-out. Go back to the same four corners, in the same order, and take the same wide shots. Then re-photograph every mark you recorded at check-in, from the same distance. If a mark is unchanged, the pair proves it. If something is new, photograph it too, and say so in your note.
- Name the files so the pair is obvious. Use names like “living-room-corner-window-check-in.jpg” and “living-room-corner-window-check-out.jpg”. An adjudicator who can find the pair in seconds will actually look at it. A folder of files named IMG_4821 to IMG_4903 will not get the same attention.
- Put the pairs side by side in your dispute bundle. When you send evidence to the scheme, place each check-in photo next to its check-out match, with a one-line caption under each pair. Do not make the adjudicator hunt for the comparison. The work you do here is the work that wins the point.
The same thinking applies to work done during the tenancy. If a tradesperson repairs something, photograph it before and after, from the same angle. Our guide to the builder and tradesperson photo check uses the same before-and-after pair idea, and it is the same reason: a pair proves a change, a single photo only proves a moment.
What is the one-week evidence routine?
Photos on your phone are not evidence yet. They become evidence when they are dated, labelled, and in someone else’s inbox. The one-week routine does that in an evening. Do it in your first week, while the move-in is still fresh, and the rest of the tenancy takes care of itself.
- Photograph before you unpack. On move-in day, work through the room-by-room shot list while the flat is still empty. Turn on your phone’s date stamp, or check that the date and time are set correctly. Keep the original files. Do not edit, crop or filter them.
- Annotate the inventory the same day. Read the inventory the agent gives you, line by line, and add every mark your photos show that the inventory missed. Write the additions in plain words, with the room and the photo file name beside each one. Sign the inventory only when it matches what your photos show. If the agent pressures you to sign a thin inventory on the spot, write “signed subject to the photos emailed on” and add the date.
- Email the full set to the landlord or agent within the week. Send one email with the photos attached, or a link to a shared folder if the set is large. List the rooms covered in the email body, and ask the landlord to confirm receipt. This email is the most important step in the whole routine. It gives your photos an independent date, one that no one can argue with, because the landlord’s own inbox holds it.
- Keep the reply, or the silence. If the landlord replies, keep the reply. If they do not reply, the sent email still stands as proof they received the set. Do not resend the photos as a fresh email weeks later. That creates a second date and muddies the record. One email, one date, kept safe.
- Store copies in two places. Keep the originals on your phone and a copy in cloud storage or on a second device, along with the sent email. A lost or broken phone in month eleven should not wipe out your evidence. Back it up the same week you take it.
- Repeat the set at check-out. On your last day, before you hand back the keys, walk the same route with the paired-angle method and email the check-out set the same day. The two emails, a year or two apart, are the frame the adjudicator reads your case inside.
One warning about dates. A reverse image search cannot tell you when a photo was taken, and it cannot rescue an undated set. The worked example near the end of this guide proves it with a real test. That is why the emailed set matters so much. The email header is dated by the landlord’s own server, not by your phone, and that date is what turns a folder of pictures into evidence.
Protecting the photos themselves matters too. Your move-in set is personal evidence, and it should not end up in the wrong hands. Our complete guide to protecting your photos online covers how to share image sets safely, what to blur before you send anything, and how to keep copies out of public image indexes.
How does deposit protection differ across the UK?
The photographic method is the same everywhere in the UK. The deposit rules around it are not. England and Wales, Scotland and Northern Ireland each run their own schemes, with their own deadlines, their own caps and their own penalties. The table below states which part of the UK each row describes, so you can check your own position and ignore the rest.
| England and Wales | Scotland | Northern Ireland | |
|---|---|---|---|
| Approved schemes | Three: Deposit Protection Service, mydeposits, Tenancy Deposit Scheme | Three, all custodial: SafeDeposits Scotland, Letting Protection Service Scotland, mydeposits Scotland | Two: MyDeposits Northern Ireland, Tenancy Deposit Scheme Northern Ireland |
| Deadline to protect the deposit | Within 30 days of the landlord receiving the money | Within 30 working days of the tenancy starting | Within 28 days of receiving the deposit |
| Deadline to give the tenant the prescribed information | Within the same 30 days | Within the same 30 working days | Within 35 days of receiving the deposit |
| Deposit cap | Five weeks’ rent, or six weeks if annual rent is £50,000 or more | Two months’ rent | One month’s rent |
| Penalty if the landlord misses the deadline | A court can order one to three times the deposit paid to the tenant | The First-tier Tribunal for Scotland can order up to three times the deposit | A fixed penalty of up to three times the deposit |
| Dispute route | Free dispute resolution service run by the scheme; adjudicator decides on the papers only | Free adjudication through the scheme; tribunal route for unprotected deposits | Free dispute resolution service run by the scheme |
The figures in this table come from GOV.UK for England and Wales, from mygov.scot for Scotland, and from nidirect for Northern Ireland. In England and Wales, the deposit must be protected in one of the three government-approved schemes within 30 days of the landlord receiving the money, and the prescribed information must also be given within the same 30 days, according to GOV.UK. The deposit is capped at five weeks’ rent, or six weeks if the annual rent is £50,000 or more, under the Tenant Fees Act 2019. If the landlord misses the deadline, a court can order one to three times the deposit paid to the tenant under the Housing Act 2004, section 214.
Scotland works on working days, not calendar days. The deposit must be protected within 30 working days of the tenancy starting, and the cap is two months’ rent. The First-tier Tribunal for Scotland can order up to three times the deposit, under the Tenancy Deposit Schemes (Scotland) Regulations 2011. Northern Ireland is tighter still on the deposit itself: the cap is one month’s rent, the deposit must be protected within 28 days of receipt, and the required information must be given within 35 days. The fixed penalty there can reach three times the deposit.
One recent change is worth noting. The Renters’ Rights Act 2025 brought its main provisions into force on 1 May 2026 in England, so most private tenancies became assured periodic tenancies and Section 21 no-fault eviction ended. Deposit protection rules continue unchanged. Your photos matter just as much under the new rules as they did under the old ones.
If you want the official wording, GOV.UK’s tenancy deposit protection page sets out the England and Wales rules, the three schemes and the dispute service in one place. The Tenancy Deposit Scheme’s own site publishes the scheme’s evidence guidance, including the advice on dated, labelled photographs that this guide follows.
What is fair wear and tear, and what do you do when the landlord claims?
Fair wear and tear is the slow, ordinary change that happens when a home is lived in normally. Carpet flattens where people walk. Paint scuffs near light switches. A kitchen worktop fades near the window. None of that is damage, and none of it can be charged to a tenant. Damage is different. A burn on a worktop, a door kicked off its hinges, a red wine stain across a new carpet. The line between the two is where most deposit disputes live, and your paired photos are what let the adjudicator draw it.
Three things push a mark towards fair wear and tear. The first is time: a carpet that has seen three tenancies will look worse than a new one, and the landlord cannot charge you for the age of the thing. The second is use: a mark in a high-traffic spot, like a hallway, is expected wear. The third is quality: cheap paint and thin carpet wear faster, and that is the landlord’s choice, not your fault. Say all three in your dispute reply, with the paired photos beside each point.
When the landlord claims a deduction, ask for their evidence before you argue. Ask for the check-in photo, the check-out photo and the quote for the repair. Compare their check-in photo with yours, angle for angle. If their check-in photo shows the same mark your photo shows, the claim fails at the first step, because the landlord has not proved the condition changed. If they have no check-in photo at all, say so plainly in your reply. Remember the burden: it is on them, not you.
Then reply through the scheme’s free dispute resolution service, not by email argument. Attach your pairs side by side, with one-line captions, and keep the reply short. Point at the photos, not at the landlord’s motives. Adjudicators decide on the papers, and a short, photo-led reply is easier to decide in your favour than a long, angry one.
One more check is worth doing if the landlord’s paperwork looks odd. Landlords sometimes present documents that do not stand up, and a photo check can expose them. Our guide to fake tenant documents explains the detection signs, written for landlords, and it is useful reading for a tenant who wants to know what genuine paperwork should look like.
Worked example: what a reverse image search proved, and what it could not
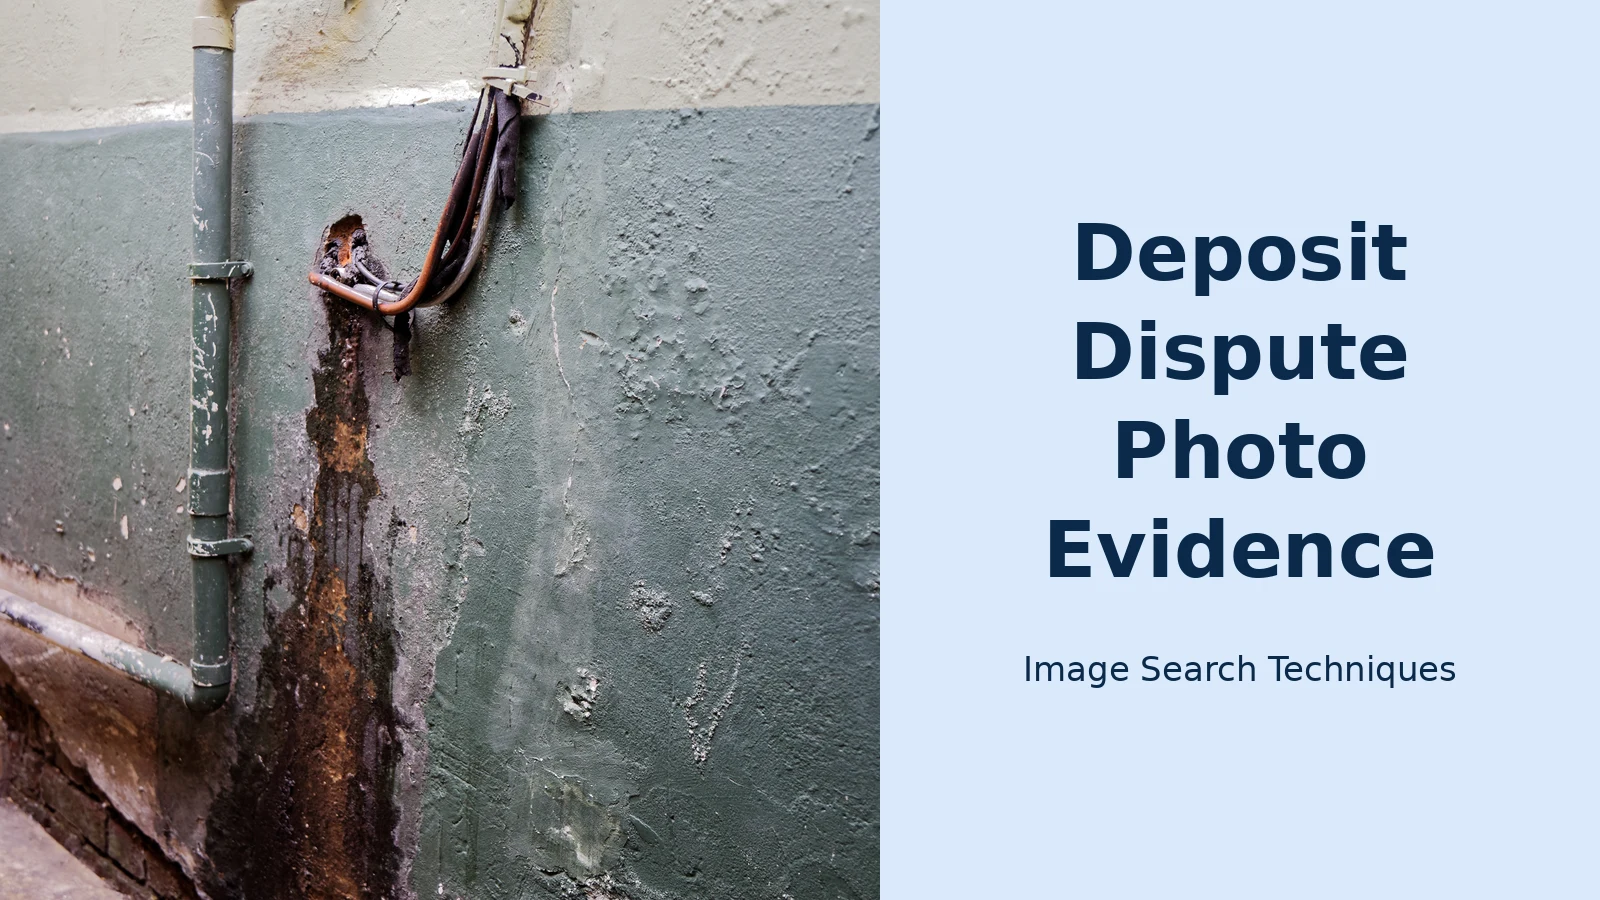
Could a reverse image search rescue an undated set of move-in photos? That is the question this test answers. On 13 November 2026, between 23:34 and 23:39 UTC, I ran a real damage photo through the site’s own free reverse image search tool at imagesearchtechniques.co.uk, to see whether any engine could date it. The photo was a Wikimedia Commons image, “A water damaged public house wall in Broadstairs Kent England”, licensed CC BY-SA 4.0, by Acabashi, taken on 6 August 2016, sized 2000 by 3000 pixels. The direct file URL was pasted into the tool.
The tool itself worked well. Pasting the URL loaded the image preview at 2000 by 3000, with no sign-up and no sign-in. One quirk: the “Search All Selected Engines” button opened only the Google tab, and the other engines had to be clicked one by one. That is a small flaw, but it did not stop the test.
Google, through Google Lens, failed completely. Lens showed a “Thinking” AI overview that never produced results, then “Expired visual search”. Two fresh sessions both gave “Something went wrong, No image at the URL”. There was no CAPTCHA. The Commons source was not found, and the search returned zero results.
Bing worked, after a fashion. It converted the image to the text query “How To Identify Water Damage In Walls”, with 1,400 results. Its “Pages with this image” list held exactly two pages: blog.meltblowntechnologies.com, at 2000 by 3000 and dated 24 January 2021, and tst-rakennus.fi, at 400 by 600 and dated 28 May 2020, the earliest date Bing showed. The Commons source was not found.
Yandex worked best. It found the image in 14 sizes, including the original 2000 by 3000. Its Sites tab listed 16 pages and did find the Wikimedia Commons source page, seventh in the list, alongside reusers including centerkv.ee, bytf.ru, liveinternet.ru and blog.meltblowntechnologies.com. No dates were shown, and there was no CAPTCHA.
TinEye worked too. A brief automatic Cloudflare “Verifying” check cleared on its own in about 15 seconds. TinEye reported 8 results, having searched 86.7 billion images, with the first indexed on 22 September 2019. Oldest first, the results were blog.meltblowntechnologies.com on 22 September 2019, neworldinsure.com on 16 November 2019, stoprestoration.com on 10 November 2021 twice, and thespruce.com on 3 August 2022 four times. The Commons source was not among the 8 results.
Pinterest was not a reverse image search at all. The tool’s Pinterest button opens a plain keyword search for the host domain, returning 29 unrelated pins. None of them was the target image.
The lesson is plain, and it is the reason this guide insists on the emailed set. Only Yandex found the Commons source. TinEye’s earliest date was 2019. Bing’s earliest was 2020. Google found nothing. And no engine returned the photo’s real capture date of 6 August 2016. A reverse image search can show where a photo has appeared online, but it cannot prove when a photo was taken. The emailed set, with its independent date, is what turns photos into evidence.
Can a photo on its own win a deposit dispute?
A single photo rarely settles a dispute on its own. Adjudicators weigh the whole set: the inventory, the dated check-in photo, the matching check-out photo and the landlord’s own evidence. One strong pair, a clear date and a short written note carry far more weight than a folder of loose pictures with no dates and no matching shots.
Do my move-in photos need a date stamp?
Yes, in practice. The schemes say undated photos cannot be verified as taken on the check-in date, so an adjudicator may give them little weight. Use your phone’s date stamp, keep the original files with their metadata intact, and email the set to your landlord within the first week so the sent date backs up the photos.
What if my landlord never replied to my emailed photos?
A reply is helpful but not required. The sent email is the record: it proves the landlord received the photos and when. Keep the sent message, the attachments and any read receipt in a safe place. If a dispute follows, send the adjudicator the email itself, not just the photos, so the date is beyond argument.
How long should I keep my move-in photos?
Keep them for at least two years after the tenancy ends, and longer if a dispute is open. Deposit disputes can start weeks after you move out, and the landlord has time to raise a claim once the tenancy ends. Store the originals and the email you sent in two places, so one lost phone cannot wipe out your evidence.