🔎 Reverse Image Search
Image search techniques made simple: upload a photo or paste a URL and search 6 engines at once. 100% free, nothing stored.
🔒 Your image is never stored on our servers longer than 24 hours and is never shared.
Yes. To identify screw from photo evidence, take one shot of the drive head-on and one side shot with a ruler in the frame. Read the drive type, count the threads over 10 mm to get the pitch, then match the size. Never match a load-bearing, vehicle or brake fastener by photo alone. Take the part to the shop instead.
A screw falls out of a hinge, a bolt goes missing from a bed frame, or a flat-pack wardrobe arrives one fastener short. You need another one, but the hardware shop has drawers full of near-identical screws, and “a small silver one” does not narrow it down. A photo can close most of that gap before you leave the house. It can show the drive type, the head shape, the thread style and, with a ruler in the frame, the size. A lock photo works the same way: our guide to identify a door lock from a photo reads the faceplate, the cylinder and the key shape from two photos. What it cannot do is prove the screw is strong enough for the job, or that the thread is exactly right. This guide shows you how to get everything a photo can give you, how to check it with a reverse image search, and where to stop and take the old screw with you instead. The same photo-first pattern works for other small parts: our guide to identifying a tap cartridge from a photo walks through spline counts and measurements the same way.
What “identify screw from photo” means: working out a fastener’s drive type, head shape, diameter, length and thread from photographs of it, so you can buy the right replacement without guessing.
What can a photo actually tell you about a screw?
A photo is good at shapes and bad at exact numbers. That single fact decides what this method can and cannot do, so it is worth being clear about it before you start.
The same photo first method works for other small objects too. A key is identified the same way, from its stamp, its grooves and a catalogue, as our guide to how to identify a key from a photo shows. Our guide to how to identify a remote control from a photo uses the same photo-first method.
A clear head-on photo shows the drive type at a glance. A Phillips cross, a Pozidriv cross with its extra tick marks, a six-pointed Torx star, a hex socket and a square Robertson recess all look different once you know what to look for. The same photo shows the head shape: flat and countersunk, domed, pan, or a hex head that takes a spanner. A side photo shows whether the screw has a sharp point for wood or a flat end for a nut, whether the thread runs the full length or only part of it, and whether the thread is coarse or fine.
What a photo cannot show on its own is the exact size. A screw photographed with nothing next to it could be 3 mm across or 12 mm across. That is why every photo in this guide has a ruler or a coin in the frame. A photo also cannot prove the material or the strength grade. Stainless steel and zinc-plated steel can look identical in a picture, and the grade markings stamped on a bolt head are often too small to read in a photo. For a hinge, a handle or a bracket, that does not matter much. For anything that holds weight, holds a wheel on, or stops a car, it matters completely, and a photo is not enough. Our guide to identifying objects from a photo covers the same idea for anything you can photograph, and the same rule applies there too: a photo names the thing, it does not certify it.
How do you photograph a screw so it can be identified?
Most failed identifications are failed photographs. A blurry head-on shot in a dark drawer tells nobody anything. Five minutes of care here saves a wasted trip to the shop.
- Clean the screw first. Wipe off grease and dust with a dry cloth. A clogged drive recess hides the shape that matters most.
- Use a plain, light background. A sheet of white paper works well. Dark screws vanish against a dark bench, and a busy pattern confuses both people and search engines.
- Take the head shot straight on. Hold the phone directly above the head, not at an angle. The camera should see the full recess shape, with all four arms of a cross or all six points of a star visible.
- Take the side shot with a ruler in the frame. Lay the screw next to a ruler or a tape measure, thread facing the camera, with the zero mark lined up with the end of the screw. This one photo carries your diameter, your length and your thread count.
- Use bright, even light. Daylight near a window beats a phone flash, which blows out the metal and fills the recess with glare. If you must use a lamp, hold it to one side so the shadows fall across the thread and show its shape.
- Take a third photo of any markings. Bolt heads often carry tiny stamped numbers or letters, such as 8.8 or A2. Photograph them as close and as sharp as you can. They are the one clue that can name the strength grade, and they are the first thing a shop will ask about.
Save the photos at full size. Cropping and compressing them later is fine, but a reverse image search works best from the sharpest original you have.
How do you identify the drive type from a photo?
The drive is the shape cut into the head, and it decides which screwdriver or bit you need. It is also the easiest thing to read from a photo, because the shape is right there on the surface. Compare your head-on photo with the chart below, and look at the details, not just the general shape.
| Drive type | What it looks like in a photo | How to tell it apart | Where you usually find it |
|---|---|---|---|
| Slotted | One straight line across the head | Only one slot; the oldest and simplest drive | Old fittings, light switches, hinges |
| Phillips (PH) | A cross with rounded inner corners | Plain cross, no extra marks; sizes PH0 to PH3 | Household items, electronics, general use |
| Pozidriv (PZ) | A cross with four small tick marks at 45 degrees between the arms | The tick marks are the giveaway; a Phillips driver will slip in it and can damage the head | European furniture, flat-pack, electrical fittings |
| Torx (T) | A six-pointed star | Star shape, not a cross; sizes named T10, T15, T20 and so on | Cars, appliances, electronics |
| Hex / Allen | A six-sided hole | A plain hexagon; turned with an Allen key | Flat-pack furniture, bikes, machines |
| Robertson | A square hole | Square, not a star; common in Canada and on decking screws | Decking, timber work, Canadian products |
| Security Torx | A star with a small pin in the middle | The pin stops a normal Torx bit fitting | Public fixtures, electronics, anything tamper-resistant |
| Pentalobe | A five-pointed shape | Five points, not six; needs a special bit | Apple iPhones and MacBooks |
The classic confusion is Phillips against Pozidriv, and it is worth a closer look because it causes more stripped heads than any other mix-up. A Phillips screw has a plain cross with rounded inner corners. A Pozidriv screw has the same cross, plus four small radial tick marks set at 45 degrees between the arms of the cross. Pozidriv was patented by GKN in 1962 as an improved version of the Phillips drive, designed to take more torque without camming out, and its drivers are marked PZ followed by a size code from 0 to 5. A Phillips driver will often fit a Pozidriv screw and feel fine at first, then slip under load and chew the head. A Pozidriv driver jammed into a Phillips screw can tear the head out when you tighten it. If your photo shows tick marks, buy a Pozidriv bit. If it does not, buy Phillips. When you cannot see tick marks because the photo is soft, take the head shot again, closer and in better light, rather than guessing. A wrong guess costs you a ruined screw head and a return trip.
One more check from the head photo: the size of the drive. A PH2 bit is the everyday size for household screws, but a PH1 or PH3 will not sit properly in the same recess. If you can, photograph the screw next to a coin and note the head diameter in millimetres. The shop can match the bit size from that.
How do you work out the size and thread from a photo?
Size is three numbers: diameter, length and thread. A photo with a ruler in the frame can give you all three, if you measure the photo rather than guessing from it.
Diameter. Measure across the outside of the thread, not across the head. In your side photo, read the diameter off the ruler where the thread is widest. A metric bolt is named by that number in millimetres: an M6 bolt is 6 mm across the thread, and an M8 is 8 mm across. An imperial bolt under a quarter of an inch is named by a gauge number, such as #8, and larger ones by a fraction, such as 1/4 inch. The gauge numbers follow a simple formula, diameter in inches equals 0.060 plus 0.013 times the gauge number, so a #8 screw is 0.164 inches across, or about 4.2 mm.
Length. Measure from under the head to the tip. The one exception is a countersunk screw, which sits flush in its hole and is measured including the head. Read the length off the ruler in your side photo, and write it down in millimetres. Shops sell metric screws in 5 mm steps for the common sizes, so a reading of 24 mm means a 25 mm screw, and a reading of 19 mm means a 20 mm screw.
Thread pitch: the ruler method. Two bolts can share a diameter and still not fit the same nut, because their threads are spaced differently. This is the step most people skip, and it is the reason a new bolt sometimes spins freely in the old nut. Here is the method that works from a photo:
- Zoom into your side photo until you can see the individual thread peaks clearly.
- Pick a 10 mm stretch of thread on the ruler in the frame.
- Count how many thread peaks fall inside that 10 mm stretch.
- Divide 10 by the count. That is the pitch in millimetres. Ten peaks in 10 mm means a 1.0 mm pitch. Eight peaks means a 1.25 mm pitch.
- Compare with the standard coarse pitches. The ISO metric thread standard, ISO 261, sets the default coarse pitch for each diameter, and the common ones are worth knowing: M6 is 1.0 mm, M8 is 1.25 mm, M10 is 1.5 mm and M12 is 1.75 mm. If your count gives you one of those, you almost certainly have the standard coarse thread.
For imperial bolts, count the thread peaks along one inch instead. That count is the threads per inch, or TPI. A 1/4 inch bolt with 20 threads per inch is written 1/4″-20, and the same diameter with 28 threads per inch is 1/4″-28. The first is the coarse thread, the second is the fine thread, and they do not fit each other. A metric nut will never fit an imperial bolt even when the diameters look the same, so do not force it.
| Size | Diameter | Coarse pitch / TPI | Fine pitch / TPI | Closest match on the other system |
|---|---|---|---|---|
| M6 | 6 mm | 1.0 mm | 0.75 mm | 1/4 inch (6.35 mm), but the threads never match |
| M8 | 8 mm | 1.25 mm | 1.0 mm | 5/16 inch (7.94 mm), but the threads never match |
| M10 | 10 mm | 1.5 mm | 1.25 mm | 3/8 inch (9.53 mm), but the threads never match |
| #8 | 0.164 in (4.2 mm) | 32 TPI (UNC) | 36 TPI (UNF) | M4, but the threads never match |
| 1/4 inch | 0.250 in (6.35 mm) | 20 TPI (UNC) | 28 TPI (UNF) | M6, but the threads never match |
| 3/8 inch | 0.375 in (9.53 mm) | 16 TPI (UNC) | 24 TPI (UNF) | M10, but the threads never match |
The full list of diameter and pitch combinations is set out in ISO 261, the international standard for general purpose metric screw threads, which was last reviewed and confirmed in 2024. You do not need to read the standard itself. The table above covers the sizes a household will meet, and anything outside it is a specialist order anyway.
Printable size gauge. If you do not own callipers, print a size gauge and use it with the screw in your hand. Draw a row of circles on paper, labelled M3, M4, M5, M6, M8, M10 and M12, each circle exactly that diameter across, and a row of short lines 10 mm long marked off in 1 mm steps. Print at 100 percent scale, never “fit to page”, and check the print against a ruler before you trust it: the 10 mm line must measure exactly 10 mm. Then hold the screw over the circles until one matches the thread diameter, and lay the thread against the marked line to count the peaks. Keep the printout in your toolbox. It takes five minutes to make and it beats guessing every time. One warning: printer scaling is the weak point, so if the check line is off by even a millimetre, print again rather than trusting a wrong gauge.
How to identify screw from photo searches
Once you have good photos, a reverse image search can name the fastener for you, or at least point you at the right family. It works best when the photo is unusual: a security drive, an old imperial bolt, a furniture confirmat screw, or a head with a maker’s mark. It works worst on the most common screws, because a plain Phillips wood screw looks like ten million other plain Phillips wood screws.
Upload your head-on photo first. Google Lens is the free starting point, and it is built into the Google app on phones. The drive shape is the most distinctive feature, and the engines read it better than they read thread. Then try the side photo with the ruler. A ruler in the frame can confuse the engines, because they read the numbers as text, so crop the ruler out of the copy you search with and keep it in the copy you measure from. Our reverse image search guide explains the engines in detail, and our step-by-step how-to walks through the process on a phone and on a computer.
Worked example: a real set of screws run through the site tool
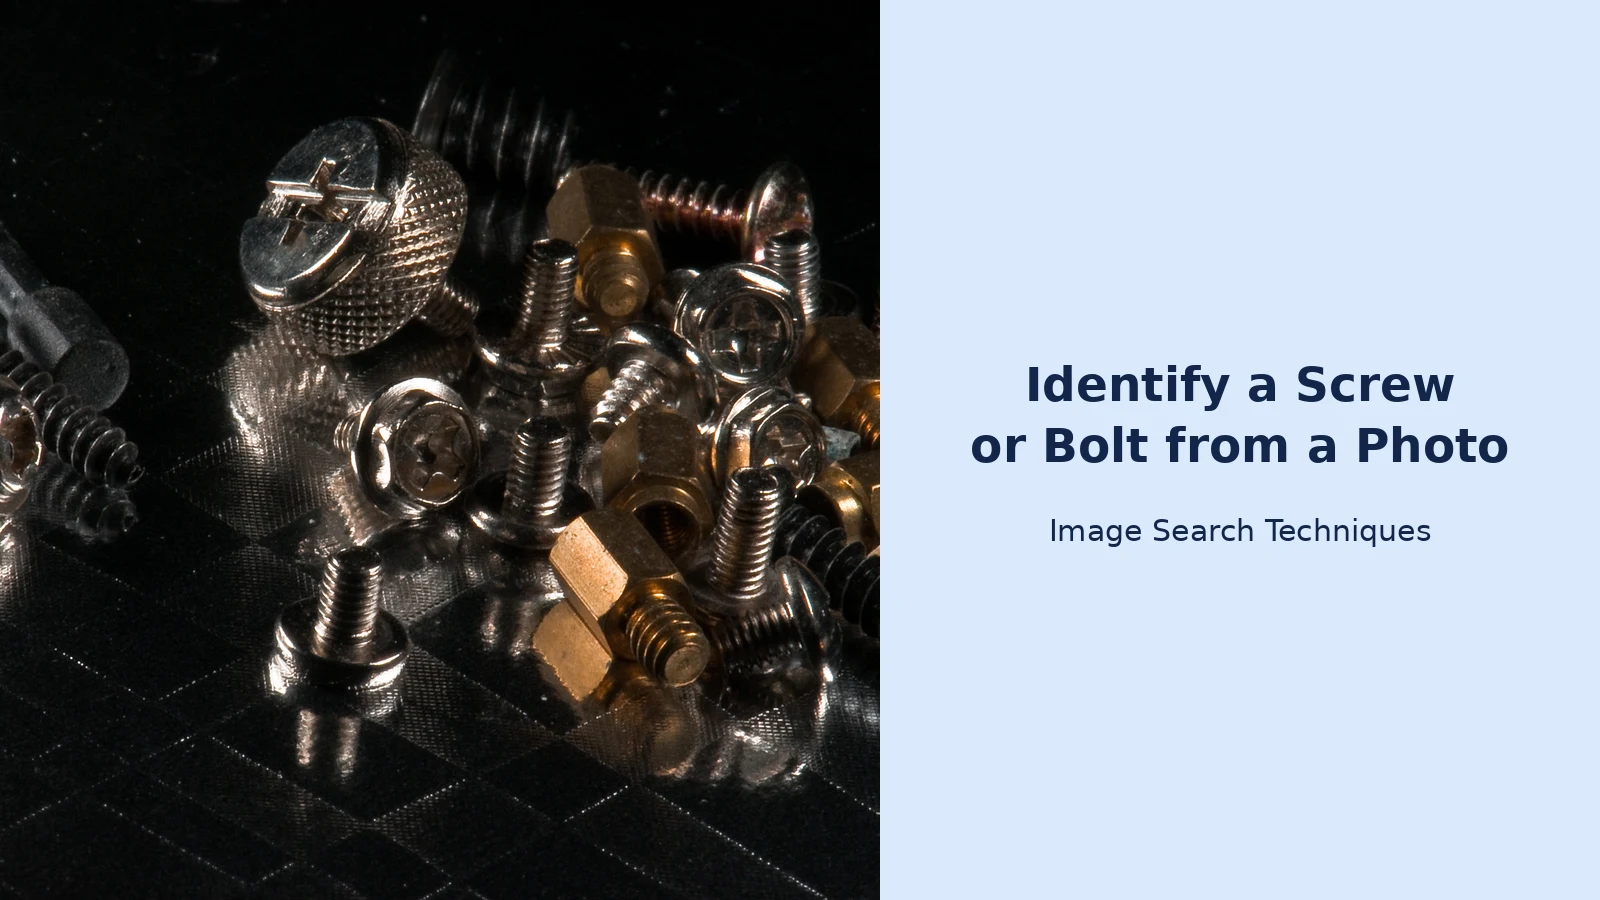
To show what actually happens, I ran a real photo through the reverse image search tool on this site on 13 November 2026. The photo was “Set of screws.jpg”, a 2008 Wikimedia Commons photo of an assortment of screws, bolts and nuts in different sizes and finishes, scattered on a dark surface. I pasted the photo URL into the tool and searched each engine. Here is what each one did, honestly reported.
Google Lens failed. After about 25 seconds the page stayed on “Thinking”, the AI Overview was blank, and the button read “Expired visual search”. Clicking “Visual matches” gave “Something went wrong” and “No image at the URL”. It named nothing, showed no results and did not find the original source. No CAPTCHA appeared. This is the same Lens failure this site has seen before with Wikimedia URLs, and it is a reminder that Lens is not reliable for every image.
TinEye found the exact source. It searched 86.7 billion images and returned one result: the Wikimedia Commons file, first indexed on 2 March 2015. It did not name the objects in the photo, but it proved the photo’s origin, which is exactly what TinEye is for.
Bing partly worked. It named the image “Screw And Bolt Assortment” and described it as an assortment of screws, bolts and nuts in various sizes and finishes, scattered on a reflective black surface. It reported 9,440 results and showed 12 visual-match thumbnails. But its “Pages with this image” tab said “Unable to find pages with this image”, so it never traced the photo back to Commons.
Yandex worked best for naming. Its tags included “set of screws” and the Russian word for fasteners. It listed the image in five other sizes and showed 15 similar-image thumbnails. Its Sites tab listed seven sites, including free-photos.biz and two Wikimedia Commons category pages, “Category:Screws” and “Category:Photographs by Dmitry Valberg”. It found the Commons categories, though not the exact file page in the list shown.
Pinterest did not search at all. The tool’s Pinterest button opened a keyword search for the image host’s domain and returned seven unrelated pins: a laptop graphic, an old couple’s photo, an Adobe advert, a word cloud, Ingrid Bergman, an Etsy stand and the Taj Mahal. None showed the screws, none named anything, and none found the source.
Two lessons came out of the test. First, no single engine does the whole job: TinEye proved the origin, Bing and Yandex named the contents, and Lens failed outright. Second, the tool’s “Search All” button opened only the Google Lens tab, so the other engines had to be opened one by one from the tool’s own buttons. Run at least two engines yourself, and trust your ruler over any single search result.
When a search engine names the fastener, treat the answer as a lead, not a verdict. Check it against your own measurements: does the named size match the diameter you measured, and does the drive match your head-on photo? If the two disagree, trust your ruler. A search result can also surface the manufacturer’s catalogue page, which is often the fastest route to the exact part number, and it can surface forum threads where someone has already solved the same puzzle, sometimes with the part number in the first reply.
What should you do once you think you know the size?
Identification is only half the job. Buying the wrong screw twice costs more than buying the right one once, so check your answer before you pay.
- Write the full description down. Drive, head shape, diameter, length, pitch and material. A complete description looks like this: Pozidriv, pan head, M5, 40 mm, 0.8 mm pitch, zinc plated. Hand that to the shop, and you will get the right drawer first time.
- Take the old screw with you if you can. A photo is a good backup, but the old screw is the test piece. Try it in the nuts on the shelf, or hold it next to the new one and compare the thread by eye. If the old screw is lost, take the part it came out of, or a clear photo of the hole it fits.
- Buy two, not one. Screws are cheap and dropping one behind a radiator is a certainty. A spare costs pennies and saves a second trip.
- Check the length before you fit it. A screw that is 5 mm too long will poke through the other side of a door or a shelf. A screw that is 5 mm too short will not bite. Hold the new screw next to the old one before you drive it in.
- Match the finish to the job. Stainless steel for bathrooms and outdoors, zinc plated for dry indoor use, brass where it will be seen. A photo cannot confirm the material, so read the packet, not the picture.
If you are buying online, a photo-led search is the other half of the job. Our guide to finding an item by image shows how to search by a photo and compare listings, which is useful when the local shop does not stock the size you need. Search with the full description from step one, not with a vague phrase, and check the listing photo against your own head-on shot before you order.
When should you stop and ask a professional instead?
Some fasteners are not a shopping problem. They are a safety problem, and no photo, however clear, can clear them.
Never match a load-bearing, vehicle or brake fastener by photo alone. That covers the bolts that hold a tow bar on, the bolts in a brake calliper, the fixings that hold a wall-mounted boiler or a heavy shelf, the bolts in a child’s car seat base, and anything on a roof, a ladder or a scaffold. For those, the strength grade, the material and the torque setting matter as much as the size, and a photo cannot prove any of them. Take the old part to a dealer or a specialist supplier, tell them exactly what it came from, and let them match it from their catalogue. If the part is missing entirely, ask the manufacturer, not a search engine.
The same caution applies to anything with a safety marking you cannot read. Bolt heads carry grade stamps such as 8.8, 10.9 or A2-70, and those numbers are the strength of the bolt. If your photo is too soft to read them, do not guess. A lower-grade bolt in a high-load job can stretch or snap, and the failure will not announce itself in advance.
Car bolts deserve a special note. A bolt from a car can look identical to a hardware shop bolt of the same size, and still be the wrong part, because car makers use fine threads, special coatings and specific grades that a general shop does not stock. Our guide to identifying a car part from a photo covers how to trace a car part properly, and the same approach applies here: identify the car first, then the part, then the fastener.
For everything else, a photo is a genuinely useful tool. A hinge screw, a bed bolt, a handle screw, a curtain rail fixing or a flat-pack cam lock can all be identified from two good photos and a ruler. Get the drive right, measure the thread properly, check the answer against a search, and you will walk out of the shop with the right screw on the first trip.
FAQs
Can you identify a screw from a photo alone?
Yes, for everyday screws, if the photo is sharp and has a ruler in the frame. The head-on shot names the drive, and the side shot gives the diameter, length and thread pitch. A photo cannot prove the material or strength grade, so for load-bearing, vehicle or brake fasteners, take the part to a dealer instead of trusting a picture.
How do you tell Phillips from Pozidriv in a photo?
Look for the four tick marks at 45 degrees between the arms of the cross. A Phillips head has a plain cross with rounded inner corners, while a Pozidriv head carries those extra marks. A Phillips driver will slip in a Pozidriv screw and can damage the head, so match the bit to the marks, not to the general shape.
How do you measure thread pitch from a photo?
Count the thread peaks across 10 mm of thread in a side photo with a ruler in the frame, then divide 10 by the count. Ten peaks means a 1.0 mm pitch, and eight peaks means 1.25 mm. Compare with the coarse pitches, M6 at 1.0 mm and M8 at 1.25 mm, check with a thread gauge or the nut.
What should you do if reverse image search cannot name your screw?
Fall back on your own measurements and take the screw to the shop. A head photo and the diameter, length and thread pitch are enough for the staff to match it, even when no search engine recognises it. Photograph the hole it came from, and note the material it fastens, since that decides the finish and the length you need.