


🔎 Reverse Image Search
Image search techniques made simple: upload a photo or paste a URL and search 6 engines at once. 100% free, nothing stored.
🔒 Your image is never stored on our servers longer than 24 hours and is never shared.
A hire car damage claim is only as strong as its photos. Ask for the hire car damage claim photos with timestamps, check the number plate and the pre-rental inspection report against your pick-up photos, and make the company prove the damage happened during your hire with a repair invoice. Do not pay until you have seen all of that.
The email usually arrives days or weeks after you handed the keys back. It has a claim number, a repair bill, and a few photos of a scratch or a dent you do not remember making. The tone is polite and final. The amount is large enough to sting and small enough that paying feels easier than arguing. That is exactly how these claims work. Most people pay without ever looking closely at the photos.
This guide is about the photos, not the legal process. You will learn how to read the claim photo set the company sends you, what an AI scanner report does and does not prove, how to check timestamps and metadata, and how to build your own evidence pack from the photos you took at pick-up and return. The dispute steps for the UK and the US are at the end, with the deadlines that actually matter. This is general information, not legal advice.
A hire car damage claim is a bill from a hire firm saying a vehicle came back damaged during your rental, supported by photos, an inspection report and a repair estimate. The photos are the evidence. If they do not prove the damage happened on your hire, the claim is weak, however official the letterhead looks.
What photos should arrive with a hire car damage claim?
The claim should come with a full photo set, not one close-up. Ask for it in writing if it does not arrive with the first letter.
A proper claim pack has five parts. First, the damage photos themselves, close enough to see the mark and wide enough to show where it sits on the car. Second, the same panel photographed before your rental, from the pre-rental inspection or the scanner record, so the two can be compared. Third, the pre-rental inspection report or damage diagram with the marks that were already there. Fourth, the return inspection record with the date and time it was made. Fifth, the repair estimate or invoice, itemised, so each charge can be checked against the photo.
If the company sends only one tight close-up of a scratch, you cannot tell which car it is, which panel it is on, or when it was taken. That is not evidence. It is a picture. Ask for the rest of the pack before you discuss money. In the UK, the BVRLA Rental Code of Conduct says members must provide photographic evidence of the damage plus a repair estimate or quote from the damage rate matrix to justify a charge, and that charges must be assessed in a transparent and proportionate way. The code was updated in January 2019 and still sets the standard its members are held to.
Keep every message. If the claim arrives by email, keep the email. If it arrives by text or through an app, screenshot the whole thread with the dates visible. You may need to show when each photo was sent to you, and a forwarded image with no date proves nothing.
How do you read the hire car damage claim photos they send?
Read the set in order: identity, time, place, then the damage itself. A photo that fails the first three checks cannot prove the fourth.
Work through the six checks in this table, one photo at a time. Do it on a large screen, not on your phone, and write down what each photo passes or fails. The table is the ranking asset for this article: the claim-photo read.
| Check | What to look for | What a fail means |
|---|---|---|
| 1. Is it your car? | The number plate or VIN visible in at least one wide shot, same make, model and colour as your rental agreement | A close-up with no plate proves nothing about your car |
| 2. When was it taken? | A timestamp on the image or in the file data, dated after your return and before the claim letter | No date, or a date before your hire, breaks the link to you |
| 3. Where is the damage? | A wide shot showing the panel and its place on the car, then the close-up of the same mark | A close-up alone cannot be matched to a panel |
| 4. Was it already there? | The same panel on the pre-rental report or the pick-up scanner images, and your own pick-up photos | A mark on the pre-rental record is not your damage |
| 5. Is the photo honest? | Sharp focus, normal light, no heavy cropping, the mark shown at real scale | Blur, glare or a tight crop can hide context or exaggerate a mark |
| 6. Does the bill match? | Each charge tied to a visible mark, with a repair estimate that names the panel and the work | A lump sum with no line items cannot be checked |
Start with identity. A scratch photo with no number plate, no VIN and no wide shot could be any car of the same colour. Ask for a wide shot of the same panel with the plate in frame. If the company cannot produce one, say so in your dispute letter and keep the request on record.
Then check the time. Ask for the original files, not screenshots of photos, because a screenshot strips the file data that carries the capture time. If the company sends only screenshots, ask for the originals by email and note the date you asked. A photo dated before your hire started cannot be your damage. A photo dated days after your return, with no return inspection in between, leaves a gap the company has to explain: who had the car in those days, and where was it parked?
Then look at the angles. A close-up of a scuff tells you nothing about scale. A coin, a key or a hand next to the mark helps, but the best proof is the pair: one wide shot showing the whole panel and one close-up of the mark itself. If the set has only close-ups, ask for the wide shots. If the wide shot shows the mark sitting exactly where the pre-rental diagram already marked a scratch, the claim fails on its own paperwork.
Watch for the common tricks of a weak set. Heavy glare across the panel can make a faint mark look deep. A photo taken at a sharp angle can make a shallow scuff look like a dent. A tight crop can hide the fact that the mark sits next to an older, larger repair. None of this proves the company is lying. It proves the photos are not enough on their own, and that is the point you make in writing.
If someone sent you a damage photo outside a hire claim, for example after a private sale or a bump in a car park, the same checks apply. Our guide to checking a car damage photo someone sent you walks through that version of the problem, where the photo is the whole case and there is no hire firm behind it.
What does an AI scanner report actually prove?
An AI scanner report proves the car looked different at two moments, if both scans exist and both are shown to you. It does not prove you caused the difference.
More hire firms now inspect cars with drive-through AI scanners instead of a person with a clipboard. Hertz uses UVeye, a system it calls Digital Vehicle Inspection, or DVI. The car is scanned as you leave and again when you return, and the system compares the before and after images. Hertz says the scan takes seconds, and at UVeye locations the customer gets a link to the inspection report by email or text, showing images from pick-up and return and any new damage found. Hertz announced the partnership in April 2025, starting at Atlanta airport, and by August 2025 CBS News reported the system was in use at 10 US airports, with more than 675,000 rentals scanned and more than 97 per cent showing no damage, according to Hertz. Hertz has published no full public list of which locations use the scanners, so check whether your airport had one before you assume a scanner was involved.
Sixt uses its own drive-through system, called Car Gate, at selected branches. The car is photographed automatically as it leaves and re-enters the branch, and the system compares the return photos with the pick-up photos. Sixt says trained staff review any suspected new damage and a case is only opened when damage is clearly identified as new, with the final assessment always made by staff. That last point matters: the scanner flags, a person decides.
Scanner reports have already produced wrong bills. In September 2025, Consumer Rescue reported a case where the scanner evidence itself proved Sixt had wrongly billed a customer 1,428 dollars for damage that was already there. A separate case recorded in the MIT AI Risk database involved a 1,659 pound bill for pre-existing damage flagged by a Sixt scanner. The pattern in both cases is the same: the machine compared two moments, and the earlier moment was wrong or missing.
Read a scanner report the same way you read the photos. Ask for both scans, pick-up and return, side by side, with the timestamps. Check whether the pick-up scan actually exists: if your branch had no scanner at pick-up, or the pick-up scan failed, the return scan has nothing to compare against, and a “new damage” flag means very little. Check whether the report shows the whole car or only the flagged panels. And check the fee: in the CBS report, one Hertz customer was billed 80 dollars for two small dents plus a 190 dollar processing fee. Processing fees are where small damage turns into a large bill, so ask for the fee to be itemised separately from the repair.
Some tools now let you run your own scan. Ravin, one of the companies that builds this software, offers a phone app that lets renters scan the car themselves before leaving the lot. It is not tied to any one hire firm, and it does not replace your own photos, but a self-scan at pick-up is better than no record at all. Do not take any hire firm’s word that its scanner is the only record that counts. Your photos are a record too, and the BVRLA code requires the firm to justify its charges with its own evidence, not just a machine verdict.
For the full picture of how the photo checks fit into the wider world of vehicle photos, our complete guide to checking suspicious photos covers the same reverse search and metadata techniques across every kind of photo claim.
How do you check the timestamps and metadata in a claim photo?
Ask for the original files, then read the capture date inside them, and never trust a date printed on a screenshot.
Every photo from a phone or a scanner camera carries file data called EXIF, which usually includes the date and time the photo was taken, the camera or device, and sometimes the location. When a hire firm emails you a photo, the file it attaches may still carry that data. When it sends you a screenshot of a photo, or a photo pasted into a PDF or a chat message, the data is usually stripped away, and all you have is the date the message was sent.
On a computer, right-click the file and open its properties or details to see the capture date. On a phone, open the photo in your gallery app and look at its details screen. If the capture date is missing, that is not proof of anything on its own, but it is a reason to ask for the original. Free online EXIF readers can do the same job: upload a copy of the file, not the original, and read the date and device fields.
Three things to check in the file data. First, the capture date and time: does it fall inside your rental, or after your return? Second, the device: does it match the scanner or the phone the firm says took the photo? Third, the editing history: some files record the software that last saved them, and a photo that has passed through an editor is not the original, even if the picture looks untouched.
Do not rely on metadata alone. File data can be wrong if a camera clock was set badly, and it can be stripped or changed. Use it as one check among several: the capture date, the return inspection time, your own photos, and the pre-rental report. When all four agree, the timeline is solid. When they disagree, the disagreement is your dispute.
Keep your own photos untouched. Do not crop, filter or re-save the pick-up and return photos you took, because each save can strip the file data that proves when you took them. Keep the originals in a separate folder, back them up, and send copies, never the only originals, to the hire firm or your insurer.
How do you prove the damage was already there?
The pre-rental inspection report is the single most important document in the whole dispute. If the mark is on it, the claim is over.
Under the BVRLA Rental Code of Conduct, members must make sure any pre-existing damage, such as scratches and dents inside and out, is clearly indicated on the pre-rental inspection report or the rental agreement. The customer must be given the chance to check and agree the condition of the vehicle before signing. If you were asked to sign before seeing the car, because it was in a car park some distance from the desk or it was a fast-track service, the member must tell you how to contact a representative to report any damage not recorded on the report. If the car was inspected in poor light or bad weather, you should have been told you could inspect it again as soon as practicable and report anything missing.
So the first thing to do when a claim arrives is to dig out your copy of that report, or ask the firm for its copy, and compare it mark by mark with the claim photos. Look at the damage diagram, not just the written notes. A small cross on the diagram over the same wing or bumper the claim photos show is often enough to end the argument. If the firm cannot produce the pre-rental report at all, that is a serious gap: the code requires the record to exist, and a claim without a starting point cannot show what changed.
Your own pick-up photos are the second line of defence. If you photographed the car before driving away, compare your photos with the claim photos panel by panel. A scuff visible in your pick-up photo, in the same place and the same shape, is pre-existing damage, whatever the claim letter says. Even a wide shot that shows the panel looking clean at pick-up helps, because it narrows the window in which the damage could have happened.
The third check is the wear and tear line. Not every mark is chargeable damage. Enterprise publishes a Damage Evaluator tool that its UK rental FAQ says is used so customers are not charged for every little scratch: any dent, hole or scratch smaller than the circles on the evaluator is not the customer’s responsibility. The numbers behind the circles are printed on Enterprise’s CarShare page in Canada: a dent or scratch on a body panel larger than a 2 inch circle counts as damage, and on a bumper the line is a 6 inch mark. The UK and US rental FAQ pages confirm the tool but do not print the numbers, so treat the 2 inch and 6 inch figures as Enterprise’s published standard, not as a rule every firm follows. Other firms have their own thresholds, and many do not publish them at all. If the claim is for a tiny door ding or a hairline scratch, ask the firm to state its own wear and tear standard in writing and show how the mark exceeds it.
Also ask for the vehicle’s recent history. If the same panel was repaired or claimed on before your rental, the damage may predate you. Firms are not always quick to hand this over, but putting the request in writing creates a record, and a firm that cannot show the car was clean at pick-up has a weak claim.
What does each charge on the bill mean?
Read the bill line by line, and challenge any line that has no photo and no estimate behind it.
| Charge | What it should be | What to ask |
|---|---|---|
| Repair cost | The cost of fixing the specific damage shown in the photos, with parts and labour itemised | Ask for the repair invoice or two independent estimates |
| Admin or processing fee | A fee for handling the claim, usually a flat amount | Ask for the amount to be stated separately and justified |
| Loss of use | Revenue lost while the car was off the road being repaired | Ask how many days the car was actually in the workshop, and at what daily rate |
| Diminished value | The claim that the car is worth less after repair, even when fixed | Ask how it was calculated; some US states limit or bar this charge |
The repair cost is the only line that should be large, and it should be tied to the photos. Ask for the final paid invoice, not just an estimate, and check that the panel named on the invoice is the panel in the photos. If the firm used its own in-house repair shop, ask how the price was set, because there is no competitive quote to check it against.
Loss of use is the line most often inflated. A car sitting in a yard waiting for a repair slot is not a car being repaired, and the firm should only charge for the days it was actually out of service. Ask for the workshop dates and the daily rate, and check the rate against the daily hire rate you paid. Some US states limit loss of use and admin charges by law, so check the rules for the state where you hired the car before accepting the figure.
Diminished value is the hardest charge to justify on a hire car, and it is not charged everywhere. If it appears on your bill, ask for the calculation in writing and check whether the law where you hired the car allows it. Do not accept a percentage of the car’s value with no workings shown.
Add the lines up yourself. Bills with a large round total and no breakdown are the ones to challenge first. A firm that can show its workings is usually a firm with a real claim. A firm that cannot is usually hoping you will not ask.
How do you build your own dispute evidence pack?
Your pack is the counter-set: your pick-up photos, your return photos, and the paperwork, in date order, with nothing edited.
Build it as soon as the claim arrives, while the dates are fresh. The pack has six parts, and each one answers a question the firm will ask.
| Part of the pack | What it proves |
|---|---|
| 1. Your pick-up photos and video | The condition of the car when you took it, with timestamps |
| 2. Your return photos and video | The condition of the car when you gave it back |
| 3. The pre-rental inspection report | What the firm itself recorded as already damaged |
| 4. The rental agreement | The car, the dates, the excess and the cover you bought |
| 5. The claim letter and every photo the firm sent | What they allege, and when they alleged it |
| 6. Your written dispute and their replies | That you challenged it in writing, and what they said back |
If you did not take photos at pick-up, build the pack anyway. The pre-rental report, the agreement and the claim letter are still evidence, and the absence of a return inspection is itself a point in your favour. For the next hire, make the walkaround a habit: four corner shots, each side, the bumpers, the wheels, the windscreen, the roof edge, the dashboard with the mileage, and a close-up of any mark you find, all with the number plate in at least one frame. Photograph the signed condition report too. Two minutes at pick-up and two minutes at return is the cheapest insurance you will ever buy.
Keep the originals. Send the firm copies, and keep a note of what you sent and when. If you later need your card issuer, a regulator or a conciliation service to look at the case, a tidy pack with dates is far more persuasive than a phone full of unsorted pictures.
The same discipline applies to other photo evidence. If you ever need to prove the state of a property you stayed in, the method is identical: timestamped arrival photos matched against the listing photos. Our guide to checking a virtually staged property photo shows how listing photos can mislead, and the same side-by-side comparison works for a hire car. And if the claim came after a rental property stay rather than a car hire, the checks in our rental listing photo guide cover the deposit side of the same problem.
Worked example: a real damaged hire car photo, reverse searched
A reverse search is only as good as the index behind it, and a zero result does not clear a photo.
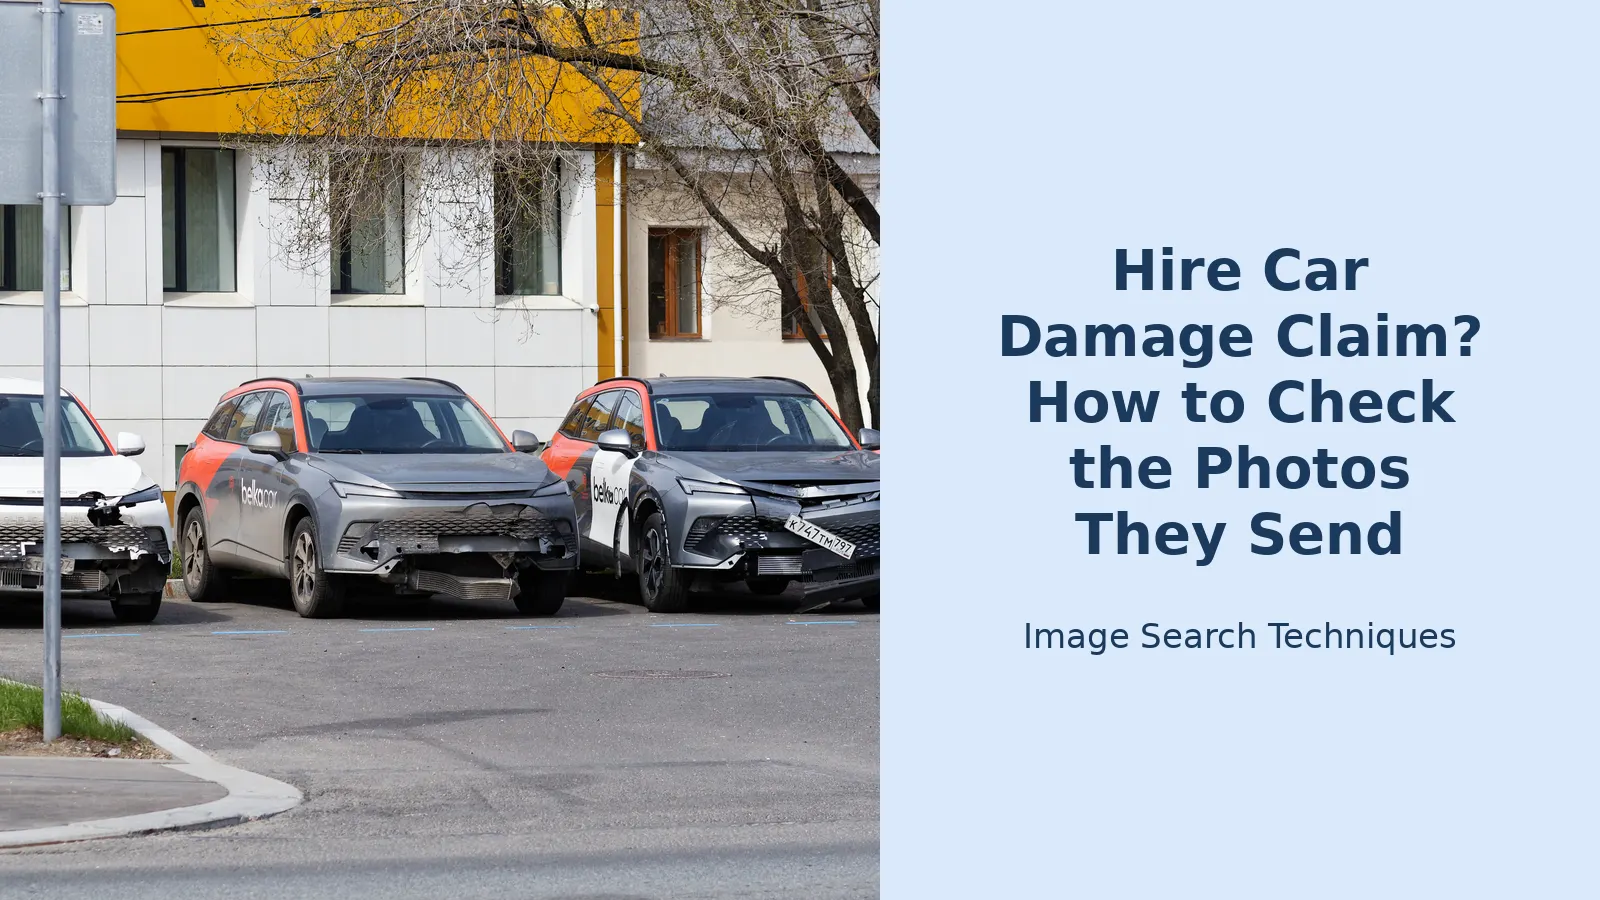
To show how the checks work in practice, I took a real public photo of damaged rental cars and ran it through a reverse image search on 14 November 2026. The photo is a close front view of a white BelkaCar carsharing car with a smashed front bumper and grille, photographed in a Moscow parking lot alongside other damaged cars from the same fleet. It is published on Wikimedia Commons under a CC0 public domain dedication, by the photographer “Retired electrician”, taken at 11:54 on 21 April 2026 on a Canon EOS Rebel SL1 at 200 millimetres, f/6.3, ISO 200, and saved through Adobe Photoshop 26.5. The file is 3,411 by 2,558 pixels and 1.84 megabytes. The banner photo for this article comes from the same series, taken four minutes later in the same lot.
I searched the photo on TinEye first. TinEye searched more than 86.7 billion images and found no matches at all. That sounds reassuring, and it is not. TinEye did not even return the Wikimedia Commons page where the photo is published, which means its crawl had not reached that page yet. A zero on TinEye here means the photo was not in TinEye’s index, not that it has never been used anywhere. A hire firm could be using this photo, or a crop of it, on a page neither engine has indexed, and TinEye would still say zero.
Google Lens was no help at all on this photo. I tried five times, with the direct image link, a smaller thumbnail link and the Commons file page link. Each time Lens either expired before the results loaded or reported that there was no image at the URL. No Lens match count exists for this photo, so this article reports none. A failed search says nothing about the photo. It says something about the tool on that day.
What does this example teach? Three things. First, always run both engines, because one can fail while the other works. Second, read the result properly: a zero with no source page returned is a crawl gap, not a clean bill of health. Third, the file data matters as much as the search: the date, the camera and the licence on the Commons page told me more about this photo in one minute than the search engines did in five attempts. When a hire firm sends you a claim photo, ask for the original file and read it the same way. If the firm cannot provide it, that gap goes in your dispute letter.
If the claim you received is your own insurance claim rather than the hire firm’s, the process is different: you are proving your own damage, not disputing theirs. Our guide to verifying insurance claim photos covers that side, including how insurers check the photos you submit.
How do you dispute a hire car damage claim, step by step?
Dispute in writing, in order, and keep the deadlines: 14 days to write, 120 days for chargeback in the UK, 60 days for a billing dispute in the US.
Step 1: do not pay yet, and do not ignore the letter. Write to the hire firm within 14 days of receiving the charge, asking for the full claim pack: the pre- and post-rental reports, the original claim photos with timestamps, and the itemised repair invoice. Civil Help, a UK consumer advice site reviewed on 13 November 2026, gives the same advice and notes that the company must show the damage existed, that it was caused during your hire, and that the repair cost is reasonable.
Step 2: compare the pack against your own photos and the pre-rental report, using the six checks in the table above. Write down every gap: a missing wide shot, a date that does not fit, a mark already on the pre-rental diagram, a charge with no invoice. Send your dispute in writing, by email so you have a record, and list each point separately with the evidence attached.
Step 3, UK: if the firm will not budge, use the BVRLA Conciliation Service. It is free, and it covers disputes with BVRLA members, which includes most large UK hire firms. Complain to the firm first and give it a reasonable time to answer, then submit to the BVRLA online. The BVRLA looks at the evidence from both sides and issues a recommendation, which is not legally binding, but firms take it seriously. The BVRLA code also requires members to tell you the steps for disputing a charge, so if the firm never did, say so.
Step 4, UK, money back: if the firm has already taken money from your card, you have two routes. Section 75 of the Consumer Credit Act makes your card issuer jointly liable with the supplier where a single item cost more than 100 pounds and up to 30,000 pounds, so a hire paid by credit card in that band can be claimed from the issuer. Chargeback is the faster route for debit cards and for smaller sums: Which? says there is typically a 120 day limit from the transaction date, so act as soon as you spot the charge. The Consumer Rights Act 2015 also helps: section 49 says a service must be performed with reasonable care and skill, and an unfair or disproportionate charge is not binding.
Step 3, US: the routes are different but the order is the same. First the firm’s customer service, then the Federal Trade Commission at ReportFraud.ftc.gov and your state attorney general, which is the route the FTC’s own “Renting a Car” advice gives. If the firm has already charged your card, the Fair Credit Billing Act gives you the right to dispute it in writing: the Consumer Financial Protection Bureau says the written billing error notice must reach the card company within 60 calendar days after the charge appeared on your statement. The issuer must acknowledge within 30 days and resolve the dispute within 90 days, and while it investigates you can withhold payment on the disputed amount. If the charge appeared on an old statement, check whether you are still inside the 60 day window, because claims that arrive months after the rental are the ones that most often miss it.
Step 4, either country: report fraud only if you suspect fraud. In the UK, Report Fraud is the national service for cyber crime and fraud, and it covers England, Wales and Northern Ireland. A disputed damage charge is not fraud just because you disagree with it. Report it there only if you have reason to think the claim is fabricated, for example photos that belong to another car or another customer. In the US, the FBI’s Internet Crime Complaint Center takes the same kind of report for cyber enabled crime, and it is not a general rental complaints service either.
If the claim goes to a collection agency, do not panic and do not pay on the phone. Ask for the debt in writing, dispute it in writing within 30 days of the first notice, and make the agency prove the debt with the original agreement, the repair invoices and the condition reports. A collector that bought the debt often does not have that paperwork.
The two official sources behind this section are the BVRLA’s own Codes of Conduct, which set the standard for UK hire firms, and Hertz’s own explanation of Digital Vehicle Inspection, which shows how its scanner reports are built and what they contain.
What mistakes make a good dispute fail?
The three mistakes that lose disputes are paying first, arguing by phone, and throwing your own photos away.
Paying first is the most common. Once the money is gone, the firm has no reason to negotiate, and getting it back means a card dispute with a deadline. If you feel pressured, write instead: a short email asking for the full claim pack costs nothing and starts the paper trail.
Arguing by phone is the second. Phone calls leave no record unless you write down what was said, and firms can deny a promise made on a call. Use email for everything that matters, and after any call, send a short email summarising what was agreed.
The third is losing your own evidence. People delete the pick-up photos once the holiday is over, or they let a phone back-up overwrite the originals with edited copies. Keep the originals until at least three months after the rental, and longer if a claim is open. Claims can arrive weeks after you return the car, and by then the photos are the only witness you have.
Two more traps to avoid. Do not sign a blank or unchecked inspection report at pick-up, and do not return a car out of hours without photographing it first. The BVRLA code says that if you return a car unattended, you stay liable for any damage found afterwards but not noted on the report, and the firm must make a note that you were not present. Your own return photos are the only answer to that note.
And do not assume a clean scanner report clears you, or a flagged one convicts you. A scanner compares two moments. If the first moment was wrong, the comparison is wrong. Ask for both scans, and read them like any other photo.
How long does a hire company have to send a damage claim?
There is no single deadline. In the UK, the BVRLA code says a member must notify a customer who was not present at the return inspection within 10 days, and must notify you before debiting your card. Claims that arrive months later are harder for the firm to prove. Check your agreement for its own time limit.
Can a hire company charge my card without telling me first?
It should not. The BVRLA code says the customer must be notified of end-of-rental charges before they are debited from the payment method. If money was taken without notice, ask the firm for the claim pack, then speak to your card issuer about chargeback or a Section 75 claim. US readers have 60 days under the Fair Credit Billing Act.
What if I returned the car out of hours and nobody inspected it?
You stay responsible for the car until the hire station reopens and checks it in. Your protection is your own return photos, taken in the drop-off bay with the time and the number plate visible. Ask the firm for the check-in photos and their timestamps, and compare them with yours before you accept any charge.
Does a clean AI scanner report prove I caused no damage?
A clean report helps, but it proves only that the scanner found no new damage between its two scans. If the pick-up scan was missing or taken at a branch without a scanner, the comparison is incomplete. Ask for both scans with timestamps. Your own pick-up and return photos are an independent record, and they matter just as much.
Can I refuse to pay a hire car damage claim?
You can dispute it, but do not ignore it. Put your dispute in writing, list each point with the evidence, and ask for the full claim pack. In the UK, the free BVRLA Conciliation Service can look at the case. If the firm has already charged your card, use chargeback or Section 75, and keep to the time limits.
What photos should I take at pick-up to protect myself?
Take four corner shots, each side, the bumpers, the wheels, the windscreen, the roof edge and the dashboard with the mileage, plus a close-up of any mark you find, with the number plate in at least one frame. Photograph the condition report. Do the same again at return. Keep the originals unedited, back them up, and send copies only.






